29 Creative Spring Door Wreaths DIY: 29 Ideas You Must Try for Your Front Door Decor
Introduction to 29 Creative Spring Door Wreaths DIY: 29 Ideas You Must Try for Your Front Door Decor
As the last frost melts away and the first green buds appear, our homes yearn for a seasonal refresh. What better place to start than your front door? A handmade wreath is more than just decoration; it’s a vibrant, welcoming statement that celebrates renewal and creativity. This season, we invite you to embrace the joy of crafting with our curated collection of spring door wreaths diy projects. From rustic foraged designs to elegant floral arrangements, these ideas will transform your entryway into a breathtaking preview of the beauty within. Whether you’re a seasoned crafter or a curious beginner, creating your own spring wreath is a wonderfully accessible way to personalize your home’s curb appeal. Consequently, you’ll infuse your space with a unique charm that store-bought items simply can’t match. Ultimately, this guide is your inspiration to roll up your sleeves, gather some beautiful materials, and craft a piece of decor that radiates warmth, color, and the unmistakable spirit of spring.
Why Choose DIY Spring Door Wreaths for Your Space
Choosing to craft your own spring wreath offers a multitude of benefits that extend far beyond simple aesthetics. Firstly, it provides an unparalleled opportunity for personalization. You control every element—the color palette, the textures, the size, and the theme. This means your finished piece can perfectly match your home’s exterior paint, your garden’s blooms, or even your personal style, whether it’s modern minimalist or cottage-core charming. Moreover, the act of creating something with your own hands carries a significant emotional impact. The wreath on your door becomes a point of pride, a conversation starter, and a daily reminder of your creativity.
Furthermore, DIY wreaths are often more cost-effective than their pre-made counterparts, especially when you utilize foraged elements, repurpose old decor, or shop sales for craft supplies. This approach is perfect for budget-conscious decorators who don’t want to sacrifice style. Additionally, a handmade spring wreath adds a layer of authentic, artisanal charm to your home’s facade. It signals a cared-for, loved home with a resident who values thoughtful details. In essence, opting for a diy spring wreath project allows you to combine functionality, beauty, and personal expression into one powerful, welcoming statement for your front door.
Key Elements & Design Components
Essential Decor Items for Your DIY Spring Wreath
Before you begin any of our 29 spring wreath ideas, it’s helpful to understand the core components. Every stunning DIY door decoration starts with a few key elements:
- The Base: This is your foundation. Popular options include grapevine wreaths (for a rustic look), straw or foam wreaths (easy to attach items to), metal hoops (for a modern twist), or even an embroidery hoop for a minimalist design.
- Florals & Foliage: This is the heart of your spring wreath. Think tulips, daffodils, cherry blossoms, peonies, and ranunculus in silk or dried forms. Don’t forget lush greenery like eucalyptus, fern, or boxwood for fullness and texture.
- Texture & Embellishments: This is where personality shines. Consider adding:
- Natural Elements: Moss, dried citrus slices, feathers, birch branches, or preserved magnolia leaves.
- Ribbons & Bows: A large, beautiful bow in gingham, burlap, or satin can be a focal point.
- Decorative Accents: Bird nests, miniature eggs, butterflies, ceramic bunnies, or a charming “Hello Spring” sign.
- Basic Tools: A hot glue gun and glue sticks are essential. Floral wire and wire cutters are also invaluable for securing heavier items.
Style Variations & Budget-Friendly Alternatives
The beauty of a DIY front door wreath is its adaptability. Here’s how to tailor the project to your style and budget:
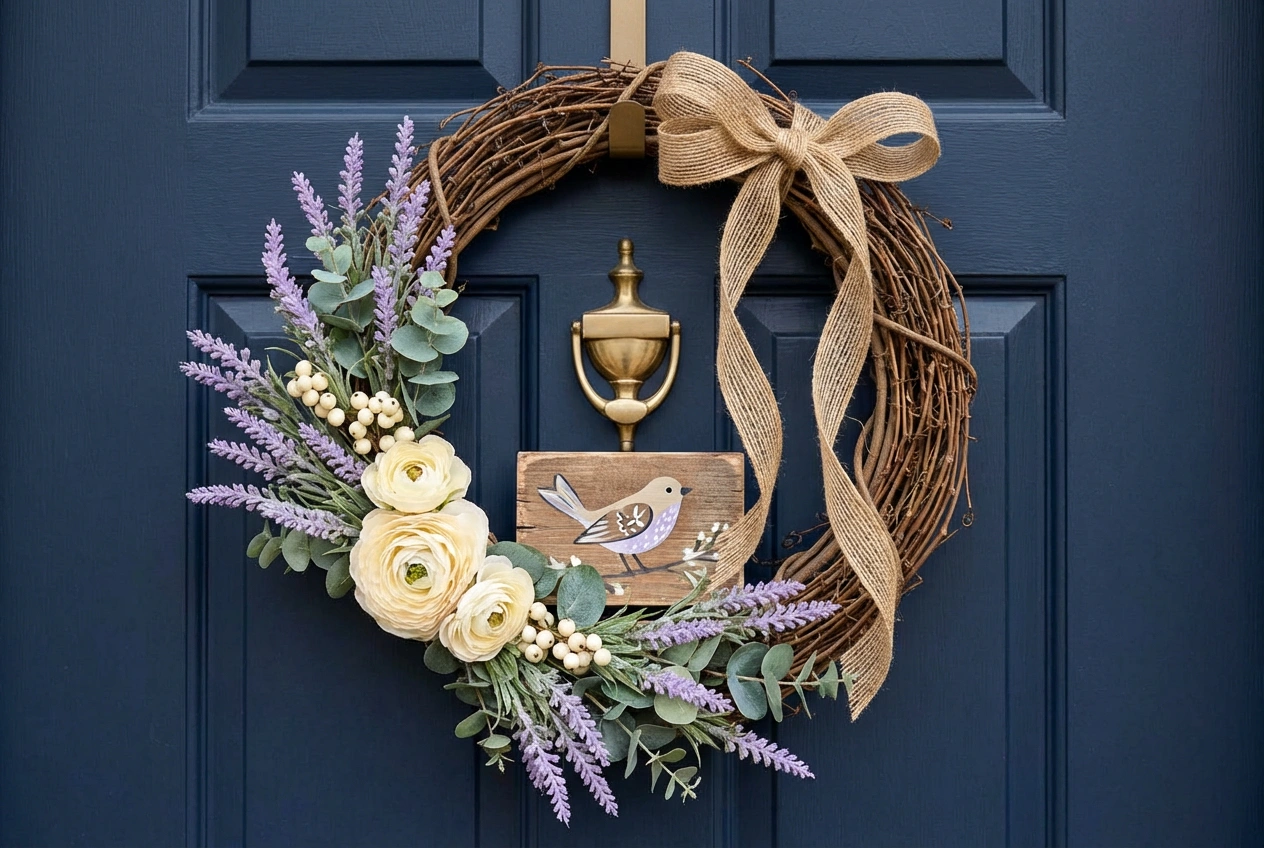
- For a Rustic Look: Use a grapevine base, foraged twigs, dried lavender, and a burlap ribbon. Moss can be hot-glued to cover the vine for a lush, woodland feel.
- For a Modern Look: Opt for a single metal hoop. Attach a dramatic, asymmetrical spray of pampas grass or a single stem of preserved eucalyptus with thin, nearly invisible wire.
- For a Classic & Elegant Look: Choose a full foam base covered in hydrangea blooms, roses, and pearls with a wide satin ribbon.
- Budget-Friendly Swaps: Instead of buying all new silk flowers, repurpose stems from old arrangements. Take a walk and collect interesting branches, pinecones, or seed pods. Use ribbon scraps from gift wrapping. Many dollar stores carry excellent basic wreath forms and seasonal accents that look far more expensive once assembled creatively.
How to Achieve the Look: Step-by-Step Styling Guide
Follow this simple, universal process to create any of the inspiring spring wreath crafts in our list of 29 ideas.
Step 1: Choose Your Theme and Gather Inspiration
Before purchasing a single item, decide on the vibe you want. Are you drawn to pastel Easter themes, vibrant tropical hues, or monochromatic greenery? Browse our 29 ideas (detailed after the guide) and save pictures that resonate with you. This will give you a clear visual goal and help you shop intentionally.
Step 2: Select and Prepare Your Wreath Base
Purchase your chosen base. If using a straw or foam wreath, consider wrapping it first with ribbon, yarn, or sheet moss to create a clean background that hides the base. This extra step makes the final product look more professional and finished.
Step 3: Create a Focal Point and Layout
Lay your base on a flat surface. Without glue, arrange your largest and most important elements (like a big bow, a nest, or your main flower cluster). Play with placement—off-center designs are often more dynamic. This “dry fit” allows you to experiment risk-free until you find the perfect composition.
Step 4: Attach Primary Elements
Once satisfied with your layout, start attaching. Use floral wire to securely fasten heavy items like branches or nests directly to the base. For foam bases, you can often push floral stems directly into the foam. Begin with your focal point and largest greenery to establish the shape and fullness.
Step 5: Layer in Secondary Florals and Filler
Now, build around your focal point. Add your main flowers, then fill in gaps with smaller blooms, berry sprigs, and textured foliage. Layer different sizes and colors for depth. Remember to step back and look at your wreath from a distance periodically, just as it will be seen on your door.
Step 6: Add Final Embellishments and Secure Details
This is the fun part! Glue on your small decorative accents like butterflies, pearls, or mini eggs. Tuck in small sprigs of baby’s breath or delicate ferns. Ensure every element is securely attached, as the wreath will be exposed to wind and weather on your front door.
Step 7: Create and Attach the Hanging Mechanism
Finally, turn your wreath over. Securely attach a loop of ribbon, jute, or a pre-made wreath hanger to the back. Make sure it’s strong enough to hold the weight. Your beautiful handmade spring door decor is now ready to welcome the season!
Elevating the Look: Advanced Styling Tips
To take your DIY spring door decoration from great to exceptional, consider these pro tips:
- Play with Depth: Don’t let all your elements sit flat on the surface. Use floral picks or small pieces of foam to elevate some flowers or leaves, creating a 3D, garden-like effect.
- Consider Scale: For a large, stately door, a big, lavish wreath makes sense. For a standard or apartment door, a smaller, tighter wreath or a crescent-moon shape can be more proportionate and elegant.
- Lighting: For evening ambiance, you can carefully weave a strand of battery-operated fairy lights into your wreath. It creates a magical, welcoming glow after sunset.
- Coordinate with Your Entryway: Let your home’s color scheme guide your palette. Pull a color from your shutters, door paint, or a nearby potted plant to create a cohesive, designed look from the street.
- Unexpected Bases: Move beyond the circle! Try a square wreath frame, a heart shape for early spring leading into Valentine’s Day, or a simple wire word like “JOY” or “BLOOM.”
Maintenance & Care: Keeping Your Wreath Fresh
A little care will ensure your spring wreath for front door lasts through the season. For wreaths with silk flowers, occasional dusting with a hairdryer on a cool, low setting is effective. If it gets wet from rain, simply pat it dry and allow it to air out completely in a garage or covered area to prevent mildew on natural elements like grapevine or moss. For wreaths with dried florals, keep them out of direct, harsh sunlight to prevent fading. When the season changes, store your wreath in a sturdy box in a cool, dry place. Placing a natural moth repellent like cedar chips in the box can help protect it until next spring.
FAQs: Frequently Asked Questions About DIY Spring Door Wreaths
Q: I’m not crafty at all. Are these DIY spring wreath projects really beginner-friendly?
A: Absolutely! Many projects start with simple bases like pre-made grapevine wreaths. You can begin by just tucking in a few beautiful silk stems and a ribbon. The process is very forgiving, and hot glue fixes almost everything. Start simple and build your confidence.
Q: How long does it take to make a DIY wreath?
A: A simple wreath can be assembled in under an hour. More complex, layered designs might take an afternoon. We recommend setting aside 2-3 hours for your first project so you can enjoy the process without rushing.
Q: Can I use real flowers for my spring door wreath?
A: While beautiful, fresh flowers will wilt quickly outdoors. For longevity, use high-quality silk or dried flowers. However, you can create a stunning short-term wreath with fresh garden clippings like boxwood, which stays green for weeks.
Q: How do I hang a wreath without damaging my door?
A: There are many non-damaging options! An over-the-door wreath hanger is the easiest. For doors without a ledge, use a clear, removable adhesive hook rated for the wreath’s weight. A sturdy ribbon tied to the top of the door (inside the frame) and hung over the top is another classic, damage-free method.
Q: What’s a good budget for a DIY wreath vs. buying one?
A: You can create a beautiful, full wreath for $25-$50 by shopping sales and using coupons at craft stores. A comparable pre-made wreath often costs $75-$150+. The DIY route saves money and gives you a unique, custom piece.
29 Creative Spring Door Wreath DIY Ideas You Must Try:
- Lemon & Lavender Wreath: Bright dried lemons paired with purple lavender on a grapevine base for a sunny, aromatic welcome.
- Moss Monogram Wreath: A lush, green moss-covered letter initial, adorned with small white florals.
- Tulip Basket Wreath: A small woven basket attached to a wreath base, overflowing with silk tulips.
- Bird’s Nest & Robin’s Egg Wreath: A classic with a mossy base, a cozy nest, and delicate blue eggs.
- Fresh Boxwood Wreath: Simple, elegant, and fragrant. Bind fresh boxwood clippings to a wire frame.
- Burlap Ruffle Wreath: Create layers of ruffled burlap on a foam wreath for rustic texture.
- Peony & Eucalyptus Hoop: A single, dramatic metal hoop draped with a garland of peonies and seeded eucalyptus.
- Pressed Flower Plexiglass Wreath: Sandwich pressed wildflowers between two clear acrylic hoops.
- Upcycled Book Page Wreath: Rolled pages from an old book formed into roses on a cardboard base.
- Succulent & Cactus Wreath: Use faux or preserved succulents for a modern, drought-tolerant look.
- Vintage Garden Tool Wreath: Attach small, vintage trowels and forks to a base with floral accents.
- Gingham Bow & Daffodil Wreath: A huge, cheerful gingham bow surrounded by bunches of daffodils.
- Cherry Blossom Branch Wreath: Flowy, delicate cherry blossom branches wired to a circular frame.
- Herb Garden Wreath: Use dried rosemary, thyme, and sage for a beautiful, scented wreath.
- Rainbow Ribbon Wreath: Layers of ombré or rainbow-colored ribbons tied around a straw wreath.
- Butterfly Migration Wreath: A cascade of colorful butterflies taking flight from a simple green wreath.
- Painted Terra Cotta Pot Wreath: Mini pots painted pastel colors and glued around a wreath, with flowers “sprouting” from them.
- Macramé Hoop with Dried Florals: A minimalist macramé wall hanging adapted with a dried pampas grass bundle.
- Easter Egg Topiary Wreath: Plastic eggs hot-glued in a gradient pattern onto a styrofoam wreath form.
- Fern & Feather Wreath: Lush faux ferns paired with natural ostrich or pheasant feathers.
- Watering Can Wreath: A small metal watering can tipped over, spilling flowers onto a wreath below it.
- Bees & Honeycomb Wreath: Hexagonal honeycomb shapes with cute bee embellishments on a yellow theme.
- Shabby Chic Vintage Frame Wreath: A picture frame as the base, with a wreath attached inside it.
- Pom-Pom Pastel Wreath: Dozens of soft yarn pom-poms in spring pastels covering a wreath form.
- Galvanized Metal “Welcome” Wreath: A metal “welcome” sign as the centerpiece, surrounded by greenery.
- Dried Citrus & Cinnamon Stick Wreath: Warm, spicy, and vibrant—perfect for the spring transition.
- Garden Gnome Door Wreath: A playful wreath featuring a central gnome figure among mushrooms and flowers.
- Whimsical Mushroom & Moss Wreath: Red-and-white polka-dot mushrooms peeking out of a deep green moss base.
- Simple Eucalyptus Hoop with Bowed Ribbon: Nothing more than a single, perfect hoop of eucalyptus and a silk ribbon—effortlessly chic.