30+ Vintage Flower Beds in Front of House Ideas That’ll Make You Look Twice!
Introduction to 30+ Vintage Flower Beds in Front of House Ideas That’ll Make You Look Twice!
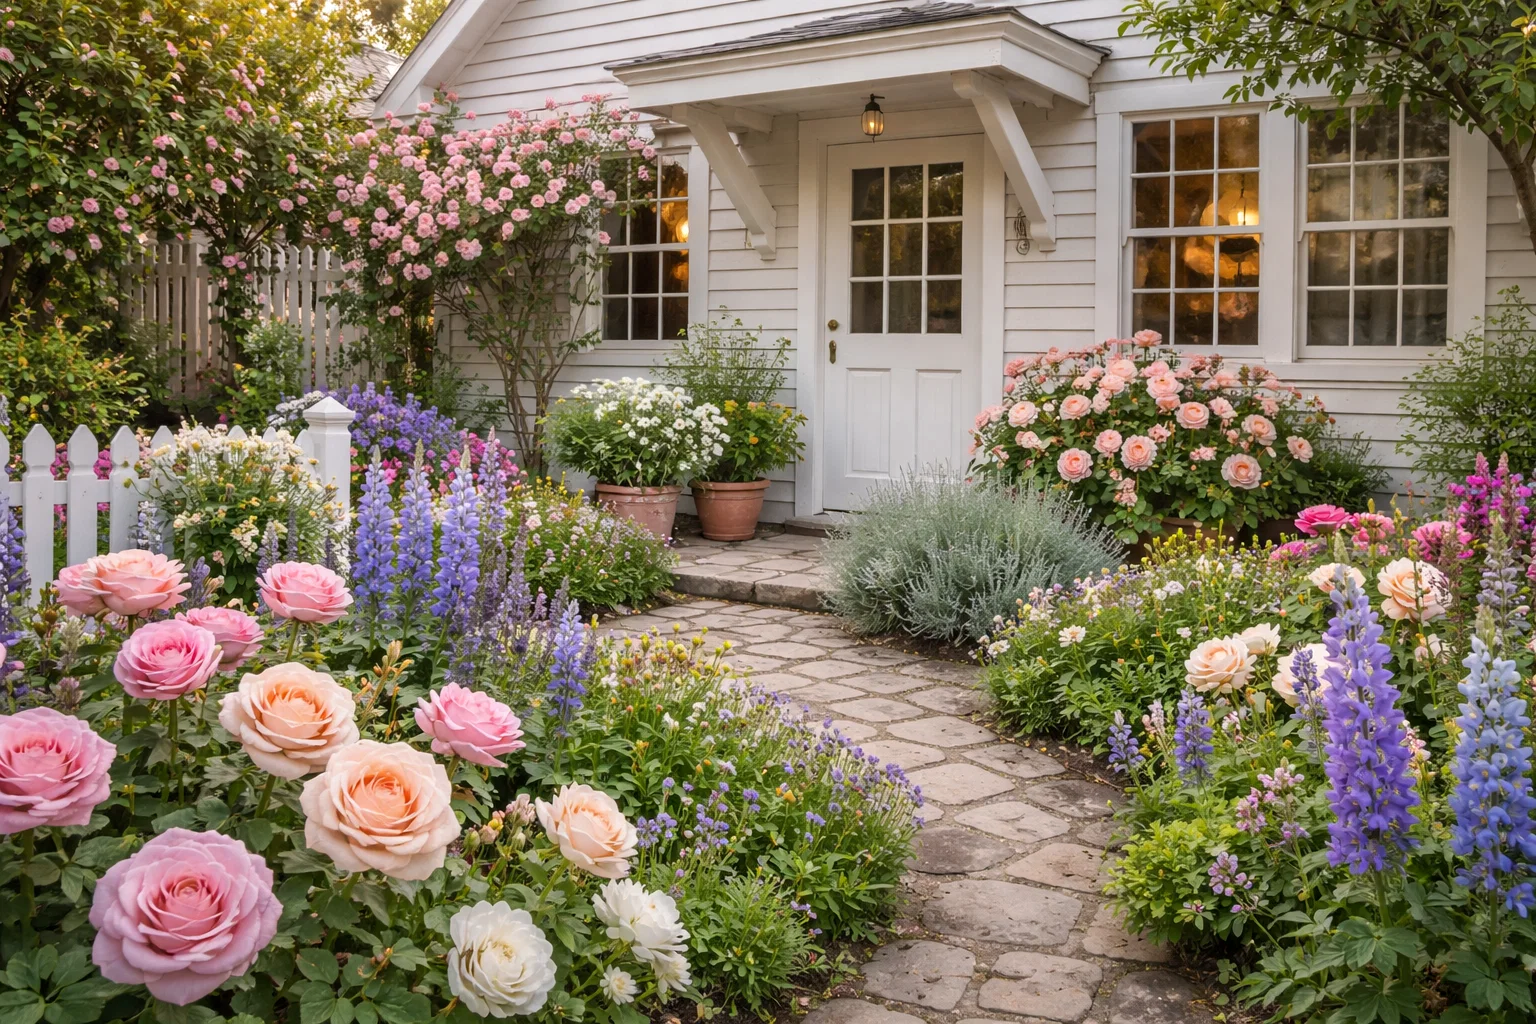
Imagine pulling into your driveway and being greeted by a scene straight from a storybook—a charming, romantic garden brimming with color, texture, and a palpable sense of history. This is the magic of creating vintage flower beds in front of house ideas. This design approach isn’t just about planting flowers; it’s about curating a living, breathing work of art that whispers tales of bygone eras and infuses your home’s exterior with soulful character. Unlike modern, minimalist landscapes, a vintage-inspired garden embraces a certain delightful untidiness, a harmonious blend of heirloom blooms, rustic accents, and timeworn charm that feels both curated and effortlessly natural.
The goal is to craft an entryway that doesn’t just say “welcome,” but sings it. By weaving together elements from cottage gardens, Victorian parterres, and rustic farmhouse styles, you can transform a plain front yard into a captivating first impression. This journey into antique garden design is for anyone who longs for a home with a warm, established feel, even if it was built yesterday. It’s about creating a space that feels loved, layered, and full of life. So, whether you’re a seasoned gardener or a novice with a dream, these ideas will inspire you to roll up your sleeves and create a front yard that truly makes passersby—and you—look twice with admiration.
Why Choose Vintage Flower Beds for Your Space
Opting for a vintage aesthetic in your front garden offers a multitude of benefits that go beyond mere beauty. Firstly, it establishes an immediate emotional connection. A classic front yard flower bed brimming with old-fashioned roses, foxgloves, and lavender evokes feelings of nostalgia, comfort, and romance. It softens the architectural lines of your home, creating an inviting and approachable atmosphere that feels deeply personal and welcoming.
Furthermore, this style is inherently sustainable and eco-friendly. Heirloom garden layouts often prioritize perennial plants, which return year after year, and pollinator-friendly species that support local bees, butterflies, and birds. The use of repurposed materials—like an old wheelbarrow as a planter or vintage bricks for edging—adds unique character while being environmentally conscious. From a practical standpoint, the dense, layered planting style typical of cottage garden inspiration helps suppress weeds and retains soil moisture. Ultimately, a vintage flower bed is a testament to timelessness. While trends come and go, the charm of a well-loved, romantic garden never fades, ensuring your home’s curb appeal remains enduringly elegant and full of heart.
Key Elements & Design Components
Essential Decor Items for a Vintage Front Garden
To authentically capture a vintage vibe, you need to think beyond the plants and consider the full tableau. Here are the essential components:
- Heirloom & Cottage Plants: The soul of the garden. Focus on flowers that have been grown for generations. Think peonies, hollyhocks, delphiniums, foxgloves, columbine, bearded irises, and climbing roses like ‘New Dawn’. Incorporate plenty of fragrant herbs like lavender, rosemary, and thyme. Don’t forget “filler” plants like lady’s mantle, catmint, and lamb’s ear for soft texture.
- Vintage Hardscaping & Edging: Materials with patina are key. Use reclaimed red brick, weathered cobblestones, or aged terracotta tiles for pathways. For edging your nostalgic planting schemes, consider rusted metal garden edging, old wine bottles buried neck-down, or hand-split field stones.
- Antique Garden Accents: These are the jewelry of your garden. Look for:
- Planters: Chipped terracotta pots, galvanized steel buckets, stone urns, or an old porcelain sink.
- Structures: A rustic wooden arbor or obelisk for climbing roses and clematis.
- Ornaments: A weathered birdbath, a sundial, a stone statue peeking through the foliage, or vintage garden tools hung on a fence.
- A Layered, “Billowing” Layout: Avoid straight, regimented rows. Plant in loose, flowing drifts, with taller plants at the back (or middle, for island beds) cascading down to shorter ones at the edges. Allow plants to gently spill onto pathways, creating a soft, abundant feel.
Style Variations & Budget-Friendly Alternatives
You can tailor the vintage look to your specific home architecture and wallet.
- Cottage Core: Maximally abundant, colorful, and informal. Mix flowers, herbs, and even vegetables. Use picket fences and arbors.
- Romantic Victorian: More structured with geometric classic front yard flower bed shapes (parterres). Features statuary, rose arbors, and a refined color palette of whites, pinks, and purples.
- Rustic Farmhouse: Focuses on practicality and simplicity. Uses farm implements as decor, wooden troughs as planters, and features hardy, self-seeding flowers like daisies and black-eyed Susans.
Budget-Friendly Swaps:
* Plants: Start with seeds or splits from friends’ gardens instead of buying large potted perennials.
* Accents: Scout flea markets, garage sales, and online marketplaces for affordable vintage items. Repurpose what you have—an old ladder as a plant stand, a colander as a hanging basket.
* Edging: Use inexpensive wooden logs, or create a mowing edge by sinking a trench instead of buying materials.
How to Achieve the Look: Step-by-Step Styling Guide
Creating your own vintage flower beds in front of house is a rewarding process. Follow these steps to build your garden layer by layer.
Step 1: Assess Your Space & Create a Base Plan
Begin by observing your front yard. Note the sunlight patterns (full sun, part shade, full shade), soil type, and the style of your house. Sketch a simple layout. Decide on the shape of your beds—curving, flowing borders often work better for vintage styles than sharp angles. Define this space by laying a garden hose on the ground to visualize the shape before you start digging.
Step 2: Prepare the Canvas – Soil & Edging
Great gardens start with great soil. Remove grass and weeds from your bed area. Amend the soil with plenty of compost to create a rich, fertile, and well-draining foundation. Next, install your chosen edging material. Whether it’s brick, stone, or metal, this step cleanly defines your antique garden design and prevents grass from creeping in.
Step 3: Select and Place Your “Anchor” Plants
Choose 3-5 key perennial plants to act as anchors. These are usually the larger, structural plants like a peony bush, a clump of ornamental grass, or a climbing rose on an obelisk. Place these in your bed first, spacing them according to their mature size. They provide the backbone of your nostalgic planting schemes.
Step 4: Build in Layers and Drifts
Now, fill in around your anchors. Plant in groups of 3, 5, or 7 of the same plant to create visual impact. Place taller plants (hollyhocks, delphiniums) toward the back/middle, medium-height plants (iris, phlox) in the middle, and shorter plants (dianthus, alyssum) at the front. Remember to include plants with varied bloom times for season-long interest.
Step 5: Incorporate Texture and Foliage
A vintage garden isn’t just about flowers. Intersperse plants with interesting foliage like silvery artemisia, the velvety leaves of lamb’s ear, or the delicate fronds of ferns. This adds depth and keeps the garden looking lush even when few plants are in bloom.
Step 6: Add the Vintage Accents
Finally, place your decorative elements. Tuck a stone birdbath among the flowers, set a cluster of terracotta pots planted with herbs by the front step, or let a vintage watering can look as if it was just set down. The key is to make these accents look integrated and organic, not randomly placed.
Step 7: Mulch and Nurture
Apply a 2-3 inch layer of natural mulch (like shredded bark or cocoa hulls) to retain moisture, suppress weeds, and give a finished look. Then, water deeply and regularly as your new retro garden borders establish themselves.
Elevating the Look: Advanced Styling Tips
To take your vintage flower bed from lovely to extraordinary, consider these nuanced touches.
- Embrace Self-Seeders: Allow plants like columbine, foxglove, forget-me-nots, and poppies to drop their seeds and pop up in unexpected places. This creates that serendipitous, “always-been-there” magic essential to cottage garden inspiration.
- Play with Height and Verticality: Use obelisks, tuteurs, or a simple section of wrought-iron fence to add vertical layers. Let sweet peas, morning glories, or clematis climb through them, adding height and romance.
- Curate a Color Story: While a riot of color is wonderful, a more curated palette can be stunning. Try an all-white “moon garden” for evening romance, or a blend of soft pinks, blues, and silvers for a calming effect.
- Lighting for Ambiance: As the sun sets, use subtle solar-powered lanterns or low-voltage path lights to highlight key features—a specimen plant, a statue, or the texture of an arbor. This extends the enjoyment of your historical landscape designs into the night.
- Add Seasonal Flourishes: Weave in seasonal elements—pumpkins and gourds in autumn, evergreen boughs and red twig dogwood branches in winter. This keeps the garden dynamic and engaging year-round.
Maintenance & Care: Keeping Your Space Fresh
The beauty of a vintage garden is its relaxed nature, but it still benefits from thoughtful care.
- Prudent Deadheading: Regularly remove spent flowers (deadhead) to encourage more blooms on plants like roses, dahlias, and cosmos. For some plants, like coneflowers, you may leave the seed heads for winter interest and bird food.
- Support and Staking: Use discreet, natural-looking supports like pea sticks (branched twigs) or green bamboo stakes to keep tall, floppy plants like delphiniums upright. This maintains the billowy look without collapse.
- Dividing Perennials: Every few years, divide overgrown perennials like hostas, daylilies, and irises in early spring or fall. This rejuvenates the plants and gives you free starts to expand your old-fashioned flower garden or share with friends.
- Refresh Mulch and Accents: Top up mulch annually to maintain its benefits. Clean and occasionally reposition vintage accents to prevent them from looking stale or overgrown. A gentle wash can revive a mossy statue or birdbath.
- Edit and Evolve: A garden is never finished. Don’t be afraid to move a plant that isn’t thriving or to add a new find from the nursery. This evolution is part of the garden’s living history.
FAQs: Frequently Asked Questions About Vintage Flower Beds
Q: I have a very small front yard. Can I still create a vintage flower bed?
A: Absolutely! In fact, a small space can make a huge impact. Focus on a single, deep border along your foundation or walkway. Use vertical space with climbers on a trellis. Choose compact or dwarf varieties of classic plants and limit your color palette to avoid visual chaos. A single, well-styled vintage flower bed in front of house can be incredibly charming.
Q: What are the best low-maintenance vintage plants?
A: Look for tough, reliable perennials that thrive with minimal fuss. Some excellent choices include: Peonies, Daylilies (hemerocallis), Catmint (nepeta), Russian Sage (perovskia), Sedum ‘Autumn Joy’, and Ornamental Grasses. Once established, these require little beyond seasonal cleanup.
Q: How do I find authentic vintage garden accents without spending a fortune?
A: Patience is key. Frequent thrift stores, estate sales, and flea markets. Look for online auctions and local “buy nothing” groups. Often, the best items are rusty, chipped, or faded—that’s the patina you want! Repurposing household items (an old chair, a colander) is also a fantastic, free option.
Q: My house is modern. Will a vintage flower bed look strange?
A: Not at all! The contrast can be stunning. A soft, romantic, and textured vintage garden can beautifully soften the clean, hard lines of a modern home. To create a cohesive look, you might use more geometric bed shapes or select a more monochromatic plant palette that complements your home’s exterior color.
Q: How do I start from scratch if I only have grass?
A: Begin with Step 1 from our guide. Use a spade or rent a sod cutter to remove grass from your desired bed area. Then, focus on amending the soil—this is the most crucial step for long-term success. Start small with one manageable bed; you can always expand later as your confidence and cottage garden inspiration grows