100 DIY Spring Decor Lantern Ideas for a Cozy Glow to Brighten Your Home
Introduction to 100 DIY Spring Decor Lantern Ideas for a Cozy Glow to Brighten Your Home
As the last frost melts away and the first buds begin to bloom, there’s an undeniable urge to refresh our living spaces with the spirit of the season. This year, why not channel that renewal into a project that brings both light and life indoors? Welcome to the ultimate guide to diy spring decor with a luminous twist: lanterns. These versatile vessels are more than just light sources; they are blank canvases for your creativity, offering endless possibilities to craft a cozy, inviting atmosphere. From rustic mason jars to elegant glass hurricanes, transforming simple lanterns into bespoke spring treasures is a profoundly satisfying way to celebrate the season’s awakening.
Imagine the soft, flickering glow of candlelight diffused through frosted glass adorned with pressed flowers, or the cheerful silhouette of a lantern wrapped in fresh greenery. This approach to handmade seasonal styling is not only budget-friendly but also deeply personal. Each project you create becomes a unique expression of spring, infusing your home with warmth and a story. Whether you’re a seasoned crafter or a curious beginner, this collection of 100 ideas is designed to inspire you to roll up your sleeves and create a glow that mirrors the lengthening, sun-dappled days. Ultimately, embracing this craft is about more than decoration; it’s about actively shaping your environment into a sanctuary of comfort and seasonal joy.
Why Choose DIY Spring Decor Lanterns for Your Space
Choosing to incorporate handmade lanterns into your spring refresh is a decision that pays dividends in ambiance, personality, and well-being. Firstly, the act of creating diy spring decor is inherently therapeutic. In a world of mass-produced items, crafting something with your own hands provides a sense of accomplishment and a direct connection to your home. Each lantern becomes a conversation piece, imbued with the memory of making it. This personal touch is something no store-bought item can replicate, ensuring your space feels authentically yours.
Furthermore, lanterns are unparalleled in their ability to sculpt light and atmosphere. The gentle, contained glow they emit is the very definition of coziness, perfect for creating intimate nooks for reading or relaxing spring evenings. This soft lighting reduces harsh shadows and adds a layer of visual warmth that makes any room feel more welcoming. From a design perspective, lanterns are incredibly versatile components. They can act as sculptural centerpieces on a dining table, whimsical accents on a mantel, or guiding lights along a hallway. Their adaptability means you can achieve a cohesive spring look throughout your entire home with one unifying craft theme.
Finally, this approach is wonderfully inclusive and budget-conscious. You can start with lanterns from thrift stores, repurpose jars from your recycling bin, or use affordable materials from craft stores. Consequently, you can achieve a high-end, designer look without the associated cost. Whether you live in a spacious house or a compact apartment, these projects can be scaled to fit. For renters, they offer non-permanent, impactful changes that won’t affect a security deposit. By choosing DIY lantern projects, you’re opting for sustainable, creative, and emotionally resonant decor that truly brightens your home from the inside out.
Key Elements & Design Components
Essential Decor Items for DIY Spring Lanterns
To embark on your crafting journey, you’ll need a foundation of materials and a palette inspired by the season. Here are the essential components to gather:
- The Lantern Vessel: This is your canvas. Collect a variety of shapes and sizes: clear glass mason jars, classic metal lanterns, geometric glass terrariums, simple wooden candle holders, or even woven rattan baskets. Diversity in form leads to a more dynamic display.
- Springtime Botanicals: Fresh or faux, flora is the heart of spring crafting. Think sprigs of eucalyptus, delicate baby’s breath, lavender bundles, faux cherry blossoms, preserved moss, and pressed flowers or ferns. These elements bring life, color, and texture directly into your decor.
- Lighting Elements: Choose your glow. Flameless LED candles (for safety and longevity), string fairy lights, vintage-style filament bulbs, or traditional tea lights and pillar candles all create different effects. Always prioritize battery-operated options for projects involving dried materials.
- Textures & Embellishments: This is where personality shines. Stock up on natural jute or ribbon for wrapping, pastel-hued paints for distressing or stenciling, decorative sand or pebbles for bases, and translucent vellum or tissue paper for lining.
- A Seasonal Color Palette: Move beyond basic pastels. Draw inspiration from a spring garden: soft sage green, buttery yellow, sky blue, warm terracotta, and creamy white. These hues should guide your choice of paints, ribbons, and floral selections.
Style Variations & Budget-Friendly Alternatives
The beauty of handmade spring accents lies in its adaptability. Here’s how to tailor the look to your style and budget:
- Rustic Farmhouse: Use mason jars, burlap ribbons, twine, and wildflower arrangements. Add a touch of chalk paint for a weathered look. Budget tip: Use coffee filters or paper bags stained with tea to create faux-parchment liners.
- Modern Minimalist: Opt for clean-lined geometric lanterns in black metal or clear glass. Use a single, striking branch (like pussy willow or forsythia) or a minimalist arrangement of smooth stones. A simple, unscented pillar candle is all you need.
- Boho Whimsical: Incorporate macramé hangers, colorful tassels, mixed patterns, and an abundance of greenery like monstera leaves or hanging ivy. Budget tip: Make your own tassels from leftover embroidery floss or yarn.
- Cozy Cottage: Embrace mismatched china teacups as tiny lantern bases, use lace doilies as wraps, and fill lanterns with violets or lily of the valley sprigs. Thrift stores are goldmines for this style.
- For Renters & Small Spaces: Focus on non-adhesive techniques. Use removable washi tape to create patterns, opt for lanterns that can sit on shelves rather than hang, and create mini-lanterns in votive holders for a clustered centerpiece that doesn’t take up table space.
How to Achieve the Look: Step-by-Step Styling Guide
Transforming your space with DIY spring lantern projects is a joyful, step-by-step process. Follow this guide to create a cohesive and glowing spring atmosphere.
Step 1: Gather Inspiration & Plan Your Palette
Begin by collecting images that resonate with you—perhaps a sunlit breakfast nook or a serene porch at dusk. From these, define your core color palette of 3-4 spring hues. Simultaneously, take inventory of the lantern bases and craft supplies you already own. This planning stage prevents overwhelm and ensures your projects feel harmonious.
Step 2: Prepare Your Lantern Vessels
Clean all glass, metal, or wooden lanterns thoroughly to ensure a clear glow and a good surface for adhesives. If you’re painting, lightly sand wooden surfaces and apply a primer. For a frosted effect, you can apply a glass-etching cream or a simple mixture of Mod Podge and baking soda. This foundational step is crucial for professional-looking results.
Step 3: Create Your Botanical Embellishments
This is the heart of your spring crafting endeavor. Press fresh flowers between book pages for a few days, clip small bundles of herbs to dry, or carefully arrange faux stems. If using fresh greens, consider preserving them with glycerin for longer-lasting projects. Having your botanicals prepared makes the assembly flow smoothly.
Step 4: Assemble Your First Lantern Project
Start with a simple idea to build confidence. For instance, line a clear jar with pressed ferns using Mod Podge, then place a LED tea light inside. Alternatively, wrap jute twine around the neck of a lantern and tuck in a few sprigs of dried lavender. Use hot glue or clear-drying craft glue for secure attachments.
Step 5: Layer in Lighting and Texture
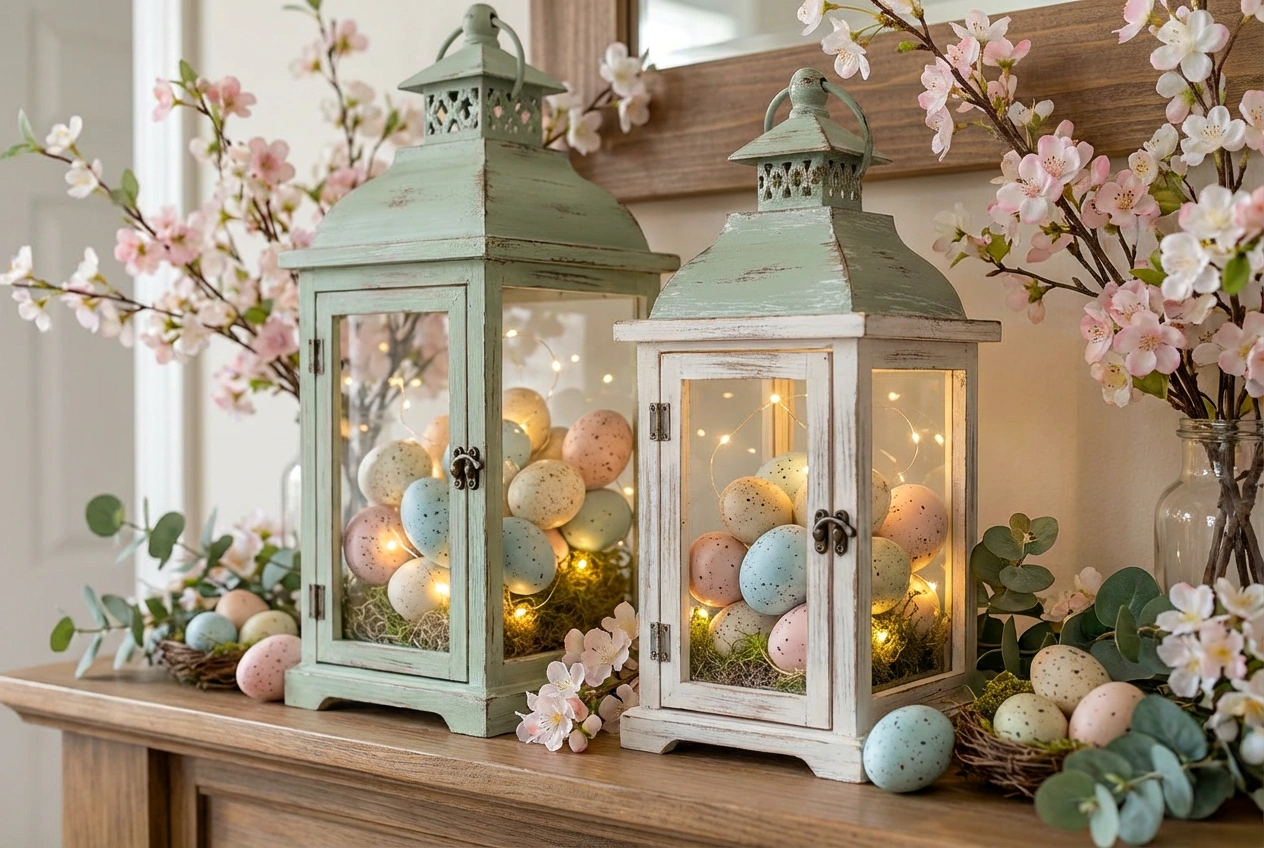
Once your main embellishment is attached, consider secondary layers. Fill the bottom of a lantern with white sand or pastel-colored eggs for Easter. Drape a second, finer ribbon over your initial wrap. The key is to add interest without creating visual clutter that might obscure the light.
Step 6: Style a Grouping or Vignette
Single lanterns are lovely, but groups tell a story. Style a collection of three lanterns of varying heights on your dining table or mantel. Use the rule of odd numbers and vary the textures—one floral, one textured with rope, one simply painted. This creates a curated, designer look.
Step 7: Incorporate Throughout Your Home
Don’t confine your diy seasonal glow to one room. Place a lantern with a citronella candle on the patio for spring evenings. Put a small, floral-lit lantern in the bathroom for a spa-like feel. A cluster of mini lanterns can brighten a bookshelf. This repetition creates a thematic thread throughout your space.
Step 8: Final Adjustments for Ambiance
As evening falls, light your lanterns (or turn on the LEDs) and assess the ambiance. You may need to adjust the placement to better catch the light or move a piece that casts an awkward shadow. This final tweak ensures your handmade creations achieve the perfect cozy glow.
Elevating the Look: Advanced Styling Tips
Once you’ve mastered the basics, these advanced tips will polish your spring lantern display to perfection.
First, play with scale and elevation. Don’t let all your lanterns sit at the same height. Use stacks of hardcover books, wooden crates, or inverted bowls as pedestals to create visual levels. A tall, statement lantern in the back of a grouping with smaller ones in front adds depth and drama. Similarly, consider hanging lanterns from shepherd’s hooks in a corner or above a side table to draw the eye upward and utilize vertical space.
Next, introduce reflective surfaces to amplify the glow. Style your lantern vignette on a mirrored tray or near a large picture frame. The light will bounce and multiply, making the space feel larger and even more luminous. This is a particularly effective trick for smaller rooms or darker corners that crave that springtime brightness.
Furthermore, curate with intention around your lanterns. Instead of placing them in isolation, build a mini-vignette. Position a lantern next to a stack of spring-themed books, a small potted fern, and a ceramic vase. The lantern becomes the luminous anchor of a carefully composed scene that tells a richer story of the season.
Finally, embrace scent as an invisible layer. While safety first means avoiding open flames near flammable decor, you can incorporate spring scents subtly. Place a few drops of essential oil (like grapefruit, lilac, or fresh linen) on the pebbles inside a lantern, or use a naturally scented pillar candle in a well-ventilated, safe holder nearby. This multi-sensory approach makes the ambiance truly immersive.
Maintenance & Care: Keeping Your Space Fresh
Maintaining your beautiful handcrafted spring lanterns ensures they bring joy throughout the season and for years to come.
For lanterns with dried florals or preserved greens, gentle dusting is key. Use a soft, dry makeup brush or a hairdryer on the cool, low setting to carefully remove dust from delicate petals and leaves. Avoid using feather dusters, as they can snag and break fragile materials. For glass surfaces, a simple microfiber cloth and a vinegar-water solution will keep the glow crystal clear.
Seasonal rotation is part of the charm. As spring transitions to summer, you can easily update your lanterns. Remove the delicate pressed blossoms and replace them with seashells or sand for a coastal vibe, or swap pastel ribbons for brighter, sun-bleached linens. Storing your spring botanicals in a flat, dry container will preserve them for use next year.
For lanterns used outdoors, ensure they are made of weather-resistant materials or brought inside during heavy rain. Battery-operated candles should have their batteries removed if the lanterns are being stored for an extended period to prevent corrosion. With these simple care steps, your DIY spring decor projects will remain beautiful, functional centerpieces of your home’s seasonal story.
FAQs: Frequently Asked Questions About DIY Spring Decor Lanterns
Q1: I’m not crafty at all. Are there any truly easy DIY spring lantern ideas for beginners?
Absolutely! Start with the simplest project: the “Spring Sprig” lantern. Take a clear glass jar, drop in a flameless tea light, and gently place a few fresh stems of eucalyptus or rosemary around the inside edge. No glue needed! Another foolproof idea is to wrap a wide satin ribbon around a plain lantern and secure it with a double knot. These projects require minimal supplies and no advanced skills, making them perfect for beginners.
Q2: How can I make my DIY lanterns safe, especially if I have kids or pets?
Safety is paramount. We strongly recommend using battery-operated LED candles for 99% of projects, especially those involving dried flowers, paper, or fabric. They provide a realistic flicker without the fire risk. If you prefer real candles, ensure they are in a stable holder, placed on a non-flammable surface, and never left unattended. Keep all lanterns out of reach of curious pets and children.
Q3: Where can I find inexpensive lanterns to use as my base?
Thrift stores, garage sales, and discount home goods stores (like TJ Maxx or HomeGoods) are excellent sources. Also, look in your own recycling bin—glass food jars, pasta sauce jars, and even tin cans (with sanded edges) can be transformed. Online marketplaces often have people selling unused lanterns from events at a fraction of the cost.
Q4: Can I use fresh flowers in my lanterns, and how long will they last?
You can, but they will be short-lived. For a longer-lasting fresh look, use hardy greens like eucalyptus, leather leaf fern, or salal. You can also submerge flower heads in water within a sealed glass globe for a beautiful, temporary centerpiece. For longevity, however, high-quality faux florals or dried/preserved botanicals are the best choice for your spring diy projects.
Q5: How do I style multiple DIY lanterns without making my space look cluttered?
The secret is cohesion through color or material. Choose a unifying element, like all-white lanterns, all natural jute wrappings, or a consistent floral type (e.g., all lavender). Then, group them in odd numbers (3 or 5) in key areas like a console table, mantel, or as a dining centerpiece. Leave plenty of “visual breathing space” around the group, and avoid spreading single, mismatched lanterns on every surface.