Creating a dedicated space for outdoor play is one of the most rewarding gifts you can give to a child. While digital screens often compete for their attention, the simple joy of playing with mud, water, and sand remains a timeless childhood staple. If you have been looking for a project that combines sustainability with backyard fun, building a DIY pallet mud kitchen is the perfect solution. This project is not only budget-friendly but also a fantastic way to upcycle materials that might otherwise end up in a landfill. By the end of a single weekend, you can transform a few old wooden pallets into a rustic, functional play station that will keep the little ones entertained for hours on end.
Why Choose Pallets for Your Mud Kitchen Project?
Using pallets for outdoor furniture and play equipment has become a massive trend for several reasons. First and foremost is the cost. You can often find pallets for free or at a very low cost from local businesses or hardware stores. When you are building something that is destined to be covered in dirt and splashed with water, using reclaimed wood makes perfect sense. It takes the pressure off keeping everything pristine and allows the natural, weathered look of the wood to shine.
Beyond the price tag, pallets are incredibly durable. Most are made from hardwoods or treated softwoods designed to withstand heavy loads and outdoor elements. Once sanded and sealed, they provide a sturdy frame that can handle the enthusiastic play of toddlers and older children alike. Plus, from a design perspective, the slatted look of a pallet naturally lends itself to a farmhouse or rustic garden aesthetic, making it a stylish addition to your landscaping rather than an eyesore.
Essential Tools and Materials You Will Need
Before you start sawing away, it is important to gather everything in one place. Having your supplies ready ensures you can actually finish this project in a weekend without making multiple trips to the store. Here is what you should have on hand:
- Two to three heat-treated pallets: Look for the HT stamp to ensure they were not treated with harmful chemicals.
- Power drill and wood screws: A variety of lengths will help you secure different thicknesses of wood.
- Jigsaw or circular saw: Essential for cutting the pallets down to size and creating the hole for the sink.
- Orbital sander: Safety is a priority, so you will want to smooth out any rough edges or splinters.
- A plastic or stainless steel bowl: This will serve as your “sink.”
- Outdoor wood glue and sealant: To protect the finished product from rain and mud.
- Measuring tape and a pencil: Precision helps the assembly go much smoother.
Selecting the Right Pallets
Not all pallets are created equal. When sourcing your wood, prioritize pallets that are in good structural condition. Avoid wood that is excessively cracked, oily, or shows signs of rot. The “HT” (Heat Treated) marking is crucial for projects involving children, as it means the wood was sanitized using heat rather than pesticides. Taking a moment to inspect your materials will save you a lot of headache during the sanding and assembly phases.
Step-By-Step Assembly Guide
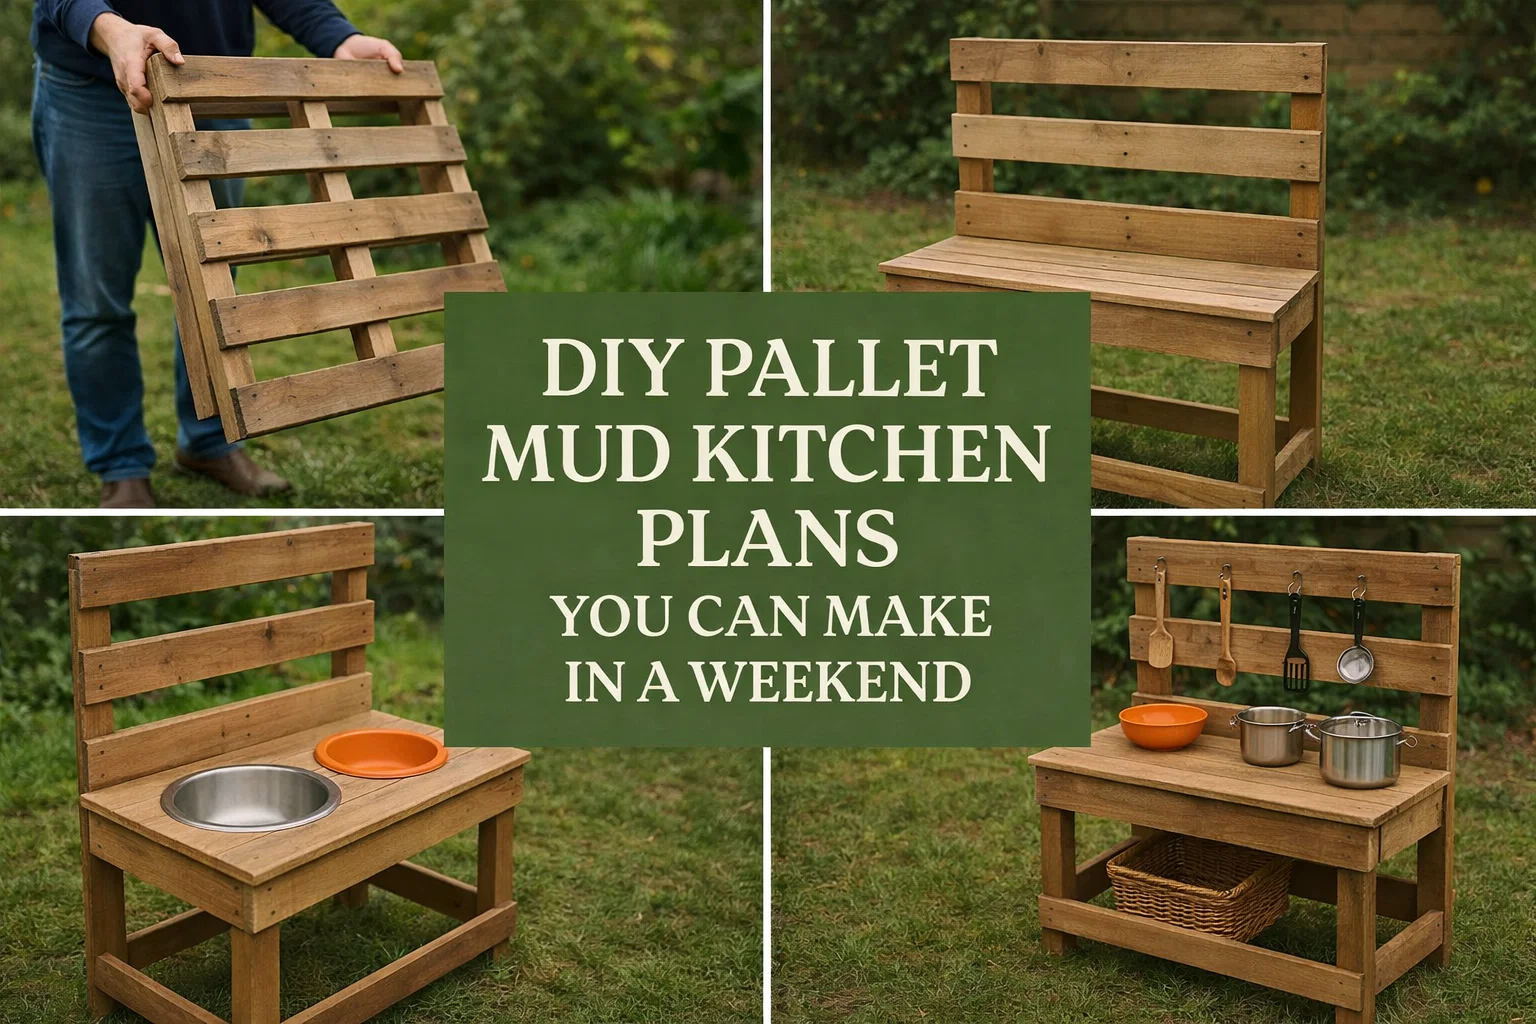
The beauty of this design is its simplicity. You are essentially creating a sturdy base, a work surface, and a backboard for hanging accessories. Follow these steps to bring your mud kitchen to life.
Step 1: Preparing the Wood
Start by dismantling one of your pallets to get individual planks. These will be used for the tabletop and any additional shelving. Use your sander to go over every inch of the wood. Since children will be using this, pay extra attention to the corners and the underside of the slats. You want the surface to be smooth to the touch.
Step 2: Building the Main Frame
Use the sturdiest parts of the pallet to create the four legs and the rectangular frame for the countertop. A standard height for a mud kitchen is usually between 20 and 24 inches, but you can adjust this based on the age of your children. Connect the legs to the frame using heavy-duty wood screws and wood glue for extra stability. If you want a lower shelf for storage, add another set of supports near the bottom of the legs.
Step 3: Creating the Countertop and Sink Hole
Lay your sanded planks across the top of the frame and screw them into place. Once the top is solid, place your bowl upside down on the surface and trace around it. Use your jigsaw to cut a hole slightly smaller than the rim of the bowl so that it sits snugly inside without falling through. This “sink” is the heart of the mud kitchen where all the mixing and cleaning happens.
Step 4: Adding the Backboard
The backboard is what gives the kitchen its character. Use a full pallet or a portion of one to create a vertical wall behind the counter. This provides a place to install hooks for spoons, ladles, and pots. It also adds structural integrity to the whole unit, preventing it from wobbling during heavy play.
The Benefits of Sensory Play in the Garden
A mud kitchen is more than just a toy; it is a developmental tool. Engaging in “messy play” helps children build fine motor skills as they pour, stir, and scoop. It also encourages social interaction if they are playing with siblings or friends, as they take on roles like “chef” or “customer.”
Furthermore, being outdoors connects children with the natural world. They might incorporate fallen leaves, pebbles, or flower petals into their recipes. This type of open-ended play fosters creativity because there are no set rules or electronic noises telling them what to do. They are the masters of their own little culinary world, fueled by imagination and a little bit of dirt.
Creative Ways to Customize Your Mud Kitchen
Once the basic structure is complete, the real fun begins. Customizing the kitchen allows you to match your home decor or create a specific theme for your kids. Here are a few ideas to get you started:
Paint and Finish
While the natural wood look is beautiful, a pop of color can make the kitchen even more inviting. Use outdoor-grade chalk paint for a vintage feel, or let the kids help pick out a bright “signature color” for the trim. If you prefer the wood grain, apply a clear waterproof stain to ensure the kitchen lasts through several seasons of wet weather.
Functional Accessories
Visit a local thrift store to find old metal pots, pans, and wooden spoons. Metal items make a satisfying sound when stirred and are much more durable than plastic toy versions. You can also install a small chalkboard on the backboard so the kids can write out the “Menu of the Day.” Adding a small battery-operated tap or a water jug with a dispenser can take the realism to the next level.
Organized Storage
Use the bottom shelf to store baskets filled with “ingredients” like pinecones, stones, or dried beans. This teaches children about organization and keeps the backyard tidy when playtime is over. Small wooden crates or wicker baskets fit perfectly into the pallet gaps and add to the overall charm of the setup.
Maintenance Tips for Longevity
Since this kitchen will live outdoors, it will face the elements. To keep it looking great, check the screws once a season to make sure nothing has loosened due to the wood expanding and contracting. A fresh coat of sealant every year or two will prevent the wood from becoming grey and brittle. If you live in an area with harsh winters, covering the kitchen with a tarp or moving it into a garage during the off-season will significantly extend its life.
Final Thoughts on Your Weekend Project
Building a DIY pallet mud kitchen is a project that yields high rewards for a relatively small investment of time and effort. It is an invitation for children to slow down, get their hands dirty, and explore the world around them. When you see the look of pride on their faces as they “cook” you a gourmet meal of grass and mud, you will know that every minute spent sanding and drilling was worth it. This weekend, turn those old pallets into a centerpiece for backyard memories that will last a lifetime.