Create Your Dream Aesthetic Vanity: Tips for a Stylish and Functional Space
Introduction to Create Your Dream Aesthetic Vanity: Tips for a Stylish and Functional Space
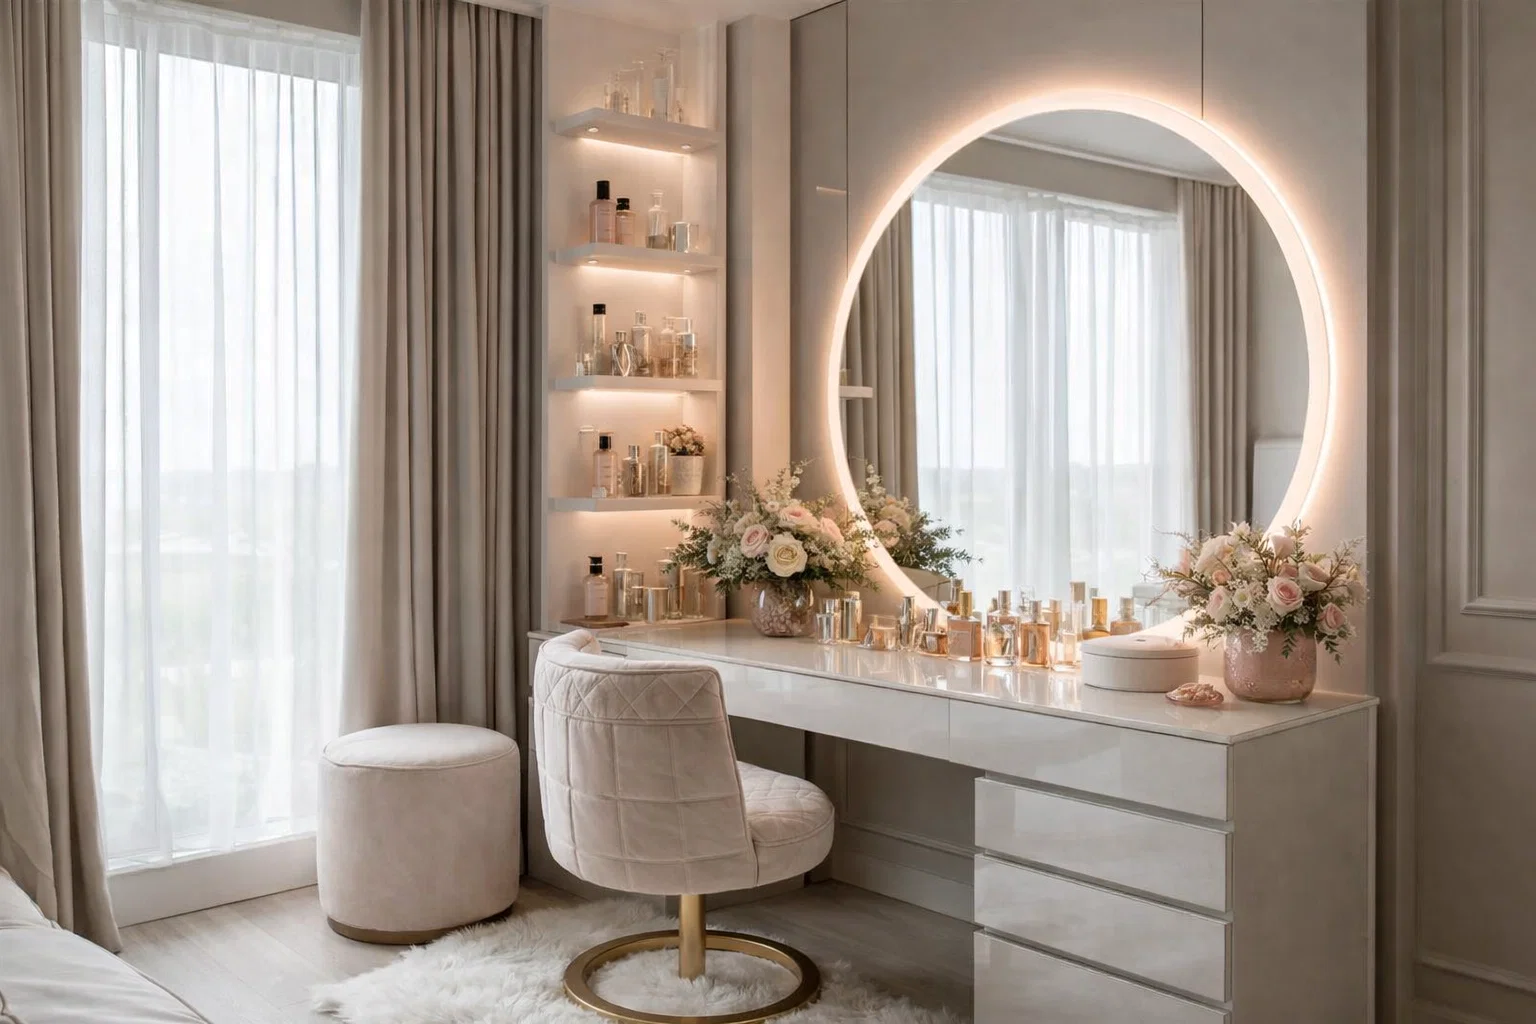
Imagine starting and ending your day at a personal sanctuary that feels less like a chore station and more like a curated corner of calm and beauty. This is the transformative power of a dedicated aesthetic vanity. More than just a place to store makeup, a well-designed vanity table is a statement of self-care, a functional workspace, and a pivotal piece of decor that elevates the entire room. Whether you’re a minimalist seeking serene order or a maximalist craving a vibrant, personalized nook, crafting this space allows you to express your unique style while creating a ritual of preparation and unwinding.
The concept transcends mere utility; it’s about crafting an atmosphere. A thoughtfully styled makeup station can evoke feelings of luxury, creativity, and tranquility. For renters, homeowners, and DIY enthusiasts alike, creating this spot is a manageable project with immense emotional payoff. It’s where functionality meets artistry—a small zone dedicated entirely to you. This guide will walk you through every element, from selecting the perfect table to the final decorative flourish, ensuring your vanity area becomes a dreamy, Instagram-worthy haven that inspires you daily. Let’s embark on the journey to design a space that is as stylish as it is practical.
Why Choose an Aesthetic Vanity for Your Space
Investing time in creating a beautiful vanity setup offers benefits that extend far beyond its surface appeal. Firstly, it champions intentionality in your daily routine. By dedicating a specific, organized area for grooming and styling, you cultivate a mindful start and end to your day. This dedicated zone minimizes clutter in other areas like the bathroom, leading to a calmer, more organized home environment. Consequently, what might feel like a mundane task becomes a cherished moment of self-pampering.
Furthermore, a well-designed vanity maximizes functionality through clever organization. Instead of digging through a messy drawer, everything has a designated home. This efficiency saves precious time during busy mornings. From a design perspective, a stylish dressing table acts as a focal point in a bedroom or dressing room. It introduces a layer of sophistication and personal flair that generic furniture often lacks. For styling professionals or beauty enthusiasts, it serves as a practical workstation with optimal lighting and storage. Ultimately, whether you have a spacious room or a modest corner, a personalized vanity nook enhances both the utility and the emotional resonance of your personal space, making it a truly transformative decor choice.
Key Elements & Design Components
Essential Decor Items for an Aesthetic Vanity
To build your dream setup, you’ll need to consider several core components that blend form and function.
- The Vanity Table: This is the foundation. Options range from ornate, vintage-inspired dressing tables with intricate mirrors to clean-lined, modern desks. Consider the surface material—marble or granite tops offer luxury, while wood provides warmth. Ensure it’s a comfortable height for sitting.
- The Mirror: Lighting is key, so opt for a mirror with built-in LEDs or one designed to be placed between two good light sources. A large, statement mirror adds drama, while a smaller, ornate one enhances a vintage vibe.
- Seating: Choose a chair or stool that complements the table’s style but is also ergonomic. A plush, upholstered stool adds comfort and texture, while a sleek acrylic chair maintains a light, airy feel.
- Organization & Storage: This is crucial for maintaining the aesthetic. Use pretty trays (marble, acrylic, or rattan) to corral daily-use products. Clear acrylic organizers keep items visible and tidy. Decorative boxes or small drawers hide less attractive items. A multi-tiered organizer can maximize vertical space.
- Lighting: Beyond the mirror lights, incorporate ambient lighting. A small, elegant table lamp or a pair of wall sconces on either side of the mirror provides flattering, even illumination and adds to the decor.
- Decorative Accents: This is where personality shines. Include a small vase with fresh flowers, a decorative perfume tray, framed art or prints leaned against the wall, a chic coaster for your morning coffee, or a sculptural figurine. A plush, small rug under the chair defines the space and adds comfort.
Style Variations & Budget-Friendly Alternatives
Your dream vanity setup should reflect your personal decor style. For a Modern Minimalist look, choose a floating shelf as a table, a simple round mirror, and monochrome organizers. A Boho aesthetic calls for a rattan peacock chair, a macramé mirror holder, and terracotta pots for brush holders. Meanwhile, a Glam style thrives with a tufted stool, a crystal-chandelier lamp, and velvet trays.
Thankfully, achieving this look doesn’t require a massive budget. Instead of a dedicated vanity table, repurpose a small desk, a console table, or even a sturdy, aesthetically pleasing shelf mounted to the wall. A simple, unframed mirror can be transformed with DIY LED strip lights. For storage, thrift store finds like vintage teacups or ceramic bowls can hold brushes, and decorative cookie tins can store hair tools. Peel-and-stick wallpaper on the wall behind the vanity creates a dramatic focal point without permanent changes—a perfect solution for renters.
How to Achieve the Look: Step-by-Step Styling Guide
Follow this actionable plan to build your personalized beauty station from the ground up.
Step 1: Define Your Space and Style Vision
First, identify where your vanity area will live. It could be a bedroom corner, a closet nook, or part of a larger dressing room. Measure the area carefully. Then, decide on the overall aesthetic. Gather inspiration from Pinterest or magazines to create a mood board. Ask yourself: Do I want serene and spa-like, playful and colorful, or elegant and vintage? This vision will guide every subsequent choice.
Step 2: Select Your Foundational Furniture
Based on your measurements and style, choose your table and seat. For small spaces, a wall-mounted shelf or a narrow console table is ideal. Ensure there’s enough knee room and that the chair fits comfortably underneath. If you’re using an existing piece, consider how you can refresh it—a new coat of paint or changing the hardware can work wonders.
Step 3: Optimize Lighting and Mirror Placement
Position your mirror first. The center should be at or slightly above eye level when you’re seated. If using natural light, place the mirror opposite or adjacent to a window. For artificial light, install sconces or use a lamp on either side of the mirror to avoid shadows on your face. A ring light or LED mirror is a fantastic functional addition for any makeup station.
Step 4: Implement Smart Storage and Organization
Sort your products into categories: daily essentials, weekly use, and special occasion items. Your daily essentials should be most accessible on the tabletop in pretty organizers. Use drawers for larger items like palettes and tools. Employ risers inside drawers to double storage space. The goal is to have a clear, beautiful surface that isn’t cluttered.
Step 5: Curate Your Decorative Display
This is the fun part. Style your surface with intentionality. Place your most beautiful perfume bottles on a tray. Add a small plant or vase for life and color. Lean a small piece of art against the wall. Keep it balanced; typically, odd numbers of objects (1, 3, 5) are more visually appealing. Remember, negative space is important—don’t cover every inch.
Step 6: Incorporate Textural and Personal Layers
Finally, add layers that invite comfort and personality. Drape a soft throw over the back of your chair. Place a small, plush rug underneath to warm up the floor. Include a cherished photo in a lovely frame or a treasured heirloom box. These elements make the space feel lived-in, cozy, and uniquely yours, completing your personal beauty nook.
Elevating the Look: Advanced Styling Tips
Once your basic setup is complete, these pro tips will add that final layer of polish and personality to your stylish dressing table.
- Play with Height and Dimension: Avoid a flat-looking surface by incorporating items of varying heights. Use a tall, thin vase next to a low, wide tray. Stack a few coffee table books to use as a riser for a decorative object.
- Create a Cohesive Color Story: While your products will be colorful, choose organizers, trays, and decor in a cohesive palette of two or three colors. This creates visual harmony and makes the space feel designed, not chaotic. Metallic accents like gold or brushed brass can unify different elements.
- Incorporate Reflective Surfaces: Mirrors, acrylic organizers, and glass trays bounce light around, making the area feel larger and more luminous. This is especially effective in smaller spaces.
- Design a “Background Moment”: The wall behind your vanity is prime real estate. Consider an accent color, removable wallpaper, a gallery wall of small prints, or even a simple shelf above the mirror to display art or more decor.
- Embrace Seasonal Rotation: Keep your vanity area feeling fresh by swapping out a few decor items seasonally. Change the flowers, switch the small art print, or use a different colored tray liner. This minimal effort makes the space feel dynamic and cared-for.
Maintenance & Care: Keeping Your Space Fresh
The charm of an aesthetic vanity lies in its pristine, inviting appearance. Maintaining it requires a simple, consistent routine. Firstly, wipe down the surface daily with a soft, dry cloth to remove dust and any makeup spills. For marble or glass, use a manufacturer-approved cleaner weekly. Secondly, dedicate five minutes at the end of each week to reorganize: put stray items back in their designated trays, declutter any accumulated junk, and clean your brushes.
Every month, do a deeper audit. Discard any expired products and wipe out the inside of drawers and organizers. Fluff your chair cushion and vacuum the small rug if you have one. To prevent the look from becoming stale, don’t be afraid to occasionally rearrange your decorative objects or introduce one new piece, like a scented candle or a new piece of art. This ongoing care ensures your dream vanity setup remains a functional and inspiring retreat.
FAQs: Frequently Asked Questions About Creating an Aesthetic Vanity
Q: I have a very small bedroom. Can I still have a vanity?
A: Absolutely! Space-saving solutions are perfect for small rooms. Consider a wall-mounted, fold-down desk that can be closed when not in use, a narrow console table against a wall, or even using a deep windowsill. A mirror that hangs on the wall (rather than sitting on the table) saves crucial surface space. The key is to think vertically with shelving and organizers.
Q: What’s the most important thing for good vanity lighting?
A: Even, shadow-free light that mimics natural daylight is essential. The best setup is having two light sources (like sconces or lamps) at eye level on either side of the mirror. This eliminates harsh shadows cast by overhead lighting. If that’s not possible, a high-quality LED ring light or a mirror with built-in, color-accurate LEDs is an excellent alternative.
Q: How can I make my vanity look expensive on a tight budget?
A: Focus on presentation. Inexpensive items look luxurious when curated well. Use a cohesive color scheme. Paint an old table in a sophisticated hue. Use a large, inexpensive mirror but frame it with DIY molding. Display your products in matching containers (like clear glass jars for cotton balls). A single, statement item like a beautiful vintage stool found at a thrift store can elevate the entire look.
Q: How do I keep my vanity from looking cluttered with all my products?
A: The secret is “edited display and hidden storage.” Only your most beautiful daily-use items should be on display. Everything else should have a home in drawers, boxes, or cabinets. Use organizers within drawers so things don’t become a jumbled mess. If you don’t have drawers, use decorative baskets or boxes with lids on the tabletop or a shelf below to conceal the clutter while maintaining the aesthetic.