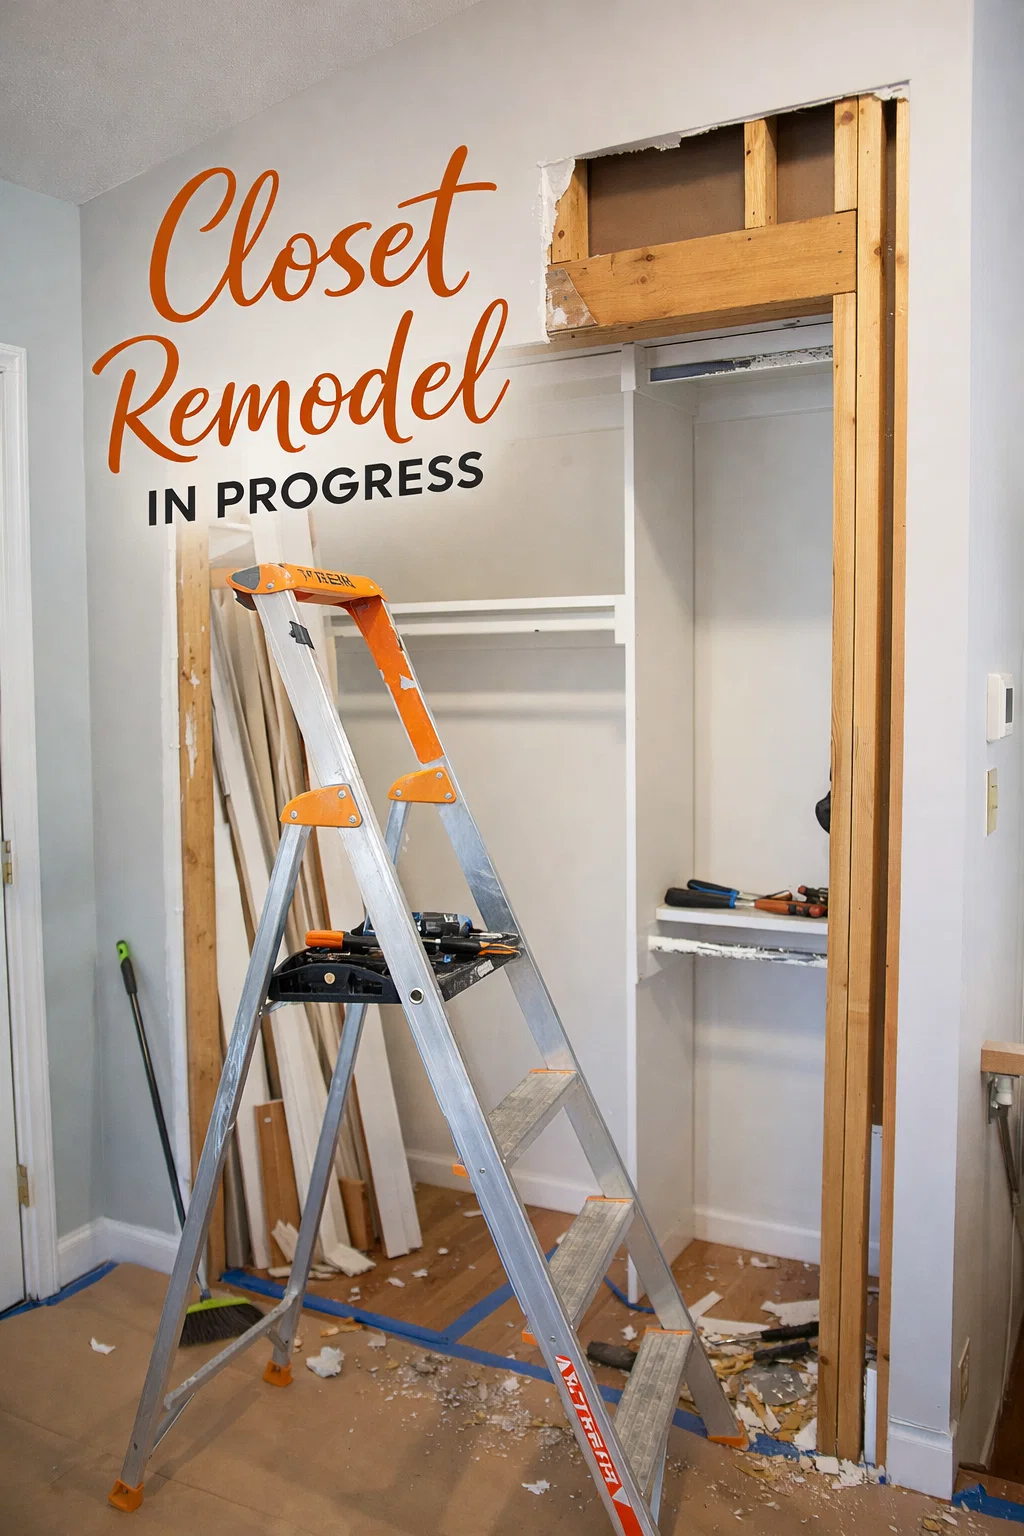
Taking on a home renovation project is one of the most rewarding challenges a homeowner can face. There is a unique thrill in stripping a room down to its studs, seeing the raw skeletal structure of your house, and realizing the immense potential hidden behind a few sheets of drywall. If you are currently looking at a scene similar to the one in the photo, with a ladder standing tall amidst debris and exposed wooden framing, you are at the precipice of a transformation that will not only improve your daily routine but also add significant value to your property.
The Anatomy of a Closet Demolition
The image captures the critical mid-point of a reach-in closet renovation. This is the stage where the old, inefficient shelving and the outdated sliding door tracks have been removed to make way for something better. Demolition is often the most physically demanding part of a project, yet it provides the clarity needed to understand the structural possibilities of the space. By opening up the header and exposing the vertical studs, you can see exactly where you have room to expand or where you might need to reinforce the structure to support new, heavy-duty organizing systems.
When you reach this phase, it is vital to inspect the quality of the existing lumber. In many older homes, you might find that the original framing was done in a hurry. Now is the perfect time to level out those uneven boards and ensure that your new closet walls will be perfectly plumb. This attention to detail during the rough-in stage ensures that when it comes time to install those sleek new doors or custom cabinetry, everything fits like a glove without the need for excessive shimming.
Strategic Planning for Maximum Storage
A reach-in closet often feels limiting because of its shallow depth. However, seeing the framing exposed allows you to think vertically. Most standard closets have a significant amount of wasted space above the door frame. By raising the header or simply planning for high-reach shelving, you can store seasonal items like winter coats or holiday decorations in space that was previously inaccessible. The goal of a modern reach-in closet is to eliminate dead zones where clutter tends to accumulate.
Designing for Your Specific Needs
Before you start putting up new drywall, take a moment to measure your wardrobe. Are you someone who has a lot of long-hanging dresses, or do you prefer folded sweaters and jeans? This is the moment to decide if you want a built-in look. Many homeowners are moving away from the basic wire rack and opting for integrated wooden shelving units. Because the walls are open, you can even consider adding electrical outlets. Imagine having a hidden charging station for your smartwatch or a built-in light that turns on automatically when you open the closet doors.
The Importance of Proper Tools and Safety
As seen in the photo, a sturdy A-frame ladder is your best friend during this process. Working at height to remove old headers or install new bracing requires stability. Alongside a reliable ladder, a renovation project of this scale demands a specific toolkit. You will need a reciprocating saw for quick cuts through old wood and nails, a pry bar for removing trim without damaging the surrounding drywall, and a heavy-duty shop vacuum to manage the inevitable dust and debris.
Safety should always be the priority. When you are tearing into walls, you must be mindful of what lies behind the plaster. This includes electrical wiring, plumbing stacks, or even HVAC ductwork. If you encounter wires, always ensure the power is cut at the breaker before proceeding. Wearing eye protection and a dust mask is non-negotiable, as old insulation and drywall dust can be irritants you want to avoid breathing in.
Framing and Structural Integrity
The wooden framework visible in the image shows a classic “rough opening.” If you are planning to change the type of doors you use, for example, switching from bypass sliding doors to elegant French doors or a trendy barn door, you may need to adjust this framing. French doors require a solid jamb to hinge onto, while a barn door needs a reinforced header to support the weight of the sliding track. Doing this work now, while the studs are exposed, is much easier than trying to retro-fit a solution later.
Choosing the Right Drywall and Finish
Once the framing is set and any electrical work is finished, the next step is hanging the drywall. For closets, standard half-inch drywall is usually sufficient. However, if your closet shares a wall with a bathroom, you might consider using moisture-resistant “green board” to prevent any future issues with humidity. After the drywall is up, the real magic happens during the mudding and sanding phase. While it is tempting to rush through this to get to the painting, a smooth finish is what separates a DIY job from a professional-looking renovation.
Innovative Organization Systems to Consider
With the structural work complete, you can begin to visualize the final layout. The trend in 2024 and beyond is all about modularity. You want a system that can grow and change with your lifestyle. Here are a few popular options for reach-in closets:
- The Wall-Hung System: These systems use a steel rail mounted to the back wall studs. All the shelves and rods hang from this rail, making it easy to adjust heights without drilling new holes.
- Floor-Mounted Built-ins: These provide a more permanent, furniture-like feel. They are excellent for creating a “boutique” look even in a small reach-in space.
- Double Hanging Rods: By placing two rods on top of each other, you instantly double the amount of space for shirts and jackets.
- Pull-out Accessories: Consider adding pull-out valet rods, tie racks, or even a fold-out ironing board to maximize every square inch.
Flooring and Trim Work
Don’t forget the floor! As you can see in the image, the flooring often needs protection during a demo. Once the walls are finished, you may need to patch the hardwood or carpet inside the closet. Carrying the same flooring from the bedroom into the closet creates a seamless, high-end look that makes the room feel larger. Finish the project with baseboards and door casing that match the rest of the room to ensure the new closet looks like it has always been there.
Lighting: The Secret Ingredient
A common mistake in closet renovations is neglecting the lighting. A dark closet is a messy closet because you cannot see what you own. Since you have the walls open, talk to an electrician about installing LED strip lighting along the shelves or a recessed can light in the ceiling. Motion-activated sensors are a fantastic addition, providing a touch of luxury and convenience every morning when you get dressed.
Budgeting for Your Closet Remodel
One of the best things about a reach-in closet project is that it can be scaled to fit almost any budget. If you are looking to save money, you can do the demolition and framing yourself and use a high-quality paint to refresh the interior. If you have a larger budget, investing in custom cabinetry and professional organization services can yield a high return on investment. Regardless of the spend, the most important factor is the labor and the quality of the “invisible” work inside the walls.
The Psychological Benefit of an Organized Space
Beyond the aesthetic and financial gains, there is a profound psychological benefit to finishing a project like this. Clutter in our physical environment often leads to mental clutter. By creating an organized, functional closet, you are streamlining your morning routine and reducing daily stress. Starting your day in a space that is clean and structured sets a positive tone for the hours ahead.
Conclusion: Your Journey to a Better Home
Looking at a pile of lumber and an open wall can be intimidating, but it is also the ultimate canvas for your creativity. The image of the ladder and the exposed studs is a symbol of progress. It represents the transition from “what is” to “what could be.” Whether you are a seasoned DIY enthusiast or a first-time homeowner taking your first steps into renovation, remember that every great room starts with a solid foundation. Take your time, measure twice, and don’t be afraid to get your hands dirty. By the time you are hanging your clothes back in that newly finished space, you will look back at this phase of the project with a great sense of pride. Your dream closet is just a few studs and a bit of hard work away. Happy building!