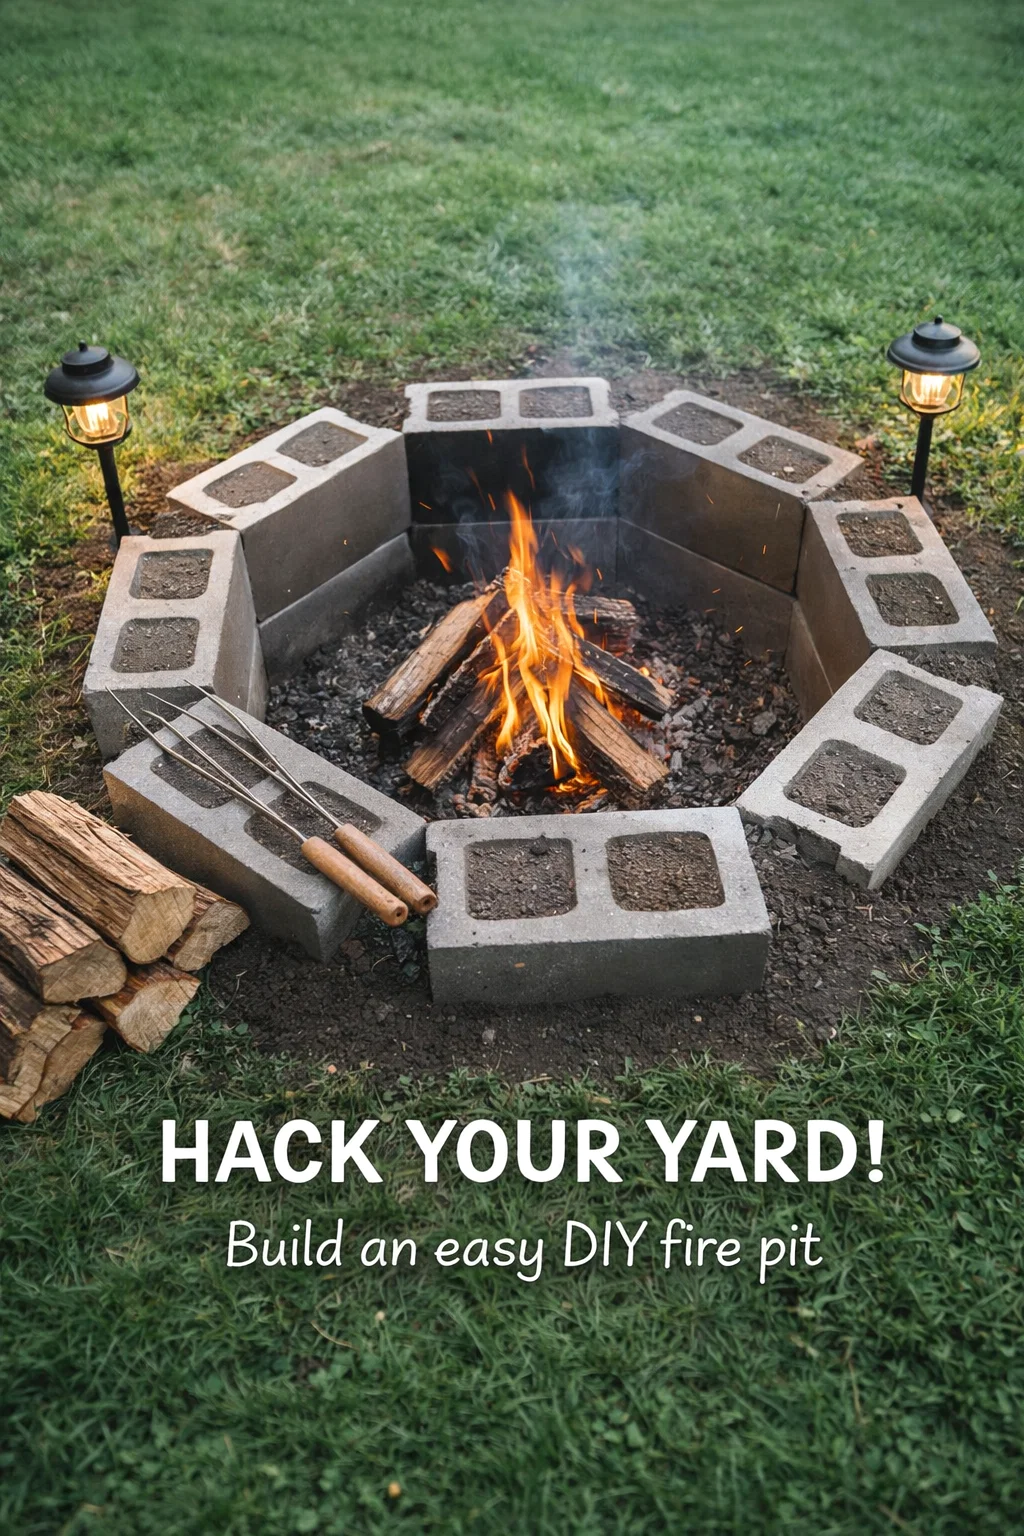
Transforming an empty patch of grass into a functional outdoor living space does not require a massive budget or a professional landscaping crew. Sometimes, all it takes is a bit of elbow grease and some basic construction materials. The image of this sunken cinder block fire pit perfectly illustrates how a simple weekend project can completely redefine the atmosphere of a backyard. By digging into the earth and utilizing the structural integrity of standard masonry blocks, you can create a safe, durable, and aesthetically pleasing focal point for your home.
Outdoor fire pits have become one of the most sought after features for modern homeowners. They extend the usability of your yard into the cooler months and provide a natural gathering spot for family and friends. While store bought metal basins are common, they often rust over time and lack the permanent, custom feel of a built in feature. An inground design like the one shown offers a unique, low profile look that blends seamlessly with the surrounding landscape while providing excellent heat retention and wind protection.
The Appeal of the Inground Cinder Block Design
There is a specific charm to an inground fire pit that elevated models simply cannot match. Because the fire sits below the surface level, it creates a cozy, campfire like experience that feels more grounded and natural. This design is particularly effective for smaller yards because it does not obstruct the line of sight across the lawn, making the space feel more open and expansive.
Using cinder blocks as the primary building material is a stroke of DIY brilliance. These blocks are incredibly affordable, readily available at any local hardware store, and designed to withstand significant weight and environmental stress. When they are placed in a circular or hexagonal pattern underground, the surrounding soil acts as a natural insulator, keeping the heat concentrated within the pit and protecting the blocks from rapid temperature shifts that might cause cracking in other materials.
Safety Benefits of a Sunken Fire Pit
Safety should always be the primary concern when dealing with open flames in a residential setting. One of the greatest advantages of the sunken design is the natural containment it provides. In a traditional raised fire pit, embers can easily be caught by a gust of wind and carried onto dry grass or nearby structures. With an inground setup, the walls of the pit and the earth itself act as a windbreak, significantly reducing the risk of stray sparks.
Furthermore, the stability of a cinder block foundation ensures that there is no risk of the pit tipping over. Since it is literally embedded in the ground, it is a permanent fixture that provides a level, controlled environment for burning wood. This makes it an ideal choice for families with pets or children, as the defined perimeter and lowered heat source are easier to manage and supervise during use.
Step by Step Guide to Building Your Own
If you are inspired by the image to start your own project, the process is surprisingly straightforward. Preparation is the most important phase. You will need to select a spot in your yard that is at least ten to fifteen feet away from your house, overhanging trees, or wooden fences. Once you have found the perfect location, you can begin the physical labor of bringing your vision to life.
Marking and Digging the Perimeter
Start by laying out your cinder blocks on the grass in the shape you desire. A circle or a hexagon works best for structural stability. Once you are happy with the size, use a shovel to mark the outline. You will want to dig a hole that is deep enough to accommodate the height of your blocks plus a few inches for a drainage base. Typically, digging down about twelve to eighteen inches is sufficient for a standard DIY fire pit.
As you dig, keep the walls of the hole as vertical as possible. This ensures that the cinder blocks will fit snugly against the earth, which provides the necessary lateral support to keep them from shifting over time. It is a good idea to keep a level handy during this process to ensure the bottom of the pit is even, which will make the block placement much easier later on.
Installing the Drainage Base
Proper drainage is the secret to a long lasting fire pit. Without it, your pit will collect rainwater and turn into a muddy puddle, making it impossible to light a fire. Before placing any blocks, fill the bottom of your hole with three to four inches of crushed gravel or lava rock. This layer allows water to filter through into the soil below while also providing a stable, non combustible surface for your wood to sit on.
Gravel also helps with airflow. By raising the wood slightly off the dirt floor, oxygen can circulate more freely underneath the logs, leading to a cleaner, hotter burn with less smoke. This small detail makes a massive difference in the quality of your fires and the ease of maintenance over the seasons.
Materials and Customization Options
The beauty of this project lies in its versatility. While the image shows a raw, industrial look with exposed cinder blocks, you can easily customize the appearance to match your home’s aesthetic. Cinder blocks are a fantastic foundation, but they can be treated as a blank canvas for more decorative finishes if you choose to take the project a step further.
- Retaining Wall Blocks: If you prefer a more polished look, you can use interlocking retaining wall stones instead of standard cinder blocks. These come in various colors and textures.
- Fire Brick Lining: For maximum longevity, consider lining the interior of the blocks with fire bricks and refractory mortar. This protects the outer blocks from direct flame contact.
- Decorative Top Cap: Adding a layer of flat flagstone or pavers around the top edge of the pit creates a finished look and provides a place to rest your feet or a marshmallow roasting stick.
- Lava Rocks or Glass: Inside the pit, you can use decorative lava rocks or fire glass over your gravel base to enhance the visual appeal when the fire is roaring.
Managing Heat and Airflow
When using cinder blocks, it is important to remember that they are porous. To ensure proper combustion, some DIYers choose to leave small gaps between a few of the blocks or drill holes through the sides to allow air to enter the bottom of the pit. This intake of oxygen is what feeds the flames. In the sunken design, the holes in the cinder blocks themselves can be utilized to help with this, as long as they are not completely packed with dense soil.
Maintenance and Long Term Care
Once your fire pit is built, maintaining it is relatively simple. After a few uses, ash will begin to accumulate on top of your gravel base. It is important to shovel this out periodically to keep the drainage layer clear. If the ash gets too thick, it will trap moisture and prevent the wood from burning efficiently. Most people find that a quick cleanup once a month during the high season is plenty to keep the pit in top shape.
During the winter or rainy seasons, you might consider using a simple metal or wooden cover to keep the interior dry. This prevents the cinder blocks from absorbing excessive moisture, which can be beneficial in climates where freezing and thawing occur frequently. Taking these small steps will ensure your backyard feature remains a safe and beautiful part of your home for many years.
Enhancing the Surrounding Atmosphere
A fire pit is more than just a hole in the ground; it is the center of an outdoor room. To get the most out of your new build, think about the area surrounding the pit. Adding a circle of crushed stone or mulch around the perimeter can help define the space and keep feet away from the grass, which might get trampled during frequent gatherings. This also adds an extra layer of fire protection by creating a buffer zone between the flames and the lawn.
Seating is the next logical step. Adirondack chairs are a classic choice for a reason; their reclined position is perfect for staring into the embers. For a more permanent feel, you could build matching cinder block benches with wooden slat tops, tying the whole look together. Stringing some bistro lights above the area or placing solar lanterns along the path to the pit will create a magical evening ambiance that makes your backyard feel like a high end resort.
Conclusion
The cinder block fire pit hack is a perfect example of how a high impact home improvement project can be achieved with minimal cost and complexity. It proves that you do not need expensive kits or professional contractors to create a space that fosters connection and relaxation. By following a few simple steps and prioritizing safety and drainage, anyone can transform their backyard into a cozy retreat.
Whether you are roasting s’mores with the kids on a summer night or staying warm during a crisp autumn evening, a DIY fire pit provides a sense of accomplishment and a lifetime of memories. So, grab a shovel, pick up some blocks, and start digging. Your perfect outdoor oasis is just a weekend away from becoming a reality.