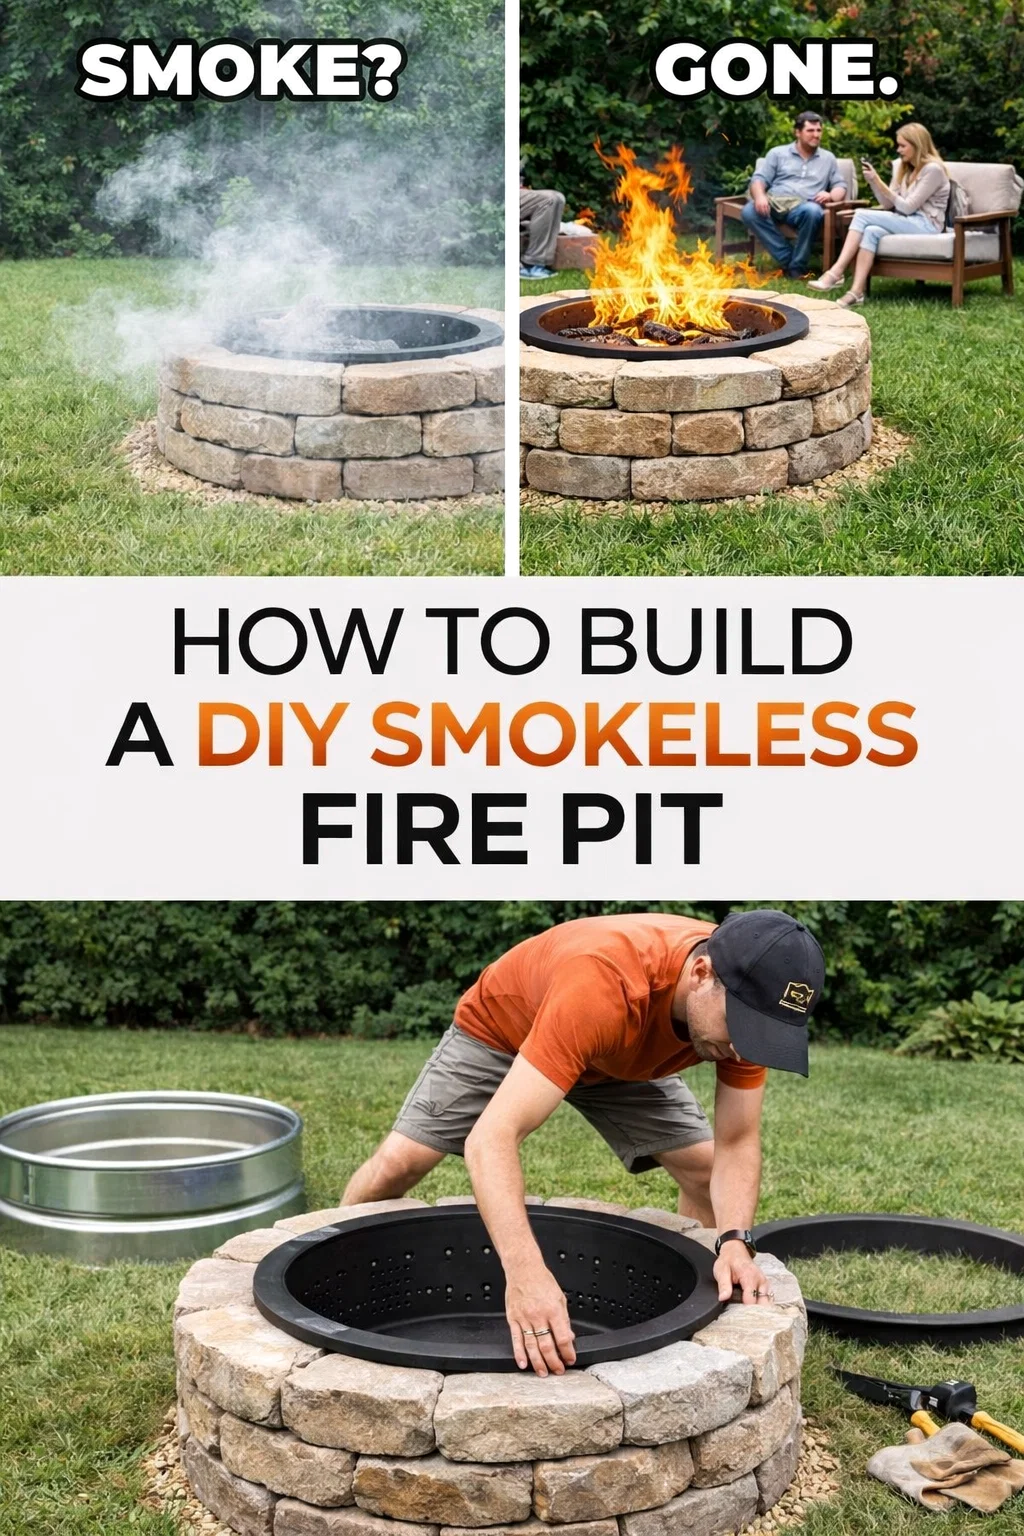
There is nothing quite like the crackle of a wood fire to turn an ordinary backyard into a sanctuary of relaxation. However, for many homeowners, the dream of a cozy evening by the flames is often dampened by the reality of stinging eyes and clothes that smell like a campfire for days. This is where the magic of the smokeless fire pit comes into play. By utilizing simple principles of thermodynamics, you can build a feature that offers all the warmth and ambiance of a traditional fire without the nuisance of heavy smoke. If you are looking to upgrade your outdoor living space, this DIY project is the ultimate game changer for your backyard aesthetic and comfort.
The Science Behind Smokeless Fire Pits
To build an effective smokeless fire pit, it is helpful to understand why smoke happens in the first place. Smoke is essentially unburned fuel. When a fire does not have enough oxygen or heat to completely combust the wood, it releases soot, gases, and moisture in the form of smoke. A smokeless fire pit solves this through a process called secondary combustion.
In a DIY setup like the one shown in our guide, you are essentially creating a double walled system. Air is drawn in through vents at the bottom, travels up between the walls where it is heated, and then exits through holes at the top. This superheated air meets the smoke at the top of the pit and causes it to ignite. The result is a much hotter fire that burns its own smoke before it ever reaches your face.
Materials You Will Need for This DIY Project
One of the best things about this specific build is that it uses readily available materials from your local home improvement store. You do not need specialized masonry skills to achieve a professional looking result. Here is a breakdown of what you will want to have on hand:
- A Steel Fire Ring: This serves as the inner liner and protects your stones from direct heat stress.
- A Galvanized Stock Tank or Secondary Metal Ring: This creates the outer layer of the combustion chamber.
- Retaining Wall Blocks: Choose stones that match your patio or landscaping for a cohesive look.
- Paver Sand and Leveling Gravel: Essential for creating a steady and safe foundation.
- High Temperature Adhesive: To ensure your stone tiers stay perfectly in place over time.
- A Drill with a Masonry Bit: If you need to add custom ventilation holes to your stone base.
Step by Step Guide to Building Your Smokeless Pit
Preparing the Foundation
Safety starts from the ground up. You should never build a fire pit directly on long grass or near overhanging branches. Start by marking out a circle that is about six inches wider than your intended stone wall. Dig down about four to six inches and fill the area with leveled gravel. This provides drainage and prevents the ground from shifting during freeze and thaw cycles. Tamp the gravel down firmly so you have a rock solid base to work on.
Setting the First Tier of Stones
The first layer of blocks is the most important. Use a level to ensure every stone is perfectly flat. If the first layer is crooked, the entire structure will look slanted by the time you reach the top. As you lay this first circle, leave small gaps between a few of the stones or use a masonry drill to create air intake vents. These holes are the lungs of your fire pit, allowing fresh air to enter the bottom of the system.
Installing the Metal Liners
Once your base is set, place your outer metal ring inside the stone circle. Then, place the smaller inner ring inside that. The gap between these two metal surfaces is where the air will heat up for secondary combustion. Make sure the inner ring has holes pre-drilled near the top rim. These holes should face inward toward the center of the fire. As the fire heats the metal, the air in the gap rises rapidly and shoots out of these holes, creating a beautiful jet like flame effect that consumes the smoke.
Stacking the Remaining Stone Tiers
Continue stacking your retaining wall blocks around the metal assembly. Use a bead of high temperature masonry adhesive between the layers to keep them from shifting. Most DIY enthusiasts find that three to four tiers of stone provide the perfect height for sitting around. Ensure the top layer of stones sits flush with or slightly above the rim of your metal fire ring for a clean, finished appearance.
Why a DIY Build Beats a Store Bought Model
While there are many high quality smokeless fire pits available for purchase, building your own offers several distinct advantages. First is the cost. You can often build a custom stone pit for a fraction of the price of a high end stainless steel portable unit. Second is the permanence and style. A stone fire pit becomes a structural part of your landscaping, adding actual value to your home. It looks like a natural extension of your patio rather than a piece of camping equipment sitting in the middle of the yard.
Furthermore, the DIY approach allows you to customize the size. If you have a large family and need a massive five foot diameter pit, you can build it. If you have a tiny urban patio, you can scale the dimensions down to fit your specific needs perfectly.
Best Practices for a Clean Burn
Even the best designed smokeless fire pit requires the right fuel to function at its peak. To minimize smoke and maximize heat, follow these simple firewood tips:
- Use Seasoned Hardwood: Oak, maple, and hickory are excellent choices because they are dense and burn hot. Avoid green wood or softwoods like pine, which contain high amounts of sap and moisture.
- Keep it Dry: Store your wood in a covered area. Even a small amount of rain can soak into the logs and cause them to smolder rather than burn cleanly.
- Do Not Overstuff: Airflow is the key to the smokeless effect. Avoid stacking the wood so high that it blocks the top ventilation holes in the inner ring.
- Start Small: Build a small teepee of kindling to get the internal temperature up quickly. The smokeless effect kicks in once the metal rings are hot enough to heat the rising air.
Safety Considerations for Outdoor Fire Features
Fire is a powerful element and should always be treated with respect. Always keep a fire extinguisher or a garden hose nearby when the pit is in use. Never leave a fire unattended, and ensure that the flames are completely extinguished before you head inside for the night. Since a smokeless fire pit burns much hotter than a standard one, the stones and metal will remain hot for a long time after the flames have died down. Warn guests and children to stay back even after the fire looks like it is out.
Maintenance and Longevity
To keep your fire pit looking great and functioning well, you should perform basic maintenance once or twice a year. Scoop out the ash regularly, as a build up of ash can block the bottom air vents and kill the smokeless effect. Inspect the stones for any cracks or loose adhesive and make quick repairs as needed. During the winter months, covering the pit with a waterproof tarp can help prevent moisture from getting into the stones and causing cracks during freezing temperatures.
Enhancing Your Fire Pit Area
Once the construction is finished, think about the atmosphere surrounding the pit. Circular seating is usually the best choice for fire pits because it encourages conversation and ensures everyone gets an equal share of the warmth. Consider using Adirondack chairs for a classic look or built in stone benches for something more modern. Stringing some Edison bulbs overhead or adding solar powered path lights around the perimeter can create a truly magical evening environment for you and your guests.
Conclusion
Building a DIY smokeless fire pit is one of the most rewarding outdoor projects you can undertake. It combines the rugged, timeless appeal of stone masonry with clever modern engineering to solve the age old problem of campfire smoke. By following the steps outlined above, you can create a centerpiece for your backyard that provides endless nights of entertainment and relaxation. Not only will your eyes thank you for the lack of smoke, but your property will benefit from a beautiful, professional looking upgrade. It is time to gather the stones, grab your tools, and start building the backyard retreat you have always wanted.