Transforming your living space doesn’t always require a massive budget or a professional interior designer. In fact, some of the most striking and conversation-starting pieces of home decor come from the simplest materials found right in your kitchen or bathroom cabinets. Today, we are diving deep into the world of creative upcycling by exploring how a humble box of cotton swabs and a piece of cardboard can be transformed into a stunning, sunburst-inspired wall mirror. This project is the epitome of aesthetic wall decor, proving that with a little hot glue and a lot of imagination, you can create something truly high-end for just a few dollars.
The Rising Trend of DIY Aesthetic Wall Decor
In recent years, the shift toward personalized, handmade home styling has exploded. Social media platforms are filled with inspiration for aesthetic bedrooms and chic living areas that prioritize texture and unique shapes over mass-produced furniture. People are moving away from the “big box store” look and toward items that tell a story or showcase a personal skill. This DIY cotton swab mirror fits perfectly into this movement. It captures the trendy sunburst or starburst silhouette that has been a staple in mid-century modern and boho-chic designs for decades, but it adds a contemporary, textural twist that is entirely unique.
What makes this specific project so appealing is its accessibility. You do not need to be a master carpenter or have an expensive studio to achieve professional results. The beauty lies in the repetition of simple lines, creating a geometric pattern that is naturally pleasing to the eye. When guests see this on your wall, they won’t believe it started as a pile of Q-tips. It is a testament to the power of seeing potential in the mundane.
Materials You Will Need for This Project
Before you begin the assembly process, it is important to gather high-quality materials. While the components are basic, choosing the right versions will ensure your wall decor lasts for a long time and looks polished. Here is what you should have on your craft table:
- Circular Cardboard Base: This serves as the foundation. You can repurpose a shipping box or use a pre-cut cake board for extra sturdiness.
- Large Pack of Cotton Swabs: Depending on the size of your mirror, you might need 200 to 400 swabs. Look for ones with sturdy plastic or paper stems rather than very flimsy ones.
- Hot Glue Gun and Glue Sticks: A high-temp glue gun is best for a quick, permanent bond. Make sure you have plenty of refills nearby.
- Small Round Mirror: A 5-inch to 7-inch craft mirror works perfectly for the center.
- Spray Paint (Optional): Gold, silver, or matte black can give the swabs a metallic or sophisticated finish.
- Hanging Hardware: A simple Command strip or a small loop of twine glued to the back will suffice.
Step by Step Guide to Creating Your Mirror
Preparing the Base
The first step is to define the size of your artwork. Trace a circle onto your cardboard that is slightly smaller than the total diameter you want for the finished piece. If you want a large statement piece, ensure your cardboard is thick enough to support the weight of the glue and the mirror. Cut out the circle carefully using a utility knife for clean edges. This circle acts as your guide, helping you maintain a perfect radial symmetry as you begin attaching the decorative elements.
The Layering Process
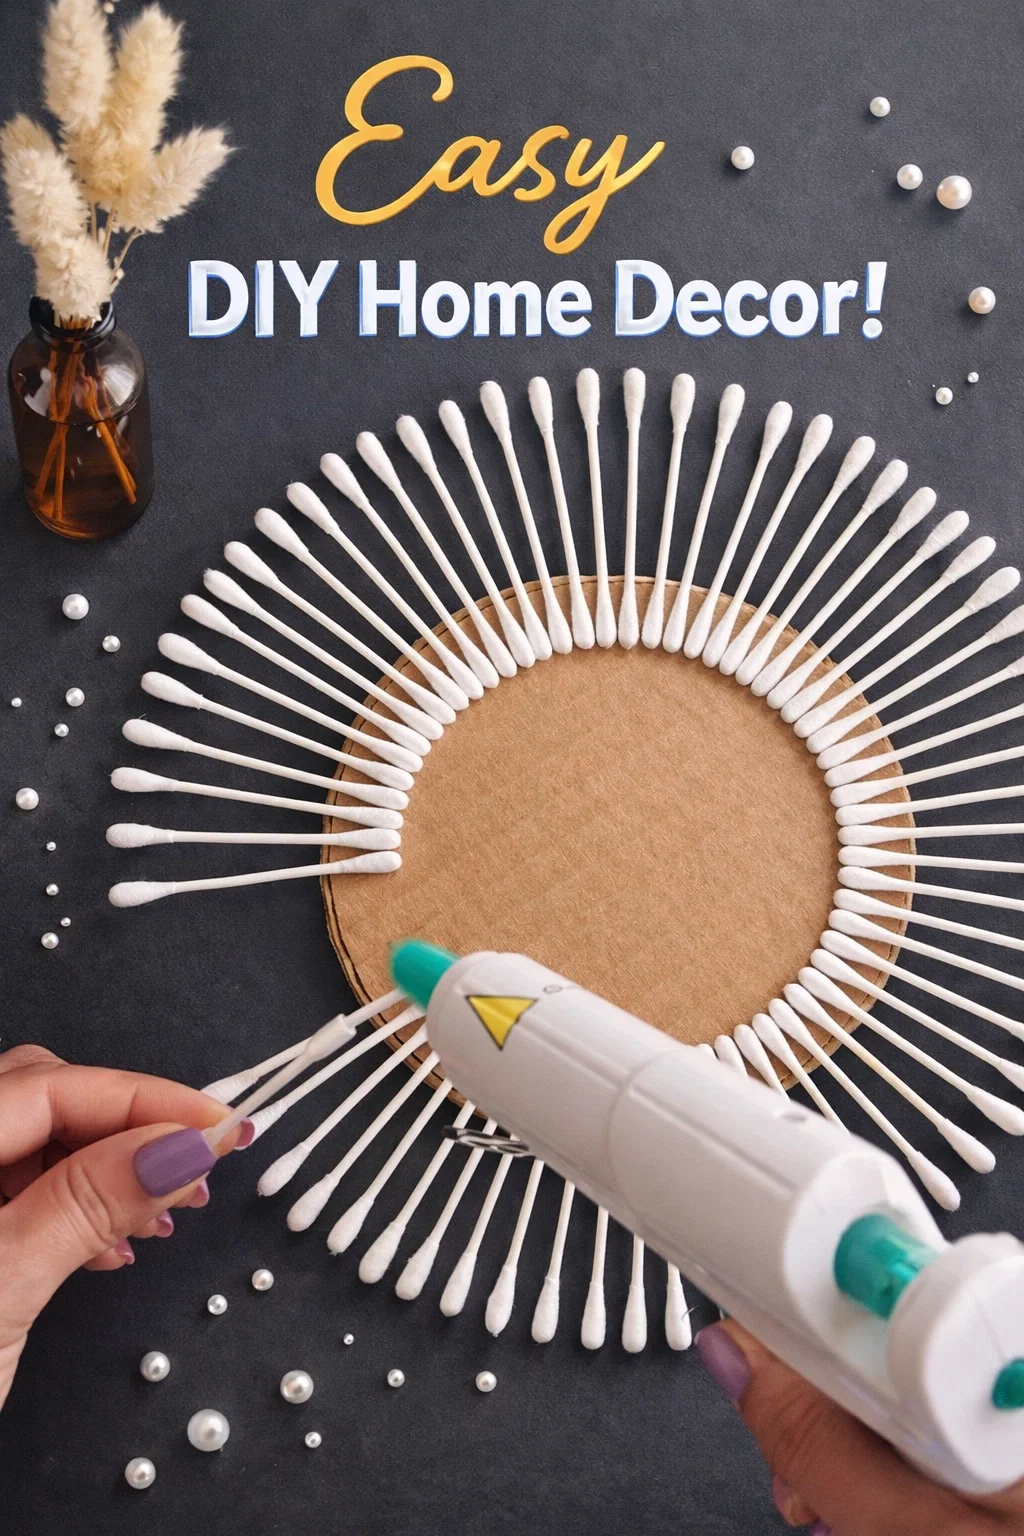
As seen in the tutorial image, the key to a professional look is the layering of the cotton swabs. Start by gluing the first “ring” of swabs along the outermost edge of the cardboard. Apply a small bead of hot glue to the stem and press it down firmly. Work your way around the entire circumference, keeping the spacing as consistent as possible. Once the outer ring is complete, start a second inner ring. By staggering the swabs or placing them slightly lower than the first layer, you create a 3D effect that adds depth and shadows to the piece.
Adding the Centerpiece
Once you have filled the cardboard base with rows of cotton swabs, you will be left with a circular opening in the center. This is where your mirror goes. Apply a generous amount of hot glue to the back of the mirror and press it firmly into the center of the swab arrangement. The mirror hides the ends of the swabs, giving the project a clean and finished appearance. At this stage, you can see the sunburst shape really come to life.
Customizing Your Design for Your Style
The basic white cotton swab look is perfect for a minimalist or “Scandi” style room, but don’t feel limited to the natural colors. One of the best parts of this DIY is how easily it can be customized to fit your specific bedroom aesthetic. If you love the “Old Money” or Regency Core look, a quick coat of metallic gold spray paint will make the swabs look like delicate brass rays. For a more modern or industrial vibe, matte black or even a bold neon color can make the piece pop against a neutral wall.
You can also experiment with the tips of the swabs. Some crafters choose to dip the cotton ends in glitter or paint them a contrasting color before gluing them down. This adds a level of detail that makes the piece look like a boutique find rather than a weekend project. If you want a more organic, boho feel, you can alternate the lengths of the swabs to create a more jagged, natural sunburst pattern.
Why DIY Decor is Good for Your Well-being
Beyond just having a pretty room, engaging in “craft therapy” has significant mental health benefits. The process of repetitive motion, such as gluing each swab in a rhythmic pattern, can be incredibly meditative. It allows your brain to switch off from the stresses of work and digital screens, focusing instead on a tactile, creative task. Completing a project like this provides a sense of accomplishment that buying something from a store simply cannot replicate.
Furthermore, decorating your space with items you made yourself creates a stronger emotional connection to your home. Your bedroom becomes a gallery of your own creativity, which can improve your mood and make your private sanctuary feel even more welcoming. It is about more than just “stuff” on a wall; it is about the time, effort, and vision you poured into your environment.
Placement Tips for Maximum Impact
Once your masterpiece is finished, where should you hang it? For an aesthetic bedroom, placement is everything. Consider hanging your new mirror above your headboard to act as a focal point. Because it is lightweight, it is much safer than heavy metal mirrors in this location. Alternatively, you can create a “cluster” wall by making three mirrors of different sizes and hanging them together in a staggered formation.
Think about the lighting in your room as well. Because the cotton swabs create a lot of texture, placing the mirror near a window or under a warm lamp will create beautiful shadows that change throughout the day. The reflective surface of the mirror will also help bounce light around the room, making a small bedroom feel larger and brighter.
Maintenance and Care
To keep your DIY mirror looking fresh, you will want to dust it occasionally. A can of compressed air (like the kind used for keyboards) is the best way to clean between the swab stems without dislodging them. Avoid using heavy liquid cleaners on the swabs themselves, as the cardboard and cotton are porous. A quick wipe of the center mirror with a microfiber cloth will keep it sparkling and functional.
Conclusion
Creating aesthetic wall decor doesn’t require a huge investment of money, but it does require an investment of heart. This cotton swab mirror project is the perfect example of how unconventional materials can be reimagined into high-end art. It encourages us to look at the world through a more creative lens and to take pride in the things we build with our own hands. Whether you keep it white and simple or go bold with gold paint, this DIY piece is sure to bring a sense of style and personality to your bedroom walls. So, grab your glue gun, put on your favorite playlist, and start crafting your way to a more beautiful home today.