Creating a warm and inviting atmosphere starts long before your guests step through the front door. It begins at the curb, where your home first meets the world. While many homeowners focus on landscaping or paint colors, there is a growing trend in the DIY community that combines functionality with rustic charm: the wooden welcome sign planter. This project is the perfect marriage of woodworking and gardening, offering a structured way to display vibrant hanging baskets while providing a friendly greeting to anyone who visits.
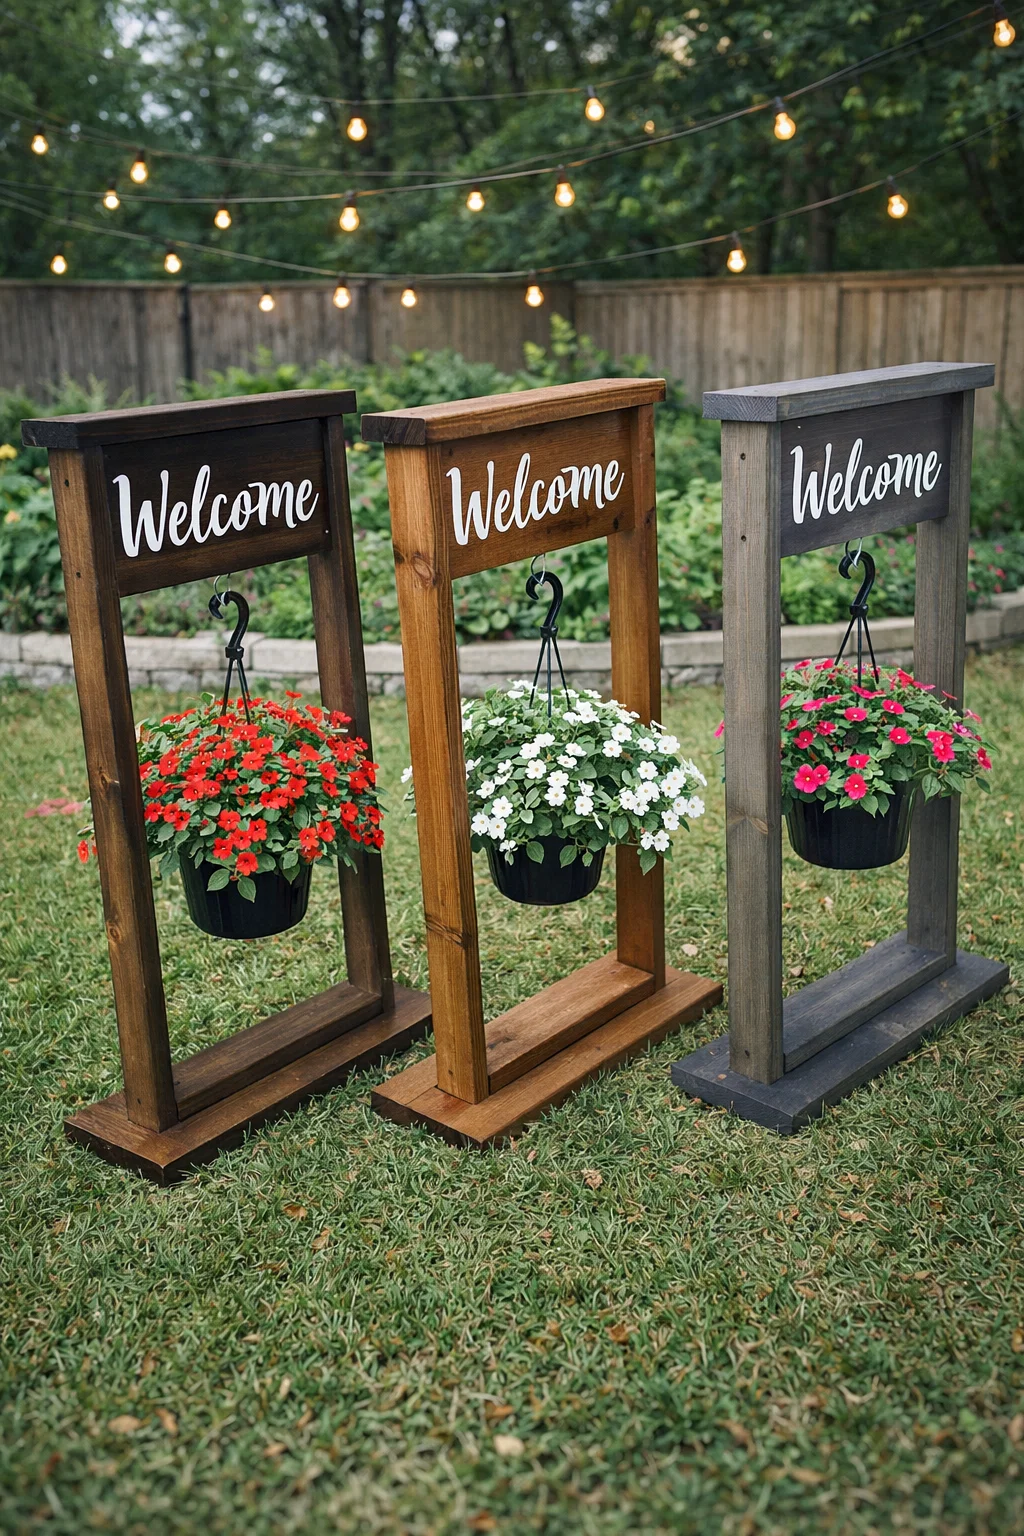
The image shows three distinct variations of these handcrafted stands, each featuring a different wood stain ranging from a deep espresso to a warm honey and a modern weathered gray. These vertical structures are not just signs; they are architectural elements that add height and texture to a porch or garden space. If you have been looking for a weekend project that offers high visual impact with a relatively simple build process, these wooden planter stands are an ideal choice.
The Rising Popularity of Vertical Porch Decor
In recent years, home decor has moved toward maximizing vertical space. Traditional floor pots are wonderful, but they often get lost against the backdrop of a house. By elevating your greenery within a wooden frame, you create a focal point that draws the eye upward. These welcome sign planters serve a dual purpose by providing a dedicated spot for seasonal flowers and a clear message of hospitality.
The beauty of this specific design lies in its versatility. Because the frame is freestanding, it can be moved from the steps of a porch to the edge of a driveway or even placed as a waypoint in a backyard garden. The inclusion of a top header for the welcome message adds a professional, finished look that mimics the high end decor found in boutique home stores, but at a fraction of the cost.
Choosing the Best Wood for Outdoor Projects
When you are building something intended to live outside, the type of lumber you select is the most critical decision you will make. Since these stands will be exposed to rain, sun, and fluctuating temperatures, you need a material that can withstand the elements without warping or rotting prematurely. Cedar is a top tier choice because it contains natural oils that repel insects and resist decay. It also takes stain beautifully, as seen in the rich tones of the examples in the image.
If cedar is outside of your budget, pressure treated pine is a durable alternative. While it initially has a greenish tint, it can be stained once it has had time to dry out properly. For those who prefer a more rustic or reclaimed look, using pallet wood is possible, though you must ensure the wood is heat treated rather than chemically treated. Regardless of the wood species, always use exterior grade screws and water resistant wood glue to ensure the structure remains sturdy for years to come.
Design Breakdown: Anatomy of a Hanging Basket Stand
Looking closely at the structures, the design is brilliantly simple yet structurally sound. It consists of a wide, stable base, two vertical pillars, and a header assembly. The top section is particularly clever, featuring a flat cap that protects the end grain of the vertical posts from water infiltration. Beneath the cap sits the sign board, where the word welcome is elegantly displayed.
The hanging mechanism is a simple heavy duty hook centered under the sign board. This allows the weight of the flower pot to be distributed evenly through the center of the frame, preventing the structure from tipping. The bottom of the frame often includes a secondary shelf or a simple brace that keeps the vertical posts aligned. This open center design ensures that the focus remains on the flowers while the wood provides a sturdy, attractive border.
Customizing Your Stain and Finish
The three colors shown in the image demonstrate how much a simple stain can change the personality of the project. The dark, nearly black stain offers a contemporary look that contrasts sharply with white lettering and bright red flowers. This is perfect for modern farmhouses or homes with dark trim. The medium brown stain brings out the natural grain of the wood, offering a traditional rustic feel that works well in almost any landscape.
For a more coastal or farmhouse chic vibe, the weathered gray stain is a fantastic option. It gives the wood an aged appearance without waiting years for natural silvering. To protect these finishes, applying a clear spar urethane is highly recommended. Unlike standard indoor polyurethanes, spar urethane contains UV blockers and is flexible enough to expand and contract with the wood as the temperature changes, preventing the finish from cracking or peeling.
Seasonal Versatility: Beyond the Spring Bloom
One of the greatest benefits of the hanging basket stand is that it is not limited to spring flowers. These structures are truly four season decor pieces. In the spring and summer, you can hang lush impatiens, petunias, or ferns. As the weather cools, you can swap the flowering basket for a pot of hardy mums or even a decorative pumpkin arrangement held in a wire basket.
During the winter months, these stands do not need to be tucked away in the garage. You can hang a small evergreen wreath from the hook or a basket filled with pine branches, holly berries, and battery operated fairy lights. The welcome sign remains relevant year round, and by simply changing the hanging element, you keep your home’s entrance looking fresh and curated for every holiday.
Tips for Perfect Lettering and Stenciling
The crisp, white welcome script seen on these projects is what gives them their professional flair. There are several ways to achieve this look depending on your comfort level with crafting. If you have a steady hand, hand painting the letters with outdoor acrylic paint can add a personal, artisanal touch. However, for those who want a perfect finish, vinyl decals or stencils are the way to go.
Using a cutting machine to create a custom vinyl stencil allows you to choose from hundreds of fonts. Once the wood is stained and fully dry, apply the stencil, dab on the paint, and peel it back to reveal sharp lines. If you are worried about the vinyl peeling off in the heat, you can use the vinyl as a one time template to paint the letters directly onto the wood and then seal over the entire board with your topcoat.
Assembly and Stability Considerations
Because these stands are tall and relatively narrow, stability is a key factor, especially if you live in a windy area. The base should be wider than the frame itself to provide a low center of gravity. If you plan to place these on a grassy area, you can even use landscape staples to pin the base into the ground. Another trick is to use a heavier flower pot at the bottom or to add a small decorative stone to the lower shelf to provide extra weight.
When assembling the frame, using pocket hole joinery is an excellent way to hide the screws and keep the finish looking clean. If you do not have a pocket hole jig, you can pre drill holes and countersink the screws, then fill the holes with wood plugs that match your stain. This attention to detail is what separates a quick DIY project from a piece of furniture quality decor.
Selecting the Right Plants for Your Stand
The flowers you choose will ultimately dictate where you place your stand. In the image, the impatiens shown thrive in shade or partial sun, making them perfect for a covered porch. If your stand will be in full sun on the edge of a walkway, you might consider sun loving plants like geraniums, lantana, or trailing verbena. Always ensure the pot you choose has proper drainage so that water does not sit and rot the bottom of your wooden stand.
Consider the color of your stain when picking your flowers. Red and pink blooms pop beautifully against dark or natural wood, while yellow and purple flowers look stunning against gray or white washed finishes. Mixing textures, such as adding a trailing ivy or a spikey dracaena to the center of your basket, can add even more visual interest to the display.
A Rewarding Weekend Project
Building a set of these wooden welcome sign planters is a rewarding experience that offers immediate gratification. It is a project that can be completed in a single afternoon, excluding the time needed for the stain to dry. For those who enjoy making gifts, these stands are a thoughtful and impressive option for housewarming parties, weddings, or Mother’s Day.
There is something special about creating something with your own hands that greets you every time you come home. It speaks to a pride of ownership and a love for the handmade. Whether you build one for yourself or a trio to line your driveway, these wooden projects are a testament to how simple materials and a little creativity can transform a house into a home.
Final Thoughts on DIY Woodworking
Woodworking does not always have to involve complex joinery or expensive machinery. Projects like these hanging basket stands prove that with basic lumber and a clear vision, anyone can enhance their outdoor living space. The key is to take your time with the sanding and finishing stages, as that is where the true beauty of the wood is revealed. As you gain confidence with these builds, you can start to experiment with different heights, decorative moldings, or even integrated solar lighting to make your welcome sign shine at night.
The journey of DIY is about constant learning and improvement. Each time you pick up a saw or a paintbrush, you are developing skills that will serve you in your next project. These welcome sign planters are a wonderful starting point or a fun addition to a growing collection of handmade garden art. So grab some lumber, choose your favorite stain, and start building a more beautiful entrance for your home today.