Woodworking is often seen as a hobby reserved for adults with heavy machinery and years of experience. However, inviting children into the workshop or clearing a space on the kitchen table for some sawdust and glue can be one of the most rewarding educational experiences you provide. Introducing kids to woodworking is not just about building a birdhouse or a toy boat; it is about building character, patience, and a sense of tangible accomplishment. When a child holds a piece of wood they have sanded, nailed, and painted themselves, they develop a profound connection to the physical world that digital screens simply cannot replicate.
The Benefits of Hand-Tool Woodworking for Children
Before diving into specific projects, it is essential to understand why woodworking is such a powerful tool for child development. In a world that is increasingly virtual, the tactile nature of wood provides a much-needed sensory experience. Children learn about different textures, the scent of cedar or pine, and the physical resistance of a material that requires effort to change.
Developing Fine Motor Skills and Hand-Eye Coordination
Every time a child holds a nail in place or grips a small hammer, they are refining their fine motor skills. These movements require precision and focus. Driving a nail straight into a board involves a complex synchronization of the eyes and hands. Over time, these activities strengthen the small muscles in the fingers and wrists, which can even lead to better handwriting and improved performance in sports or musical instruments.
Fostering Critical Thinking and Mathematical Understanding
Woodworking is a hidden math lesson. It involves measuring lengths, understanding shapes, and grasping the concept of three-dimensional space. When a child has to figure out how many nails are needed to secure a board or how to balance a toy boat so it floats, they are engaging in real-world problem-solving. This practical application of geometry and arithmetic makes abstract concepts much easier to grasp later in a classroom setting.
Essential Safety Tips for Young Woodworkers
Safety is the primary concern for any parent or educator introducing tools to kids. However, the goal is not to eliminate risk entirely, but to teach children how to manage it responsibly. By providing the right environment and supervision, you can create a safe space for creativity to flourish.
Selecting the Right Tools
It is a common mistake to give children toy tools made of plastic. These are often frustrating to use because they do not function properly. Instead, look for real, small-scale hand tools designed for smaller hands. A 7-ounce or 8-ounce claw hammer is much easier for a child to swing accurately than a full-sized framing hammer. Short, crosscut saws with fine teeth are also safer and more manageable for beginners.
Establishing the Golden Rules
Before any project begins, establish clear boundaries. One of the most important rules is that tools stay in a designated “work zone.” Safety glasses should be non-negotiable, even for simple tasks like sanding, to protect against stray dust or wood chips. Teach children to always keep their “helper hand” away from the path of the tool. By instilling these habits early, you are raising a generation of safe and competent makers.
Engaging Woodworking Projects for Beginners
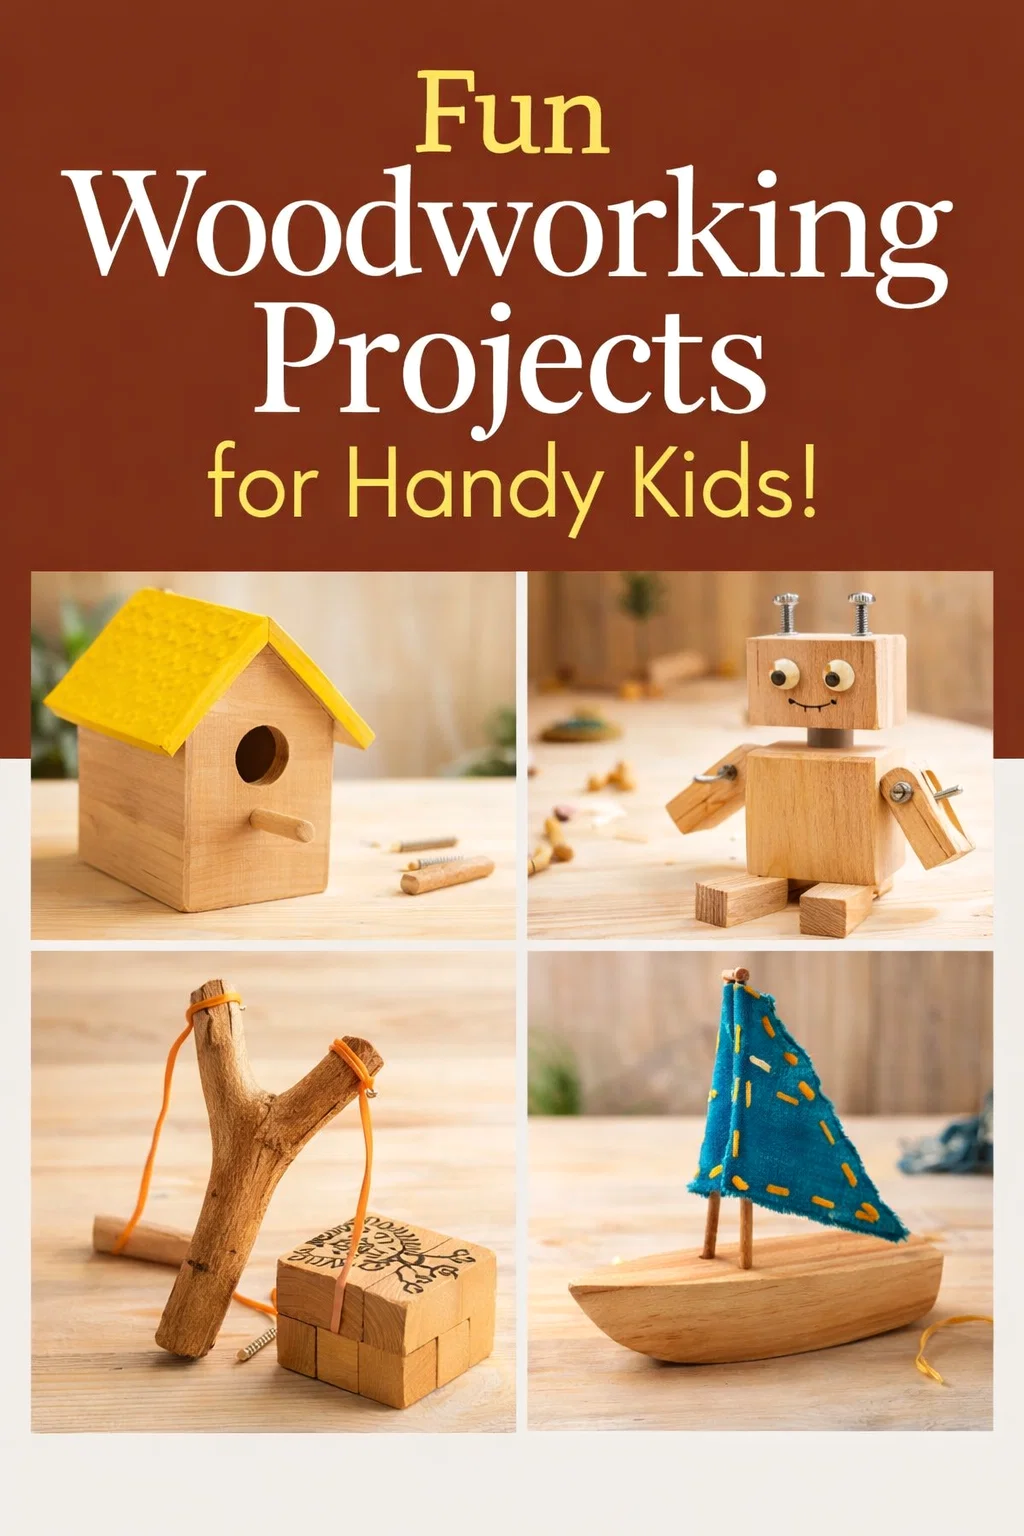
The key to keeping children interested in woodworking is to start with projects that offer quick wins. The images of the hedgehog, the sailboat, and the candy dispenser show a range of complexity that can grow with the child. Let us explore how to bring these ideas to life.
The Nail Art Hedgehog
As seen in our featured image, a simple wooden wedge can become a charming hedgehog. This project is perfect for children who are just learning how to use a hammer. You can use a scrap piece of 2×4 wood, cut at an angle to create a “nose.”
The child can then draw a face on the front and spend time driving nails into the back to represent the quills. This repetitive motion is excellent for building muscle memory. To make it even more educational, you can use colored rubber bands or yarn to wrap around the nails once they are driven in, creating a colorful geometric pattern.
Scrap Wood Sailboats
There is something magical about making a toy that actually works. Wooden sailboats are a classic beginner project. You can use thin slices of a tree branch or small rectangular wood scraps for the hull. A small hole drilled in the center can hold a twig or a dowel as a mast.
For the sails, children can use felt, scrap fabric, or even sturdy leaves. This project introduces the concept of buoyancy and balance. Once the boats are finished, a simple tub of water or a backyard pond becomes a theater for imaginative play. It teaches kids that they don’t need to buy plastic toys when they have the power to create their own.
The DIY Candy Dispenser
For slightly older children or those ready for a multi-step project, a jelly bean or candy dispenser is a fantastic challenge. This involves creating a wooden base with a sliding mechanism that allows a small amount of candy to drop from a jar. This project introduces the concept of simple machines and moving parts. It requires more precise assembly and perhaps some wood glue alongside the nails. The reward at the end is functional and sweet, which provides a huge boost to a child’s confidence.
The Role of Adult Supervision and Encouragement
Your role as the adult is to be a guide, not a micromanager. It can be tempting to step in and fix a crooked nail or sand down a rough edge, but doing so takes the ownership away from the child. Allow them to make mistakes. A crooked nail is a lesson in physics; a rough edge is a lesson in patience.
Asking Open-Ended Questions
Instead of telling a child what to do next, ask them questions like, “What do you think will happen if we put the mast here?” or “How can we make this surface smoother?” This encourages them to think through the process and take pride in their decisions. Your enthusiasm for their work is the fuel that will keep them coming back to the workbench.
Creating a Dedicated Maker Space
You do not need a massive garage to start woodworking. A sturdy low table or even a dedicated “work board” that can be placed on the floor is enough. Having a specific place where it is okay to get a little messy and leave projects-in-progress sends a message to the child that their creative work is valued and important.
Sourcing Materials on a Budget
One of the best things about kids’ woodworking is that it can be incredibly inexpensive. You do not need to buy expensive hardwoods from a specialty lumber yard. In fact, using found materials often sparks more creativity.
- Tree Trimmings: If you or a neighbor are pruning trees, keep the branches. Slices of branches (often called wood cookies) make great coasters, ornaments, or bases for sculptures.
- Construction Scraps: Check with local construction sites or cabinet shops. They often have bins of “off-cuts” that they are happy to give away. These small pieces are the perfect scale for kids.
- Upcycled Furniture: An old wooden crate or a broken chair can be dismantled and turned into something entirely new. This also teaches children about the importance of recycling and sustainability.
Conclusion: Building More Than Just Projects
When we look at a child working with wood, we might just see a mess of sawdust and some crooked nails. But if we look closer, we see a child who is learning how to persevere when a task gets difficult. We see a child who is discovering the joy of creation and the power of their own two hands. Woodworking teaches kids that they can shape the world around them.
Whether they grow up to be professional carpenters, engineers, or artists, the lessons learned at a simple wooden workbench will stay with them forever. They learn that quality takes time, that safety is a responsibility, and that there is no limit to what they can build if they just start with a single piece of wood. So, find some scraps, grab a hammer, and start building some memories today.