Creating an inviting outdoor space does not have to cost a fortune or require professional landscaping experience. If you have been scrolling through social media dreaming of a cozy backyard retreat, you have likely seen beautiful stone fire pits that look like they cost thousands of dollars. The image of this circular stone fire pit proves that you can achieve a high end look for a fraction of the cost. With just sixty dollars and a few hours of work, you can transform a plain patch of grass into the primary gathering spot for your home. This project is the perfect entry point for anyone looking to improve their home exterior through simple, functional design.
The Appeal of a DIY Backyard Fire Pit
There is something inherently primal and comforting about gathering around a flickering flame. A fire pit acts as a natural anchor for any backyard, providing a designated spot for conversation, relaxation, and even outdoor cooking. Beyond the aesthetic appeal, building one yourself offers a massive sense of accomplishment. Instead of buying a metal kit that might rust over a few seasons, a stone structure built with masonry units offers durability and a timeless look that blends seamlessly with natural surroundings.
For many homeowners, the hurdle to starting a backyard project is often the perceived cost. However, by using basic retaining wall blocks and a bit of elbow grease, the financial barrier disappears. This project focuses on accessibility, ensuring that whether you have a sprawling lawn or a modest patio area, you can incorporate a feature that encourages you to spend more time outdoors breathing fresh air and disconnecting from digital screens.
Materials and Tools You Will Need
To keep this project under the sixty dollar mark, the key is to shop at local home improvement centers for individual masonry units. You do not need specialized equipment or heavy machinery. Most of these items can fit in the back of a standard vehicle or a small trailer.
Essential Supplies
- Trapezoidal Retaining Wall Blocks: These are the most common blocks used for circular pits because their angled sides allow them to fit together without large gaps.
- Paver Sand or Leveling Sand: This is crucial for creating a flat base so your fire pit does not lean or become unstable over time.
- Lava Rocks or Gravel: These are placed at the very bottom to provide drainage and protect the ground underneath.
- Construction Adhesive: Optional, but highly recommended if you want to ensure the blocks stay perfectly aligned through winter freezes and summer heat.
Recommended Tools
- A sturdy shovel for clearing grass and leveling the soil.
- A level to ensure the first course of stone is perfectly flat.
- A metal rake to spread sand and gravel evenly.
- A rubber mallet to nudge blocks into place without cracking the stone.
Step by Step Construction Guide
Building a fire pit is more about preparation than the actual stacking of stones. If you take the time to prepare the ground correctly, the rest of the assembly will take less than thirty minutes. Follow these steps to ensure your structure is safe and long lasting.
Step 1: Selecting the Perfect Location
Safety is the priority when dealing with fire. Choose a spot that is at least ten to fifteen feet away from your house, overhanging trees, or wooden fences. You should also check for underground utility lines before you start digging. Look for a flat area to minimize the amount of leveling work you will have to do. Once you have picked the spot, place one block in the center and use a string to mark a perfect circle around it, giving yourself a few extra inches of space beyond the width of the blocks.
Step 2: Ground Preparation and Excavation
Using your shovel, remove the grass and about two to three inches of topsoil within your marked circle. You want to reach the firmer dirt underneath. Once the area is cleared, pour in your leveling sand. Use your rake to spread it out and then use the level to make sure the surface is even. This sand base prevents the heavy blocks from sinking unevenly into the mud when it rains.
Step 3: Laying the First Course
The first layer of blocks is the most important. Place your trapezoidal blocks in a circle, touching side to side. Use your level on every single block. If one is too high, tap it down with the rubber mallet. If it is too low, add a tiny bit more sand underneath. A level foundation ensures that as you stack higher, the fire pit remains straight and visually appealing.
Step 4: Stacking and Staggering
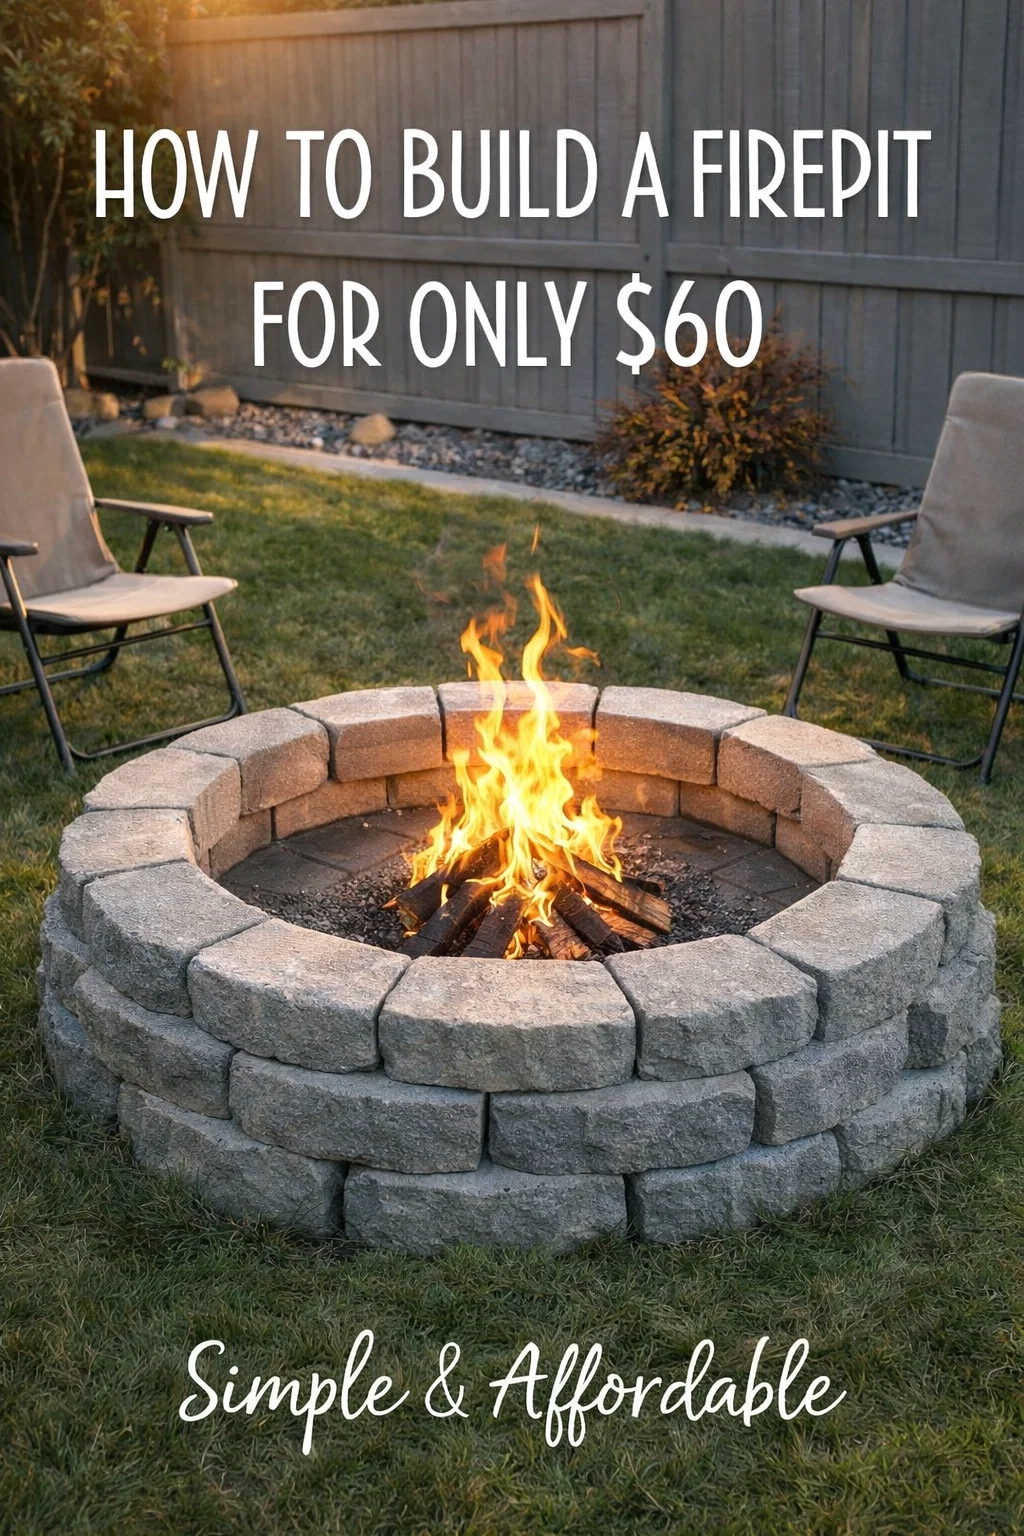
For the second and third layers, you want to stagger the seams. This means the middle of a block on the second layer should sit directly over the crack where two blocks meet on the first layer. This staggering technique provides structural integrity. If you are using adhesive, apply a small bead to the top of the blocks before placing the next layer down. For a fire pit like the one in the image, three layers is usually the sweet spot for height.
Enhancing the Interior for Better Airflow
A common mistake in DIY fire pits is forgetting about oxygen. Fire needs air to breathe. While the gaps between the blocks often provide enough airflow, you can enhance the performance by adding a layer of pavers or fire bricks at the bottom. In the inspiration photo, you can see a neatly laid floor of square pavers inside the ring. This makes it much easier to scoop out ash later and prevents the fire from sitting directly on damp earth, which can create a lot of unnecessary smoke.
Safety Considerations for Outdoor Burning
Owning a fire pit comes with responsibility. Always keep a bucket of water or a garden hose nearby when the fire is active. Never leave a fire unattended, especially if there are children or pets around. It is also wise to invest in a simple metal spark screen to place over the top, which prevents embers from floating onto dry grass or nearby structures. Additionally, check your local city ordinances regarding open flames, as some areas have specific rules about the size of the pit or the types of wood you are allowed to burn.
Styling Your New Fire Pit Area
Once the construction is finished, it is time to focus on the environment around the pit. The goal is to create a zone that feels like an extension of your indoor living room. You can surround the pit with Adirondack chairs, which are classic, comfortable, and weather resistant. To add a bit of a boho or rustic vibe, consider stringing solar powered Edison bulbs between nearby trees or fence posts.
Incorporate greenery to soften the look of the stone. Planters filled with lavender or citronella plants are not only beautiful but also help keep mosquitoes away during your summer gatherings. If you have extra budget later on, you can dig out a larger circle around the pit and fill it with pea gravel to create a dedicated patio zone that prevents your lawn from getting trampled by foot traffic.
Why the $60 Price Point is a Game Changer
In the world of home improvement, it is rare to find a project that provides such a high return on investment for such a low cost. Most outdoor furniture sets cost hundreds of dollars, yet this permanent masonry feature stays under sixty. This affordability allows you to shift your budget toward other areas, like high quality outdoor cushions or premium firewood. It proves that a beautiful, minimalist aesthetic is achievable for everyone, regardless of their DIY skill level or financial constraints.
Maintenance and Long Term Care
Stone fire pits are incredibly low maintenance, but a little care goes a long way. After every few uses, once the ashes have completely cooled, scoop them out and dispose of them. Excess ash buildup can block airflow and make it harder to start the next fire. If you live in a climate with harsh winters, check the stones in the spring for any shifting. Because this is a dry stack method (or uses simple adhesive), it is very easy to lift a block and add a bit more sand to level it back out if the ground has heaved.
Conclusion: Your Backyard Transformation Starts Now
Building your own fire pit is a rewarding project that pays off every time the sun goes down and the temperature drops. By following this simple guide and using the inspiration from the stone circular design, you can create a professional looking feature for just sixty dollars. It is an investment in your home, your social life, and your personal wellness. There is no better way to end a long day than sitting by a fire you built with your own hands, watching the stars, and enjoying the company of friends and family. Grab your shovel, head to the store, and start building your backyard sanctuary this weekend.