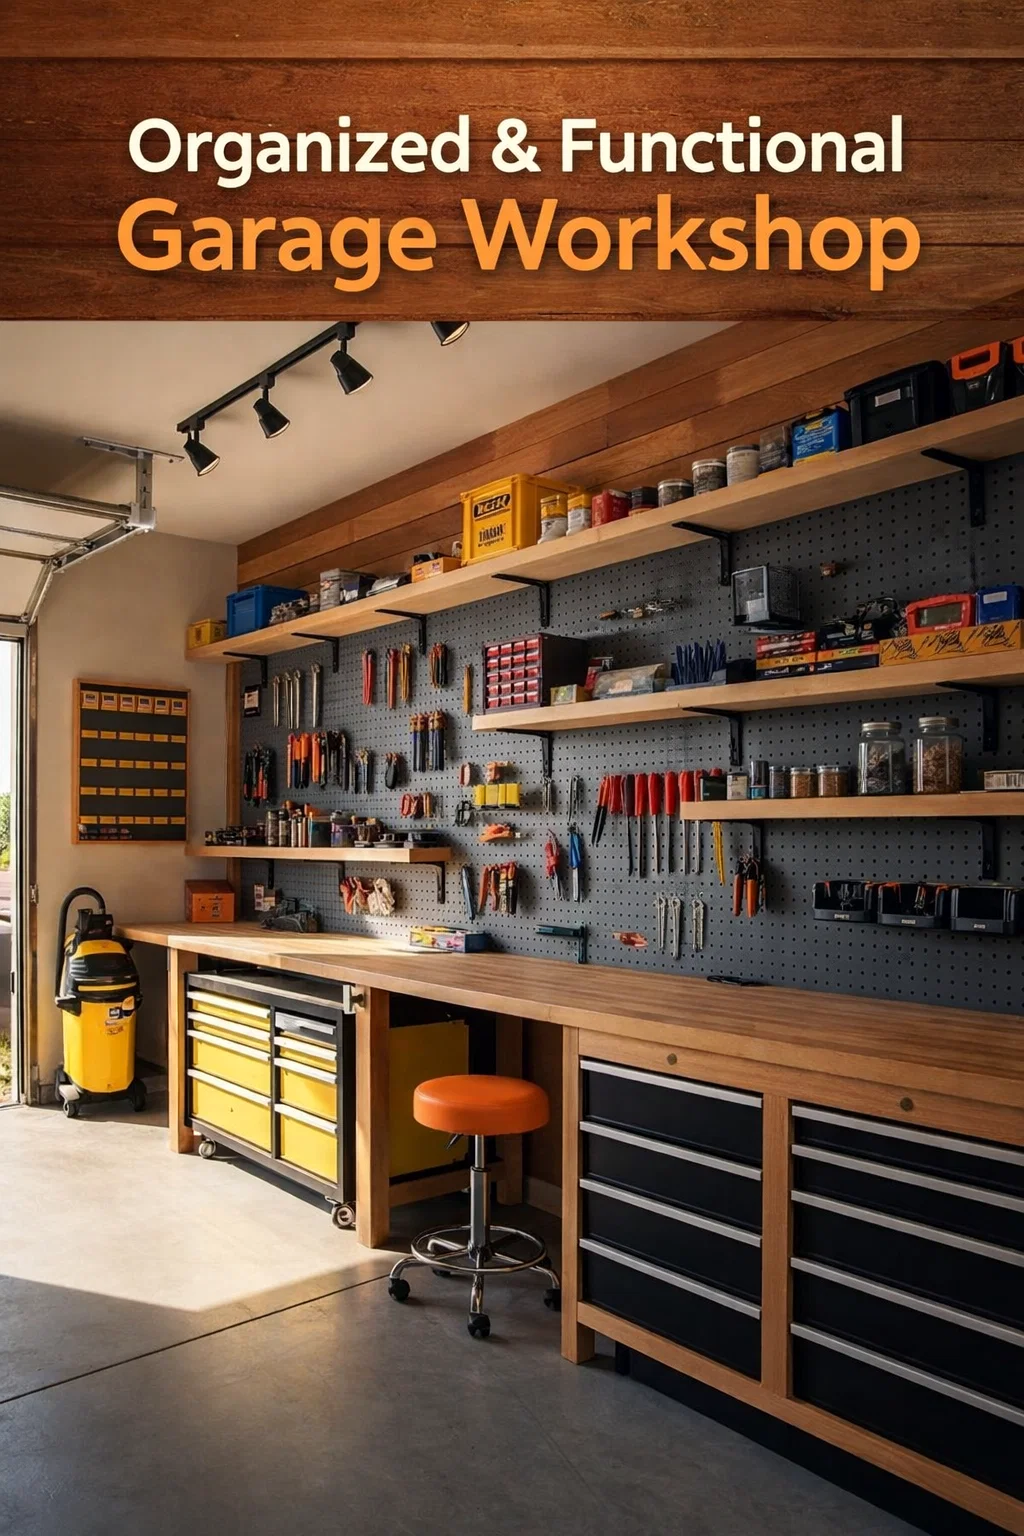
Transforming a cluttered garage into a functional workshop is one of the most rewarding home improvement projects you can undertake. Looking at the perfectly organized space in the image, it is clear that a well designed workspace is about more than just aesthetics. It is about creating an environment where creativity can flow without the constant interruption of searching for a misplaced wrench or a specific size of drill bit. A professional grade setup like this combines heavy duty storage, ample lighting, and ergonomic design to turn any DIY task into a seamless experience.
The Foundations of an Efficient Home Workshop
The first thing that stands out in a high quality workshop is the layout. A great workshop is built around the workflow of the maker. In this space, the long, continuous wooden workbench serves as the primary stage for all activities. By using a solid wood top, the bench provides a durable surface that can handle everything from delicate electronics repair to heavy duty woodworking. The warmth of the wood also contrasts beautifully with the industrial feel of the tool storage, making the garage feel like a true extension of the home rather than just a utility room.
One of the most effective elements shown is the use of vertical space. Many homeowners make the mistake of focusing only on floor cabinets, but the wall is your most valuable asset. The dark grey pegboard stretching across the wall is a masterclass in accessibility. By mounting tools vertically, you keep the workbench clear for actual work while ensuring that every screwdriver, hammer, and pliers set is visible and ready for use. This visual organization reduces mental fatigue and keeps the momentum of a project going.
Advanced Tool Storage Solutions
While the pegboard handles the hand tools, the integrated drawer systems beneath the workbench provide the heavy lifting for organization. Using a mix of yellow and black industrial tool chests allows for the categorization of larger items. Deep drawers are perfect for power tools like circular saws, drills, and grinders, while shallower drawers can be fitted with foam inserts to cradle precision instruments or socket sets. This hybrid approach ensures that nothing is left sitting on the floor where it can become a tripping hazard or collect dust.
Maximizing Small Parts Organization
Any seasoned DIYer knows that it is often the smallest items that cause the most frustration. Screws, nails, washers, and specialized fasteners have a habit of disappearing into the “junk drawer.” In this professional setup, we see a combination of clear jars on high shelves and dedicated small part organizers. Using clear glass or plastic jars allows you to see exactly how much hardware you have left at a glance, which is much more efficient than rummaging through opaque cardboard boxes.
The Role of Overhead Shelving
Notice the upper shelving units that run the length of the wall. These are essential for items that are used less frequently, such as seasonal supplies, bulk materials, or specialized automotive fluids. By placing these items high up, you keep the primary “strike zone” (the area between your waist and eyes) reserved for the tools you reach for every single day. The use of sturdy brackets and thick wooden planks ensures that even heavy containers can be stored safely above the workspace.
Lighting and Atmosphere in the Workspace
Lighting is often an afterthought in garage conversions, but it is actually the most critical factor for safety and precision. The track lighting system installed on the ceiling is a brilliant choice. Unlike a single fluorescent bulb in the center of the room, track lighting allows you to angle individual lamps toward specific zones of the workbench. This eliminates shadows and ensures that when you are measuring a cut or soldering a connection, you have perfect visibility.
Beyond the functional lights, the natural light pouring in from the open garage door creates an inviting atmosphere. A workshop should be a place where you want to spend time. The combination of clean concrete floors, wood paneled accents on the walls, and a pop of color from the orange shop stool makes the space feel modern and energized. High quality flooring, like the polished concrete shown here, is also easy to sweep and keep free of sawdust and oil spills.
Essential Tips for Designing Your Own Tool Wall
- Categorize by Frequency: Place your most used tools in the center of your pegboard. Tools used once a month can go toward the edges or higher up.
- Use Silhouette Outlines: Many professionals trace the outline of their tools on the pegboard. This makes it instantly obvious if a tool hasn’t been put back in its correct home.
- Invest in Quality Hooks: Cheap pegboard hooks often fall out when you pull a tool away. Look for locking hooks or heavy duty versions that stay seated in the board.
- Incorporate Power Strips: Mount power strips directly to the workbench or the wall just above it. This prevents cords from draping across your workspace and keeps chargers organized.
Creating a Multipurpose Environment
Modern garages are rarely used for just one thing. A setup like the one in the image can easily transition between a woodworking shop, an automotive repair bay, and a home maintenance station. The mobile tool chests are a key part of this flexibility. Because they are on casters, they can be rolled out to the driveway if you are working on a car, then tucked back under the bench to save space when you are finished. This versatility is essential for homeowners who need to make the most of limited square footage.
Ergonomics and Comfort
Working on your feet for hours can take a toll on your back and joints. The inclusion of a height adjustable swivel stool is a vital addition for tasks that require detail work. Additionally, for those who prefer standing, adding an anti fatigue mat in front of the main work zone can make a world of difference. The height of the workbench itself should be tailored to your most common tasks. Woodworking benches are typically lower to allow for leverage, while general repair benches are higher to prevent hunching over.
Maintaining the Dream Workshop
Building the workshop is only half the battle. Maintaining it is the other half. The beauty of the system shown is that it encourages cleanliness. When every item has a specific “home,” the cleanup process at the end of a project takes minutes instead of hours. A daily habit of wiping down the wooden bench and returning tools to their designated hooks will keep the space looking as pristine as it does in the photo. This discipline ensures that the next time inspiration strikes, you can walk into your shop and start creating immediately rather than spending an hour clearing a space to work.
The Impact of a Professional Workspace on Creativity
There is a psychological shift that happens when you move from working on a kitchen table to a dedicated workshop. A professional environment validates your hobbies and projects. It provides the physical and mental space to take on more complex challenges. Whether you are building furniture, restoring a vintage engine, or simply fixing household items, having a shop that is as organized as the one pictured here gives you the confidence to do the job right. It turns “chores” into a form of mindfulness and relaxation.
Conclusion
The image we analyzed represents the gold standard for home organization and DIY productivity. By combining vertical storage, mobile tool stations, and specialized lighting, this garage has been elevated into a professional grade workshop. You don’t need a massive budget to start your journey. Begin with a solid workbench and a simple pegboard, then grow your space as your skills evolve. The goal is to create a space that supports your work and inspires your next great idea. With a little planning and the right organizational strategy, your dream workshop is well within reach. Save these ideas and start sketching out your own layout today.