Transforming your garden into a vibrant sanctuary for local wildlife is one of the most rewarding home improvement projects you can undertake. A bird bath serves as more than just a decorative piece; it is a vital resource for birds, providing them with a place to hydrate, clean their feathers, and cool down during the hot summer months. While store bought basins are readily available, there is a special charm in creating something yourself. DIY bird baths allow you to express your creativity, repurpose household items, and design a unique feature that perfectly complements your outdoor aesthetic.
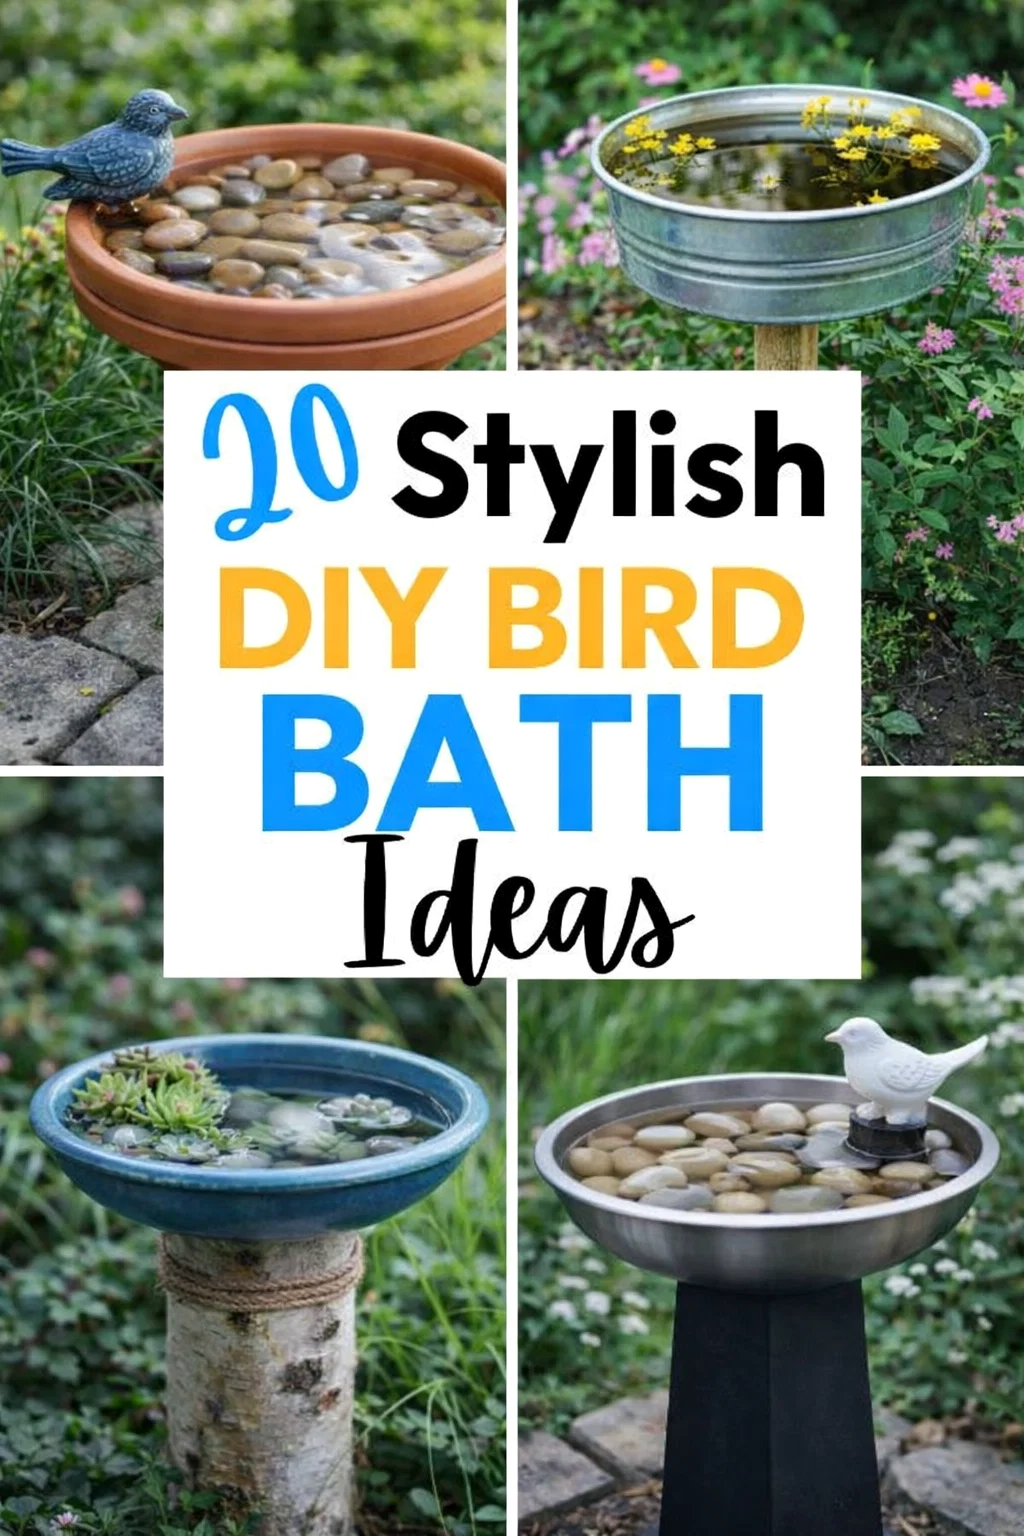
The image we are looking at today highlights the incredible versatility of these projects. From elegant glass platters to rustic terracotta stacks and even miniature fairy gardens, the possibilities are endless. Whether you have a sprawling backyard or a small balcony, there is a DIY bird bath design that will fit your space and budget. In this guide, we will explore the best materials, creative design ideas, and maintenance tips to help you build the perfect avian oasis.
Why Every Garden Needs a Bird Bath
Before diving into the construction process, it is important to understand why these water features are so beneficial. Water is a magnet for birds. Even if you do not have bird feeders, a clean source of water will attract a wide variety of species that you might not otherwise see. Birds need water for two primary reasons: drinking and preening.
Preening is the process by which birds clean their feathers and keep them in good flight condition. By splashing in a shallow pool, they remove dust, parasites, and debris. Clean feathers provide better insulation and aerodynamics, which are essential for survival. Additionally, during heatwaves, a bird bath acts as a life saving cooling station. By providing a reliable water source, you are actively supporting your local ecosystem and enjoying the beauty of nature right outside your window.
Choosing the Right Materials for Your Project
The beauty of a DIY approach is that you can use materials that might otherwise end up in a landfill. The image showcases several popular choices that are both functional and visually stunning. Here are some of the best materials to consider for your build.
Terracotta Pots and Saucers
Terracotta is a classic choice for garden projects because of its natural, earthy look. As seen in the bottom right of the inspiration image, stacking terracotta pots of different sizes creates a sturdy and attractive base. Saucers make excellent basins because they are naturally shallow, which is exactly what birds prefer. You can leave them in their natural orange hue or paint them with bird safe waterproof sealant to match your garden colors.
Vintage Glassware and Ceramics
If you prefer a more elegant or vintage look, look no further than your kitchen cabinets or local thrift store. A textured glass platter, like the one shown in the top left of the image, catches the light beautifully and provides a slip resistant surface for birds. Old salad bowls, large ceramic plates, or even decorative serving trays can be glued onto a sturdy base to create a high end look for just a few dollars.
Natural Wood and Logs
For those who love a rustic, woodland vibe, using natural wood is a fantastic option. The top right corner of the image shows a clever design using birch branches to create a tripod stand. This natural look blends seamlessly into a garden bed and provides a sturdy platform for a simple clay saucer. Driftwood or old tree stumps can also serve as incredible pedestals for a more organic feel.
Creative Design Ideas to Inspire You
Now that you know what materials to use, let’s look at some specific design styles that can elevate your garden. The key is to match the bird bath to the overall theme of your outdoor space.
The Whimsical Fairy Garden Bath
One of the most charming ideas in the featured image is the fairy garden bird bath. This design turns a standard concrete or stone basin into a miniature world. By adding a tiny birdhouse, moss, and small flowering plants around the edges of the water, you create a magical focal point. This approach is perfect for families with children as it combines gardening with storytelling.
The Stacked Stone Pillar
If you have a collection of flat stones or river rocks, you can stack them to create a Zen like pedestal. Use waterproof construction adhesive to secure the stones in a vertical column and top it with a shallow stone bowl. This design looks particularly beautiful near a pond or a shaded rock garden.
The Hanging Teacup Bath
For small spaces or to keep water away from ground predators like cats, a hanging bird bath is ideal. You can use a large oversized teacup and saucer, glue them together, and hang them from a tree branch using a decorative chain. It is a dainty, Alice in Wonderland inspired look that attracts smaller songbirds like finches and chickadees.
Step by Step Guide to Building a Simple Stacking Bird Bath
Building your own bird bath does not require professional construction skills. Here is a simple way to create a sturdy terracotta bird bath similar to the ones pictured.
- Gather Your Supplies: You will need three or four terracotta pots in graduating sizes, one large terracotta saucer, and a strong waterproof adhesive like E6000 or a specialized garden glue.
- Prepare the Base: Turn your largest pot upside down on a flat surface. This will be the bottom of your pedestal.
- Stack and Glue: Apply glue to the bottom of the next largest pot and place it upside down on top of the first one. Continue this process until you reach your desired height.
- Attach the Basin: Once the pedestal is dry and stable, apply a generous amount of glue to the top of the smallest pot and center the saucer on top.
- Seal the Saucer: Terracotta is porous and will absorb water over time. To prevent leaking and make cleaning easier, apply a clear, non toxic waterproof sealer to the inside of the saucer.
- Decorate: Once everything is dry, you can add river rocks to the center to provide perches for the birds.
Placement and Safety Tips
Where you put your bird bath is just as important as how it looks. If birds do not feel safe, they will not use it. Follow these tips to ensure your new garden feature is a success.
Visibility and Protection
Place the bird bath in a spot where birds can see predators coming. Avoid putting it in the middle of thick, low lying bushes where a cat could hide. However, it should be within ten to fifteen feet of a tree or tall shrub. This gives the birds a quick escape route and a place to dry off after their bath.
Keep it Level
Make sure the ground is level before setting up your pedestal. A tilted bird bath will not hold as much water and may become unstable during windstorms. You can use a small amount of sand or gravel to level the earth beneath the base.
Depth Matters
The most common mistake people make is making the water too deep. Most songbirds are quite small and are intimidated by deep water. The water should be no more than two inches deep in the center and even shallower at the edges. Adding stones that peek above the water level gives birds a safe place to land and gauge the depth.
Maintenance and Cleaning
A dirty bird bath can actually do more harm than good. Stagnant water can host bacteria, algae, and mosquito larvae. To keep your backyard visitors healthy, you must commit to regular maintenance.
Change the water every two to three days. In the peak of summer, you may need to do this daily as the water evaporates quickly. Once a week, give the basin a good scrub. You do not need harsh chemicals; a mixture of nine parts water to one part white vinegar works wonders. Scrub away any algae buildup with a stiff brush, rinse thoroughly, and refill with fresh water. Avoid using soaps or detergents, as these can strip the essential oils from a bird’s feathers.
Enhancing the Experience with Motion
If you find that birds are ignoring your new creation, it might be because the water is too still. Birds are biologically wired to be attracted to the sound of moving water. It signals that the water is fresh and clean. You can easily add motion to your DIY bird bath by incorporating a small solar powered fountain pump or a dripper. These are inexpensive, easy to install, and create a gentle splashing sound that will act as a dinner bell for every bird in the neighborhood.
Final Thoughts on Your DIY Journey
Creating a DIY bird bath is a wonderful way to blend artistry with environmental stewardship. As we see in the inspiring images of glass, clay, and wood designs, your only limit is your imagination. By following the tips regarding depth, placement, and cleanliness, you will create a functional piece of garden art that provides endless hours of birdwatching entertainment.
The joy of seeing a robin or a goldfinch splashing happily in a basin you built with your own hands is unmatched. It connects you to the rhythms of nature and brings a sense of peace to your outdoor living space. So, grab some old pots, a vintage plate, or a few sturdy branches, and start building your garden sanctuary today. Your local birds will thank you for it!