Transforming your backyard from a simple patch of grass into a functional, inviting retreat doesn’t require a massive renovation budget or a team of professional contractors. As seen in the recent surge of home improvement trends, the DIY fire pit has become the ultimate weekend warrior project. It represents the perfect intersection of affordability, utility, and aesthetic appeal. By clearing a small circular area and laying down a few foundational stones, you are not just building a place to burn wood; you are creating a hub for family gatherings, a spot for quiet reflection, and a centerpiece that adds significant value to your outdoor living experience. This guide will walk you through every step of creating your own budget-friendly fire pit, ensuring you get professional results without the professional price tag.
Choosing the Perfect Location for Your Fire Pit
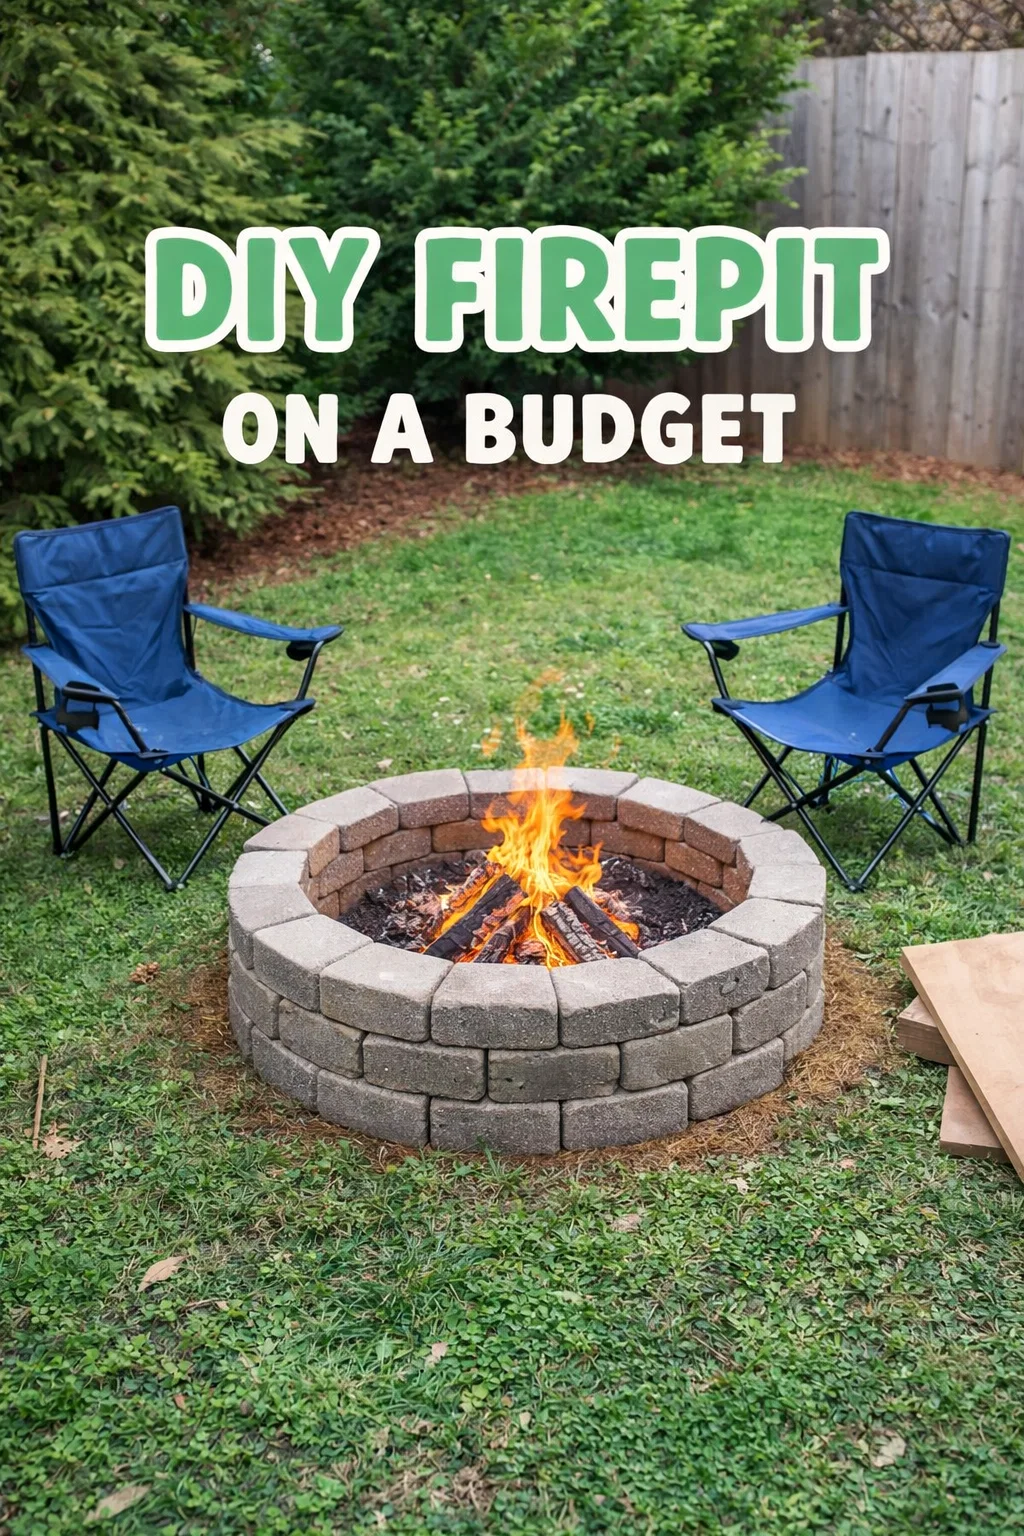
Before you even pick up a shovel, the most critical decision you will make is where to place your fire pit. Safety is the top priority here. You need to look for a spot that is level and at least ten to twenty feet away from any structures, including your house, shed, or low-hanging trees. In the image, you can see the project is situated in an open area of the lawn, well away from the wooden fence and the patio furniture. This clearance ensures that stray sparks won’t pose a fire hazard to your property.
Beyond safety, consider the flow of your yard. You want the fire pit to be accessible but not right in the middle of a high traffic walkway. Think about the wind patterns in your area as well. You do not want to place the pit in a spot where the smoke will be constantly blown directly toward your back door or into your neighbor’s yard. Taking a few minutes to observe your yard at different times of the day can help you identify the most comfortable and safe location for your new gathering spot.
Gathering Your Budget Friendly Materials
One of the best things about a DIY fire pit is that the materials are incredibly accessible and inexpensive. You don’t need specialized masonry skills or expensive imported stone to achieve a high end look. Most home improvement stores carry retaining wall blocks or concrete pavers that are perfect for this application. These blocks are designed to fit together easily, often featuring a lip or a tapered shape that naturally forms a circle when laid side-by-side.
- Retaining Wall Blocks: These will form the main structure of your pit. Choose a color that complements your existing landscaping.
- Leveling Sand or Paver Base: This is essential for creating a flat foundation so your stones don’t shift over time.
- Gravel or Lava Rocks: Placing these at the bottom of the pit helps with drainage and protects the soil underneath.
- Marking Paint or String: Use this to outline your circle before you start digging.
- A Sturdy Shovel: You will need this to remove the grass and create a shallow trench for the first layer of stones.
Step by Step Guide to Building Your Fire Pit
Once you have your materials, the physical work begins. The process is straightforward but requires a bit of patience during the leveling phase to ensure a sturdy final product. Follow these steps to ensure your fire pit stands the test of time.
Marking and Digging the Foundation
Start by placing a stake in the center of your chosen spot. Attach a string to the stake that is half the diameter of your desired fire pit. Walk in a circle with the string taut, marking the ground with spray paint or a shovel. In the project shown, a modest sized circle has been cleared of grass. You should dig down about two to four inches. Removing the top layer of sod and soil creates a stable “footing” for your stones and prevents the grass from burning underneath the structure.
Leveling the Base
This is arguably the most important step. If your base layer is uneven, every layer on top of it will be crooked, and the structure may eventually lean or collapse. Pour an inch or two of leveling sand into the excavated circle and use a rake or a flat board to smooth it out. Use a spirit level to check the ground in multiple directions. A perfectly level base makes the rest of the assembly feel like playing with giant building blocks.
Laying the First Ring of Stones
Begin placing your stones around the edge of the circle. Each block should be pushed firmly against the next. As you place each stone, use your level to make sure it is even both side to side and front to back. If one stone is too high, tap it down with a rubber mallet. If it is too low, add a little more sand underneath. Once the first ring is complete and level, the hard part is over.
Stacking and Securing
For the second and third layers, stagger the blocks so that the seams of the new layer sit over the middle of the blocks below. This “running bond” pattern provides much more structural integrity than stacking seams directly on top of each other. While many people choose to dry stack their fire pits (meaning no glue is used), you can use a high heat construction adhesive between the layers if you want extra permanent stability.
Enhancing the Area for Maximum Comfort
Building the pit is just the beginning. To truly enjoy your new feature, you need to think about the surrounding environment. In the background of the project image, we see a simple patio set, but you can expand on this. Consider adding a ring of Adirondack chairs, which are the gold standard for fire pit seating due to their relaxed, reclined position. If you want to keep things on a budget, simple wooden benches or even large logs can provide a rustic, campfire feel.
Lighting also plays a huge role in the ambiance. String lights draped from nearby trees or fence posts can create a magical atmosphere that extends beyond the glow of the fire. You might also consider adding a small side table between chairs to hold drinks, snacks, and the essential s’mores ingredients. Creating a defined zone using mulch or pea gravel around the fire pit can also help separate the space from the rest of the lawn and reduce maintenance.
Essential Safety Tips for Fire Pit Owners
While a fire pit is a source of joy, it involves managing an open flame, which requires respect and caution. Always keep a fire extinguisher, a heavy duty garden hose, or a bucket of sand nearby whenever the fire is lit. Never leave a fire unattended, even for a minute. Wind can pick up unexpectedly and carry embers further than you might anticipate.
It is also important to burn the right materials. Use seasoned hardwood like oak or maple, which burns cleaner and longer than softwoods like pine. Avoid burning pressure treated lumber, trash, or plastics, as these can release toxic fumes. When you are finished for the night, make sure the fire is completely extinguished. Stir the ashes and douse them with water until there is no more steam or heat rising from the pit.
Maintenance and Longevity
To keep your fire pit looking great for years to come, perform a bit of routine maintenance. Periodically clear out the old ash once it has cooled completely. A buildup of ash can hold moisture, which may cause your stones to degrade faster or create a messy sludge after it rains. If you live in a climate with heavy snow or rain, consider purchasing a metal or vinyl cover to protect the interior of the pit when it is not in use. This prevents water from pooling inside and helps keep the stones dry and ready for your next spontaneous bonfire.
Wrapping Up Your DIY Weekend Project
Building a fire pit on a budget is one of the most rewarding DIY projects any homeowner can undertake. As seen in the progress photo, it starts with a simple plan and a bit of manual labor, but the result is a lifestyle upgrade that pays off every time the sun goes down. You don’t need a massive bank account or professional training to create a beautiful, functional space where memories are made. By following these steps and focusing on a solid foundation, you will have a safe and stylish fire pit that serves as the heart of your backyard for many seasons to come. So grab some stones, clear a patch of dirt, and get ready to enjoy the warmth and glow of your very own handmade outdoor fireplace.