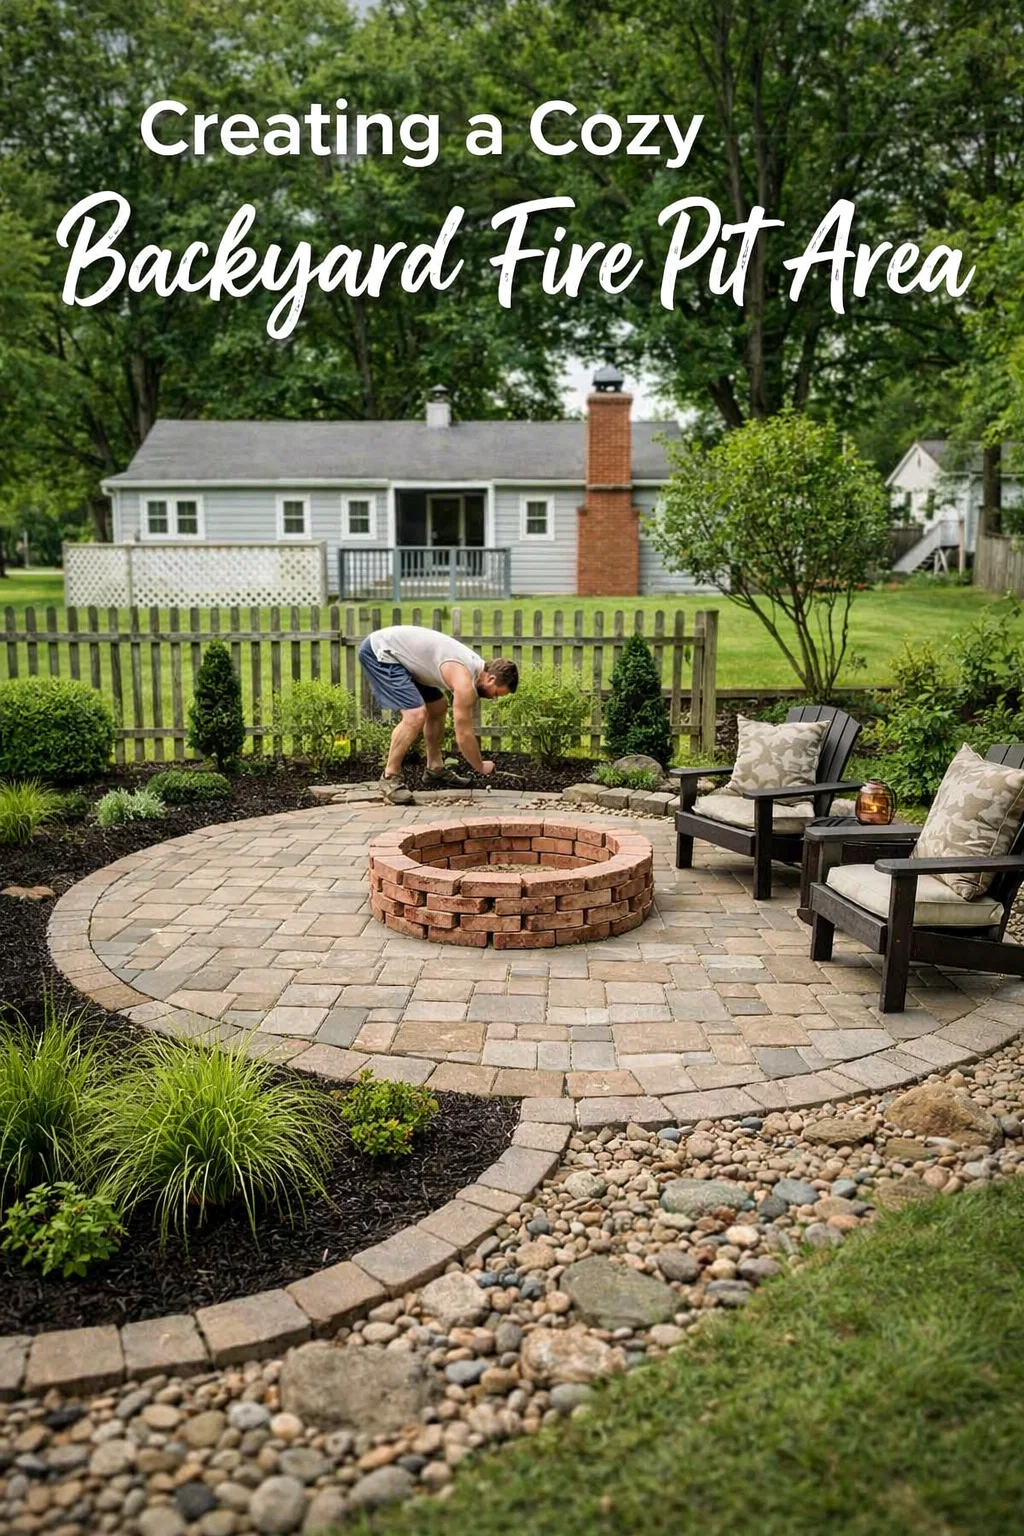
Transforming an underutilized patch of grass into a functional and beautiful outdoor living space is one of the most rewarding home improvement projects you can undertake. The image captures the essence of a true DIY journey: the hard work, the planning, and the exciting transformation of a backyard. Building a brick fire pit paired with a circular patio is not just about adding value to your property; it is about creating a destination where memories are made, stories are told, and the stresses of the day melt away under the glow of a warm flame.
The Vision: Why a Circular Fire Pit Patio Works
There is something inherently social about a circle. Unlike rectangular patios that can feel formal or directional, a circular design encourages everyone to face the center, making it the perfect layout for a fire pit. This shape mimics the natural way people gather around a campfire. From a design perspective, the curves of a circular patio soften the often rigid lines of a backyard fence or the rectangular silhouette of a house, providing a more organic and inviting look to your landscaping.
When you look at the progress in the photo, you see the importance of scale. The fire pit is centered perfectly within a larger radius, ensuring there is enough room for seating without feeling cramped. This balance between the fire source and the surrounding lounging area is what separates a professional looking DIY project from a cluttered one.
Phase 1: Planning and Site Preparation
Before the first brick is laid, a significant amount of ground prep must occur. This is often the most physically demanding part of the process but also the most critical for the longevity of your patio. As seen in the image, the sod has been carefully removed to create a clean, level slate. Leaving grass or roots under your patio will lead to decomposition and eventual sinking or shifting of your pavers.
Marking Your Dimensions
To achieve that perfect curve shown in the picture, use a simple stake and string method. Drive a stake into the center where the fire pit will sit. Attach a string cut to the radius of your total patio area and walk in a circle, marking the edge with landscape spray paint. This ensures your circle is mathematically sound and aesthetically pleasing.
Excavation and Depth
You need to dig down deep enough to account for your base materials. A standard patio requires a few inches of compacted crushed stone or gravel, followed by a layer of leveling sand, and finally the height of the pavers themselves. If you skip the excavation depth, your patio will sit too high above the surrounding lawn, making it difficult to mow around and prone to tripping hazards.
Phase 2: The Importance of Weed Barriers and Base Layers
In the project photo, a heavy duty black landscape fabric is being rolled out over the excavated soil. This is a step you should never skip. This fabric serves two primary purposes: it prevents weeds from pushing up through your paver joints and, more importantly, it keeps your gravel base from sinking into the soft soil over time. It acts as a stabilizer that maintains the integrity of your hardscaping.
Choosing the Right Fabric
Opt for a woven or non-woven geotextile fabric specifically rated for underlayment. While cheap garden center weed barriers might work for flower beds, they often lack the strength required to support the weight of stone and furniture. Ensure the fabric overlaps at the seams and extends slightly beyond the edge of your patio to provide full coverage.
Leveling with Sand and Gravel
Once the fabric is down, the next step is the base material. A layer of crushed stone provides drainage, while a thin layer of sand on top allows you to “screed” or level the surface perfectly. Use a long, straight board to pull the sand across the area, creating a flat plane for your pavers to sit on. If your base is not level, your final patio will have “lips” where one brick sits higher than the next.
Phase 3: Building the Brick Fire Pit
The centerpiece of this project is the masonry fire pit. Using reclaimed or new red bricks adds a classic, rustic charm that feels timeless. In the image, the fire pit is being constructed with a double wall or thick border, which provides stability and a ledge for resting feet or poker tools. It is important to use fire rated bricks or a steel fire ring insert on the interior to protect the outer bricks from cracking under high heat.
Stacking and Bonding
For a dry-stack look that remains sturdy, you can use high heat construction adhesive between the layers of brick. This prevents the bricks from shifting if someone accidentally kicks them or leans against the wall. Stagger your joints, meaning the middle of a brick should sit over the seam of the two bricks below it. This “running bond” pattern is much stronger than stacking seams directly on top of one another.
Airflow and Ventilation
A fire needs oxygen to burn efficiently. When building your walls, consider leaving small gaps or “weep holes” in the bottom layer of the brick. This allows air to be drawn into the base of the fire, resulting in less smoke and a more vibrant flame. It also allows any rainwater that enters the pit to drain out rather than sitting in a stagnant puddle.
Phase 4: Laying the Paver Border and Surface
The transition from the fire pit to the rest of the patio is where the craftsmanship really shines. Starting from the outside edge and working inward, or starting from the fire pit and working outward, requires a keen eye for symmetry. The image shows a defined border being established first, which acts as a “frame” for the rest of the stonework.
- Edge Restraints: Use plastic or metal landscape edging around the perimeter of your circle to hold the pavers in place. Without this, the outer ring of bricks will eventually migrate into the grass.
- Joint Sand: Once all your pavers are laid, you will fill the cracks with polymeric sand. This special sand contains a binder that hardens when misted with water, effectively “locking” the bricks together and preventing ants or weeds from moving in.
- Color Selection: Notice how the red of the fire pit bricks contrasts with the earthy tones of the soil and eventual pavers. Choosing colors that complement your home’s exterior creates a cohesive look.
Essential Tools for the Job
Taking on a project like the one in the photo requires more than just a shovel. Having the right tools on hand will make the process faster and the results more professional. You will likely need a plate compactor, which can be rented from most hardware stores, to pack down the gravel base so it doesn’t settle later. A rubber mallet is essential for tapping pavers into place without breaking them. Additionally, a masonry saw or an angle grinder with a diamond blade will be necessary for cutting those wedge shapes needed to fit bricks into a perfect circle.
Landscaping Around Your New Patio
Once the hardscaping is finished, the project isn’t truly complete until the surrounding landscape is addressed. The image shows several small shrubs and trees nearby that provide a sense of enclosure. Adding mulch beds around the patio edge can create a professional transition between the brick and the lawn. Consider planting lavender, rosemary, or citronella plants near the seating area; these not only smell wonderful but can also help naturally repel mosquitoes during those summer night gatherings.
Lighting for Ambience
While the fire provides plenty of light, adding secondary lighting can enhance the safety and beauty of the space. Solar path lights around the perimeter or string lights hanging from nearby trees can create a magical atmosphere. Low voltage LED lights can even be integrated directly into the brickwork of the fire pit or the patio steps for a high end, custom look.
Maintenance Tips for Longevity
A DIY patio is an investment of time and money, so you want it to last for decades. Every few years, you should inspect the joint sand. If it has washed away, simply sweep in some new polymeric sand and wet it down. Sealing your pavers is another great way to protect them from stains like wood ash or spilled drinks, and it can help enhance the natural colors of the stone.
For the fire pit itself, make sure to shovel out the ash regularly. Accumulated ash can hold moisture against the bricks, which can lead to damage during freeze and thaw cycles in the winter. If you live in a particularly wet or snowy climate, covering the fire pit with a metal or vinyl lid when not in use can significantly extend the life of the masonry.
Conclusion: The Reward of DIY Success
Building a backyard fire pit and patio is a labor of love that pays off every time you strike a match and watch the flames dance. As the photo illustrates, the process involves a series of logical steps: clearing the land, stabilizing the base, and carefully laying the stone. While it requires physical effort, the result is a custom outdoor sanctuary that reflects your personal style and provides a functional space for your family to enjoy.
Whether you are hosting a large neighborhood barbecue or enjoying a quiet night with a book, your handmade fire pit will be the heart of your home’s exterior. Take the lessons from this visual guide, grab your shovel, and start planning your own backyard transformation. The effort you put in today will be rewarded with years of warmth and relaxation under the open sky.