Have you ever walked into your bathroom, looked around, and felt like you were stuck in a 1990s time capsule? You are not alone. Many homeowners face the dilemma of a dated bathroom that feels dark, heavy, and uninspired. The oak cabinets, the beige tiles, and the basic builder grade mirrors can make the space feel cramped and old. However, the biggest barrier to a renovation is usually the price tag. We often assume that a fresh look requires thousands of dollars and a professional crew. But what if I told you that you could completely shift the energy of your bathroom for the price of a nice dinner out? Yes, a $50 transformation is not only possible; it is one of the most rewarding DIY projects you can tackle this weekend.
The Power of a Budget Makeover
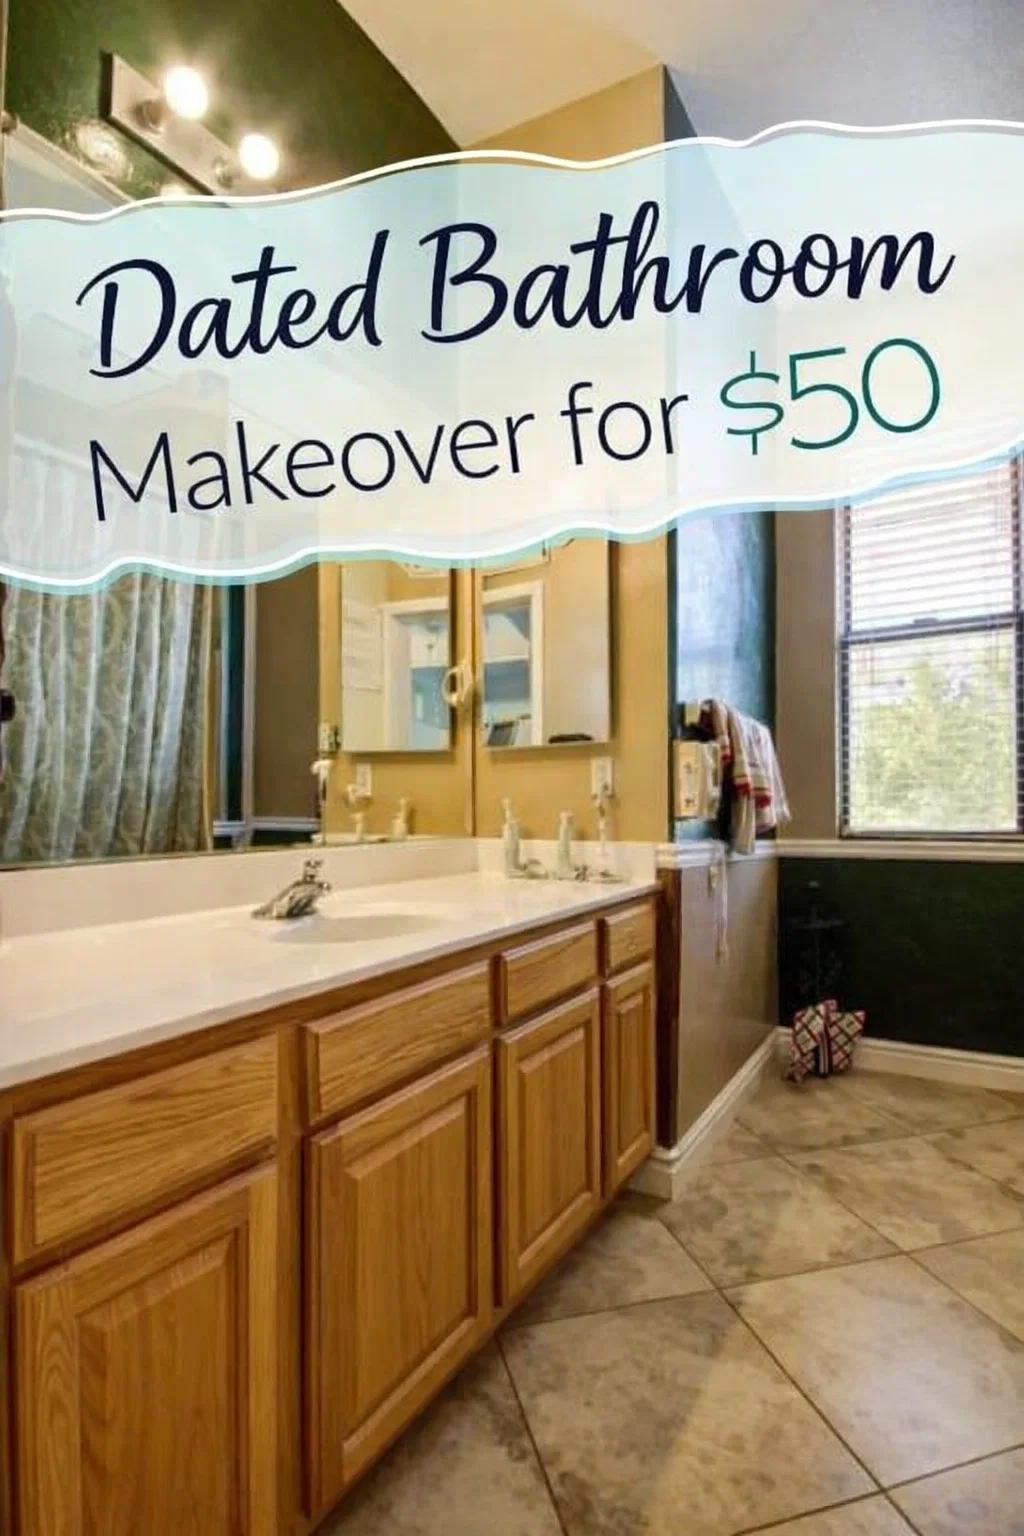
When we talk about a 50 dollar makeover, we are focusing on high impact, low cost changes. The image of a dated bathroom often features honey oak cabinetry and brassy fixtures. These elements were staples of home design for decades, but today they can feel heavy and yellow. By strategically using paint, hardware, and lighting, you can mask these dated features and bring in a contemporary vibe without touching a single piece of plumbing or tile. This approach is about working with what you have and using a little bit of elbow grease to achieve a high end look.
The beauty of a budget renovation is that it allows you to be creative. When you aren’t spending a fortune on materials, you feel more free to experiment with bold colors or unique textures. It is the ultimate way to personalize your home while adding instant equity. Let’s break down exactly how to take a space from drab to fab without breaking the bank.
Starting with the Vanity: The Focal Point
The vanity is almost always the largest piece of furniture in a bathroom, which means it has the biggest influence on the overall aesthetic. If your vanity is currently that classic honey oak or a worn laminate, a fresh coat of paint is your best friend. For under $20, you can purchase a high quality cabinet paint or a small can of chalk paint that requires minimal prep work.
Choosing the Right Color
To modernize an older space, consider these color palettes:
- Charcoal Gray or Navy: These dark tones provide a sophisticated, grounded look that contrasts beautifully with white countertops.
- Soft Sage or Eucalyptus: These colors bring a spa-like, earthy feel to the room and pair well with wood accents.
- Classic White: If your bathroom is small and lacks natural light, a crisp white vanity will instantly brighten the entire space.
Before you start painting, make sure to clean the surfaces thoroughly with a degreaser. Lightly sanding the wood will help the paint adhere better, ensuring that your $50 investment lasts for years to come. Remember to remove the doors and drawers to get into every nook and cranny for a professional finish.
Updating Hardware for an Instant Lift
Once the vanity is painted, the old polished brass or plastic handles will look even more out of place. This is where hardware comes in. You can find modern, minimalist pulls and knobs at discount home stores or online in bulk packs. Switching to matte black, brushed gold, or satin nickel hardware can take a cabinet from looking like a DIY project to looking like a custom piece of furniture.
If new hardware isn’t in the budget, don’t forget the power of spray paint. A $7 can of metallic spray paint can revive your existing knobs and even your towel racks or toilet paper holder. It is a cohesive way to tie the whole room together for pennies.
Addressing the Walls and Trim
The walls are the backdrop of your bathroom story. In many older bathrooms, the paint color is either a safe beige or a dated pastel. Painting the walls is the most cost effective way to change the mood of a room. Since bathrooms are smaller spaces, you can often get away with buying a single gallon of paint or even a couple of large samples.
Creating Contrast with Molding
In the provided image, we see a chair rail molding separating two different wall treatments. This is a fantastic design element to lean into. You can paint the bottom half a darker, more saturated color and keep the top half light to create depth. If you don’t have molding, you can create a faux version using inexpensive pine strips from the hardware store. Painting the trim a clean, bright white will make the wall colors pop and give the room a finished, architectural feel.
Lighting: The Secret to a Modern Glow
Nothing says dated bathroom like a “Hollywood” style light bar with exposed round bulbs. Lighting is often the most overlooked aspect of a DIY makeover, but it is the one that affects how you feel in the space every morning. While a brand new fixture might push your $50 budget, there are plenty of ways to hack your existing lighting.
Try swapping out clear bulbs for frosted LED globes for a softer look. You can also spray paint the base of your light fixture to match your new cabinet hardware. If you have a few extra dollars, look for “open box” deals at lighting stores. A sleek, modern sconce or a minimalist vanity light can completely shift the focal point of the room away from older tiles and toward your new design elements.
Smart Accessorizing on a Budget
The final layer of any makeover is the styling. This is where you can shop your own house or hit up local thrift stores. To keep the bathroom looking clean and modern, follow the principle of “less is more.”
Functional Decor Tips
- Textiles: Swap out a tired, patterned shower curtain for a textured white waffle knit curtain. It adds a hotel-quality feel instantly.
- Greenery: A small faux plant or a hardy real plant like a snake plant or pothos can breathe life into a windowless bathroom.
- Coordination: Use a small tray to group your soap dispenser and a candle. This prevents clutter and makes the vanity look organized.
Adding a new rug or bath mat in a neutral tone can also hide a floor that you aren’t quite ready to replace yet. These small touches bridge the gap between the permanent fixtures and your new DIY updates.
Handling the Floor and Mirror
If your floor tiles are the main culprit of the “dated” look, don’t despair. While you can’t replace a floor for $50, you can certainly improve it. Floor decals or peel and stick tiles are becoming incredibly popular for renters and budget renovators. You can cover up old linoleum or ceramic tile with a modern pattern for a fraction of the cost of real stone.
The mirror is another area for easy improvement. Most older bathrooms have a large, frameless plate mirror glued to the wall. Instead of removing it, which can be dangerous and messy, try framing it. You can buy inexpensive molding, paint it, and use construction adhesive to stick it directly onto the edges of the mirror. This gives the appearance of an expensive, custom framed mirror and adds a lot of character to the vanity area.
The Impact of Consistency
The reason most budget makeovers fail is a lack of consistency. When you are working with a small budget like $50, you have to be very intentional. Pick one metal finish and stick to it. Choose a color palette of three colors maximum: a neutral, a highlight, and an accent. By keeping the design tight, the room will look professional and cohesive rather than a collection of random DIY projects.
In the image we analyzed, the combination of dark lower walls, warm wood, and bright light shows a foundation that is ready for a change. By simplifying those elements and leaning into a more modern color story, the potential for a stunning reveal is huge. It proves that you don’t need a sledgehammer to have a beautiful home; you just need a vision and a few hours of your time.
Conclusion: Your Weekend Project Awaits
Transforming a dated bathroom for $50 is about more than just aesthetics. It is about taking pride in your home and realizing that you have the power to change your environment regardless of your bank account balance. By focusing on the vanity, updating the hardware, and being smart with paint, you can turn a room you used to avoid into a space that makes you smile every time you brush your teeth.
The most important step is simply to start. Grab a roll of painter’s tape, pick a color that inspires you, and give your bathroom the glow-up it deserves. You will be amazed at what a difference a few small changes can make in your daily routine. So, what are you waiting for? Head to the hardware store and start your transformation today!